Last time on the blog, we spoke about using Shopify tags to organize your store. This week, we continue that conversation with an exploration of Shopify collections.
While Shopify tags can be used to organize many different resources like orders, customers, and products — Shopify collections, on the other hand, are a product-specific organization tool.
Shopify collections allow you to group your products into categories, making it easier for your customers to find what they are looking for.
In this blog post, we are going deep into the world of Shopify collections so that you have absolute confidence to use them to organize your products to drive more sales to your store.
How to organize products on Shopify?
There are many different tools you can use to organize your Shopify products; for example, collections, tags and metafields. These tools help you organize and group your products both in your Shopify admin for you and your team and on your storefront for your customers. In this post, we will focus on collections (but we will also look at Shopify product tags as well).
What is a Shopify collection?
A Shopify collection is a way to group products together to make them easier for your customers to find. The way you group your collections is completely up to you as the store owner and will vary depending on the type of Shopify store you run. But in general, it's good practice to group your products into like categories. Some example Shopify collections that you will often see are:
Gender
Item type, for example, tables and chairs.
Color or Size
Seasons (Summer and winter collections)
Items that are on sale
When thinking about creating a Shopify collection, put yourself in the shoes of your customer, and try to think about ways they might want to browse through your products. Just like a retail store is organized into different sections to group products, collections serve that purpose for your eCommerce store.
Let’s apply this theory practically using a demo store — Shoppu Records — a fictitious record store that sells some of our favorite vinyl records at gobsmackingly low prices.
In our record store, we sell:
Records
Turntables
Accessories
Record cleaning supplies
This is a great starting point, our store can have the above product types as our 4 main Shopify collections. However, just like in an actual record store, the records are going to be organized into smaller categories to make them easier to find. Generally, this is classified by genre.
And while it's a totally valid approach to use Shopify collections to categorize our records in different genres, in this case, we are going to Shopify product tags as it's a more scalable solution (we will talk more about this later in the post).
So then, let’s classify our records into the following genres:
Jazz
Reggae
Rock
Electronic
Any other genres we find along the way.
How to add a collection on Shopify?
You can create or see all your collections by clicking products > collections in your side navigation:
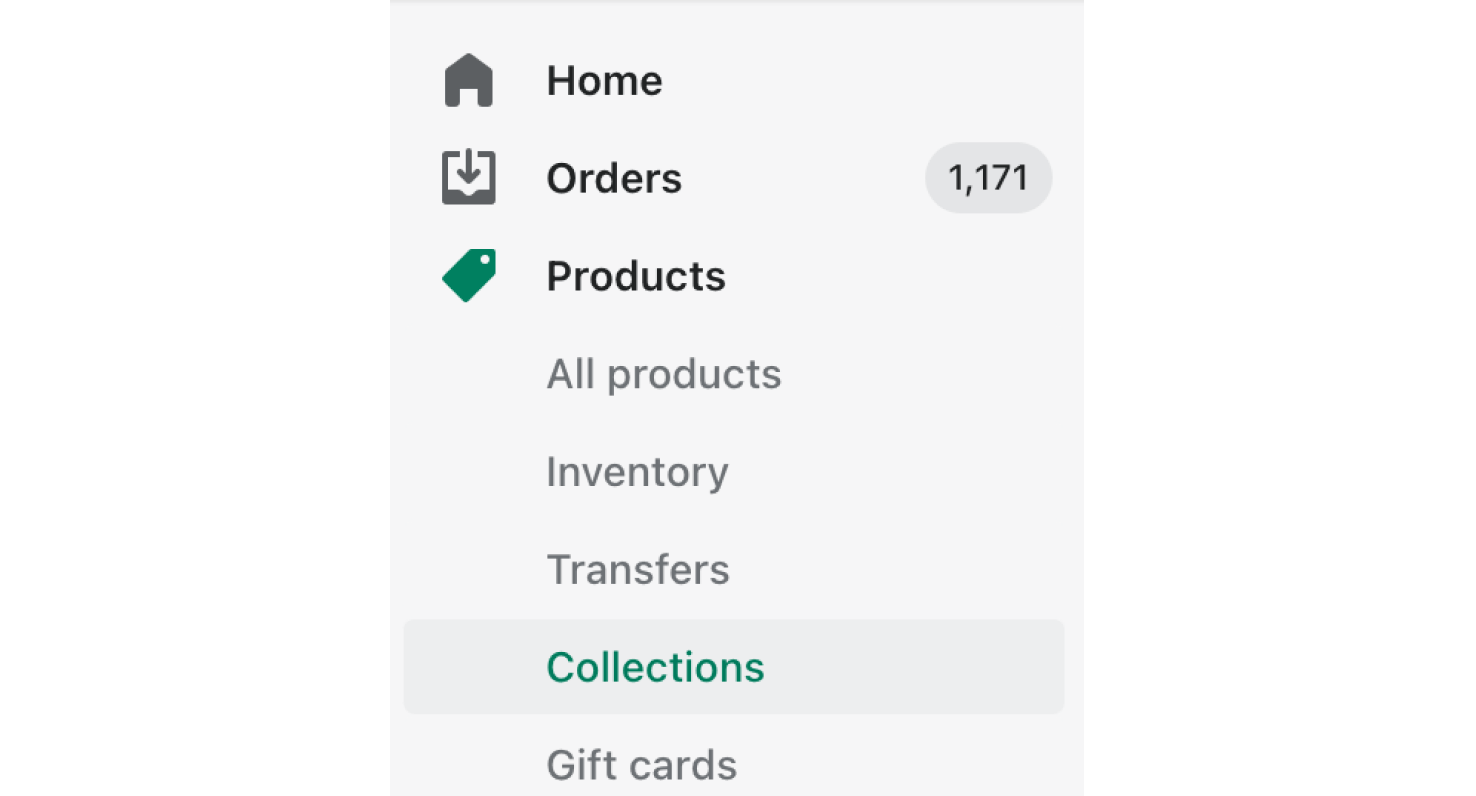
And then just click the create collection button:
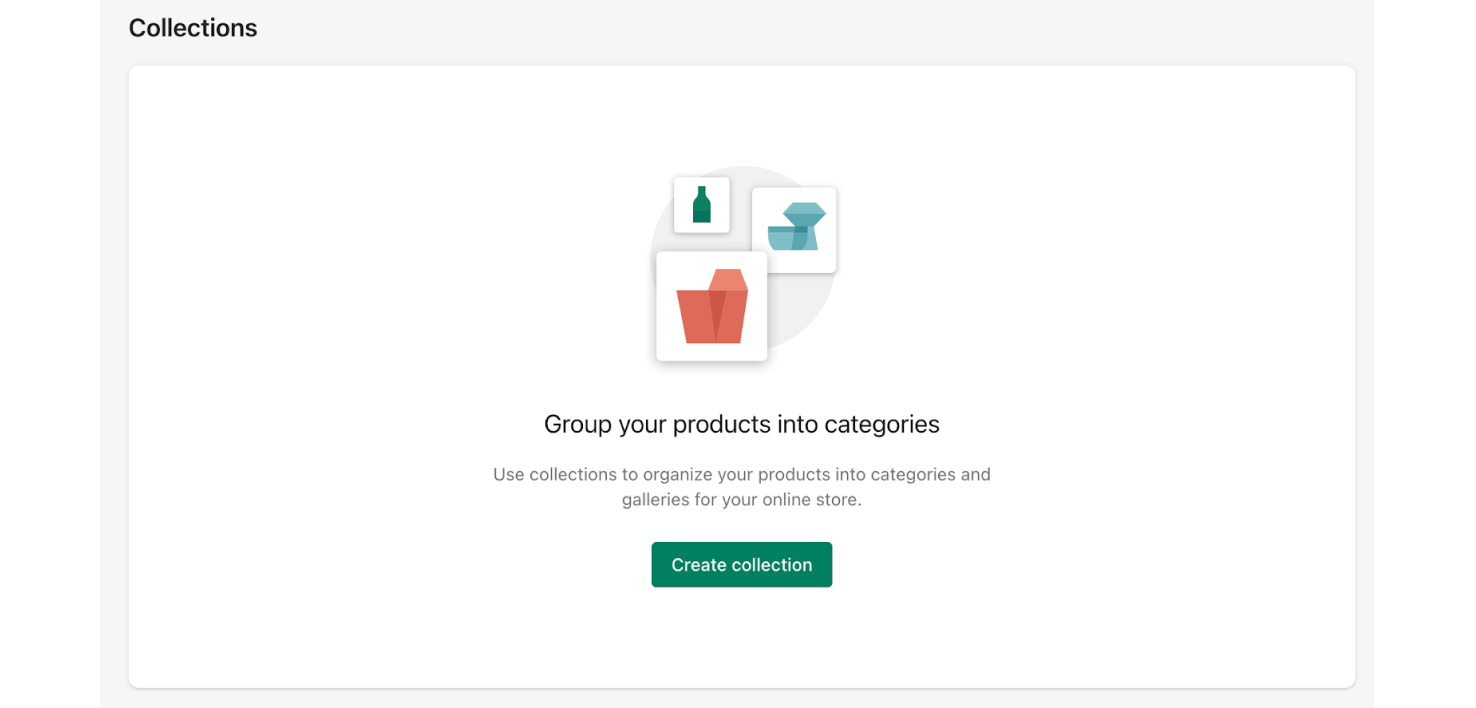
Types of Shopify collections
In Shopify, there are two different types of collections; manual collections and automated collections.
With manual Shopify Collections, you have to manually add each product to the collection. So this means going through all your products, clicking on each product, and adding it to the collection. And as you can imagine, this can be very time-consuming which makes it not the best solution in terms of scalability. It's a good option if your store only has a few products that don't often change.
Automated Shopify collections allow you to set collection conditions that determine which products should belong in the collection. If a product matches these conditions, it will automatically be added. As of writing this post, the Shopify collection conditions you can use are:
Product title
Product type
Product vendor
Product price
Product tag
Compare at price
Weight
Stock
Variant title
You can combine up to 60 Shopify collection conditions together to create some very custom collections.
In our case, since we have a lot of products that are constantly changing as we receive new records from our suppliers, an automated Shopify collection is going to work best for us.
So now that we have a good general understanding of what a Shopify collection is, now we can look at actually adding products to our collections.
Filter by product type to create an automated Shopify collection
So let's create our first automated collection for all our records. All we need to do is select Automated as the collection type, and for the conditions we just need one filter — Product Type | is equal to | Records:
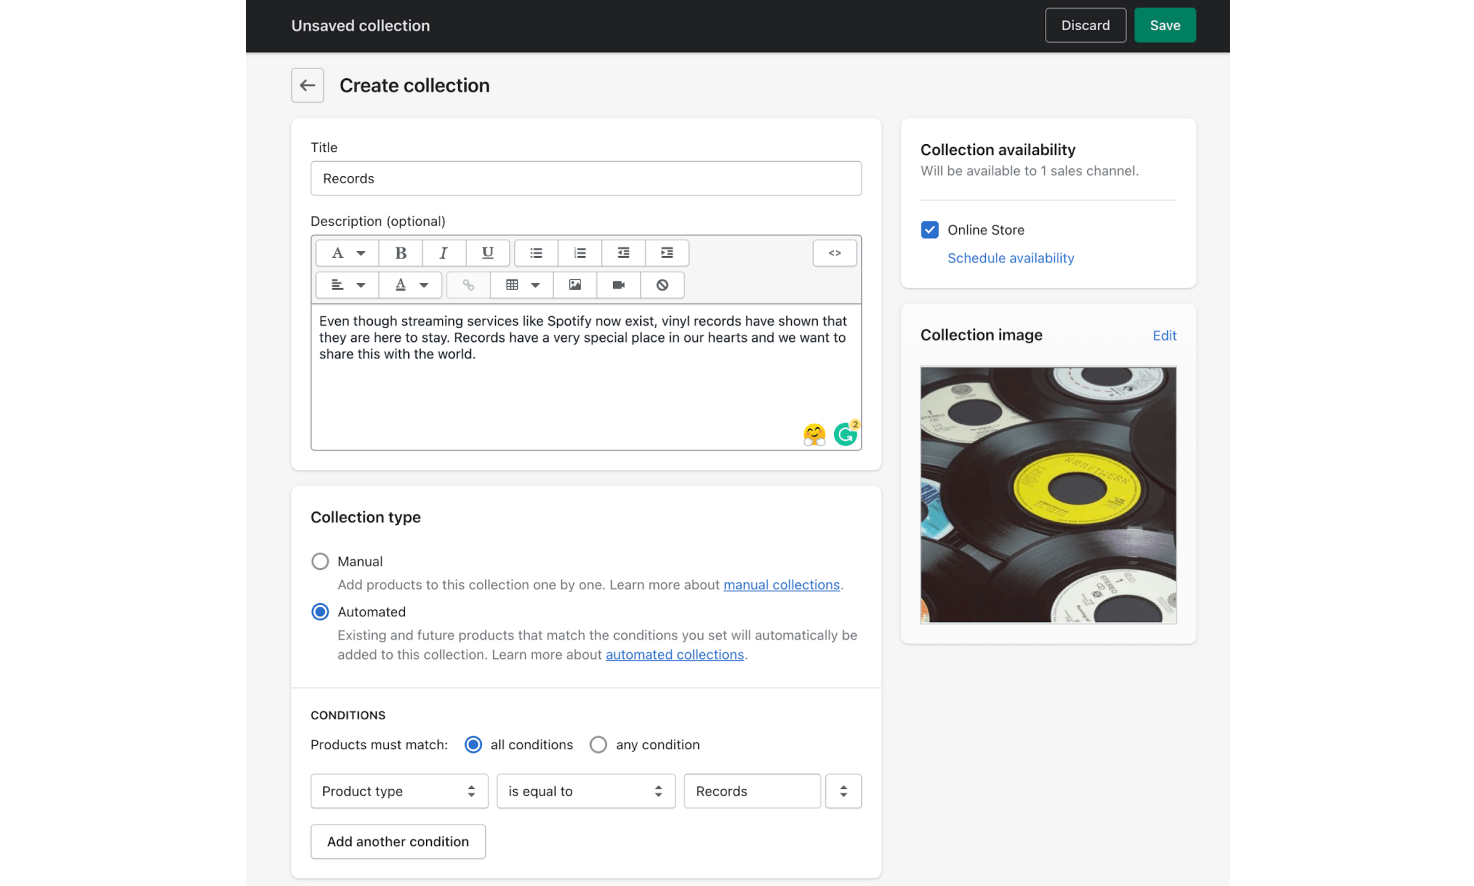
Once we click save, all the records are automatically added to the collection:
.png)
I'll also go ahead and create 3 other automated collections for our other product types too.
As I mentioned above, if your store only has a few products, instead of creating an automated collection, you can create a manual collection by selecting Manual as the collection type.
Filter by product tags to create an automated Shopify collection
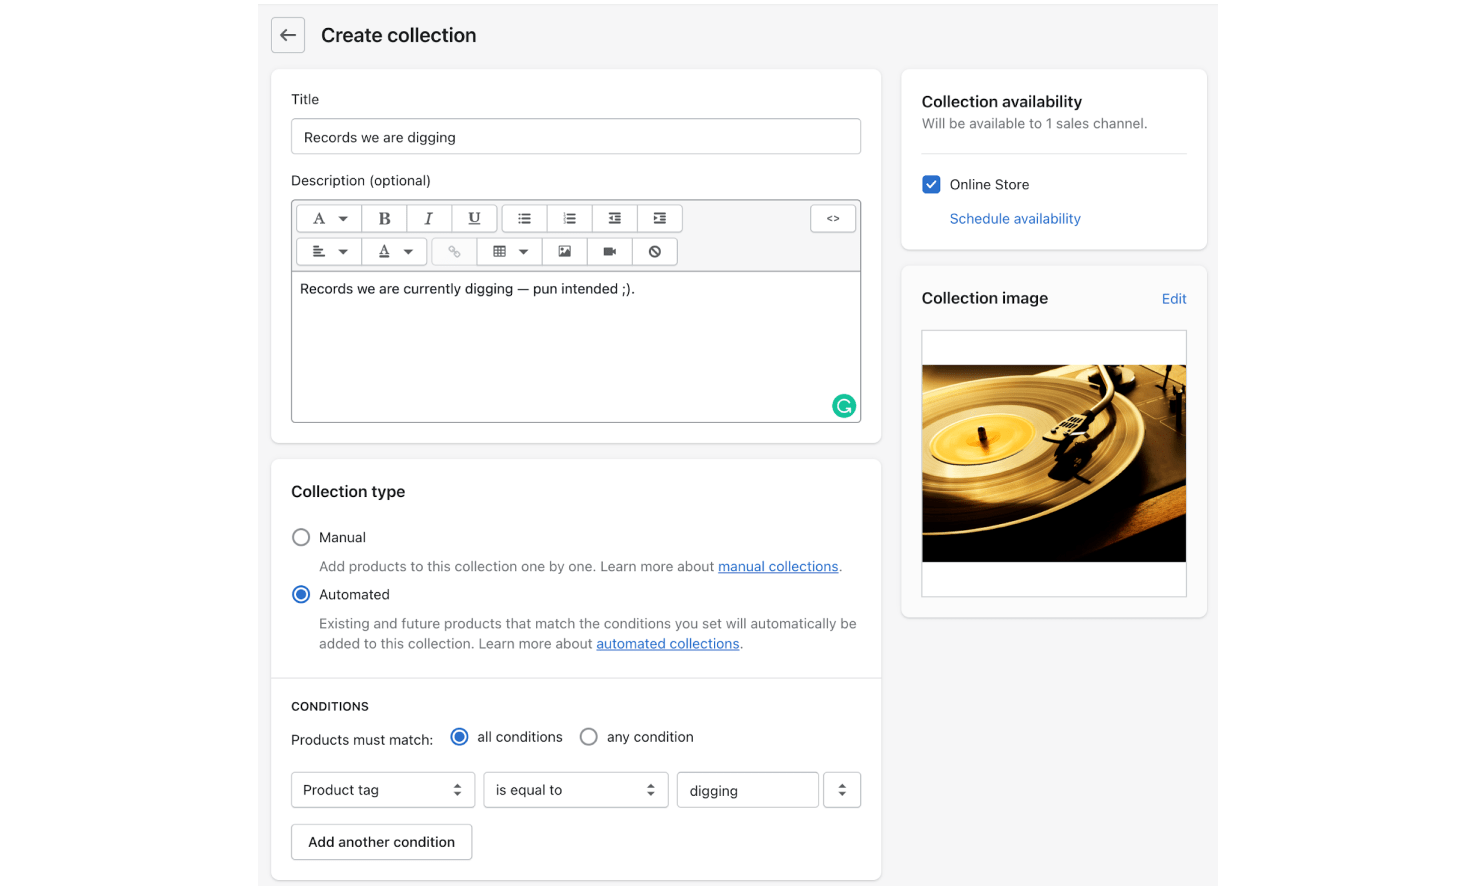
As mentioned above, you can actually use product tags as a filter on your automated collections. Let's create a collection of our team's favorite records, I'll call it 'Records we are digging' (pun intended).
So let’s head back to our products admin page and individually select all the products we want to add to this collection.
We can then click More actions > Add tags:
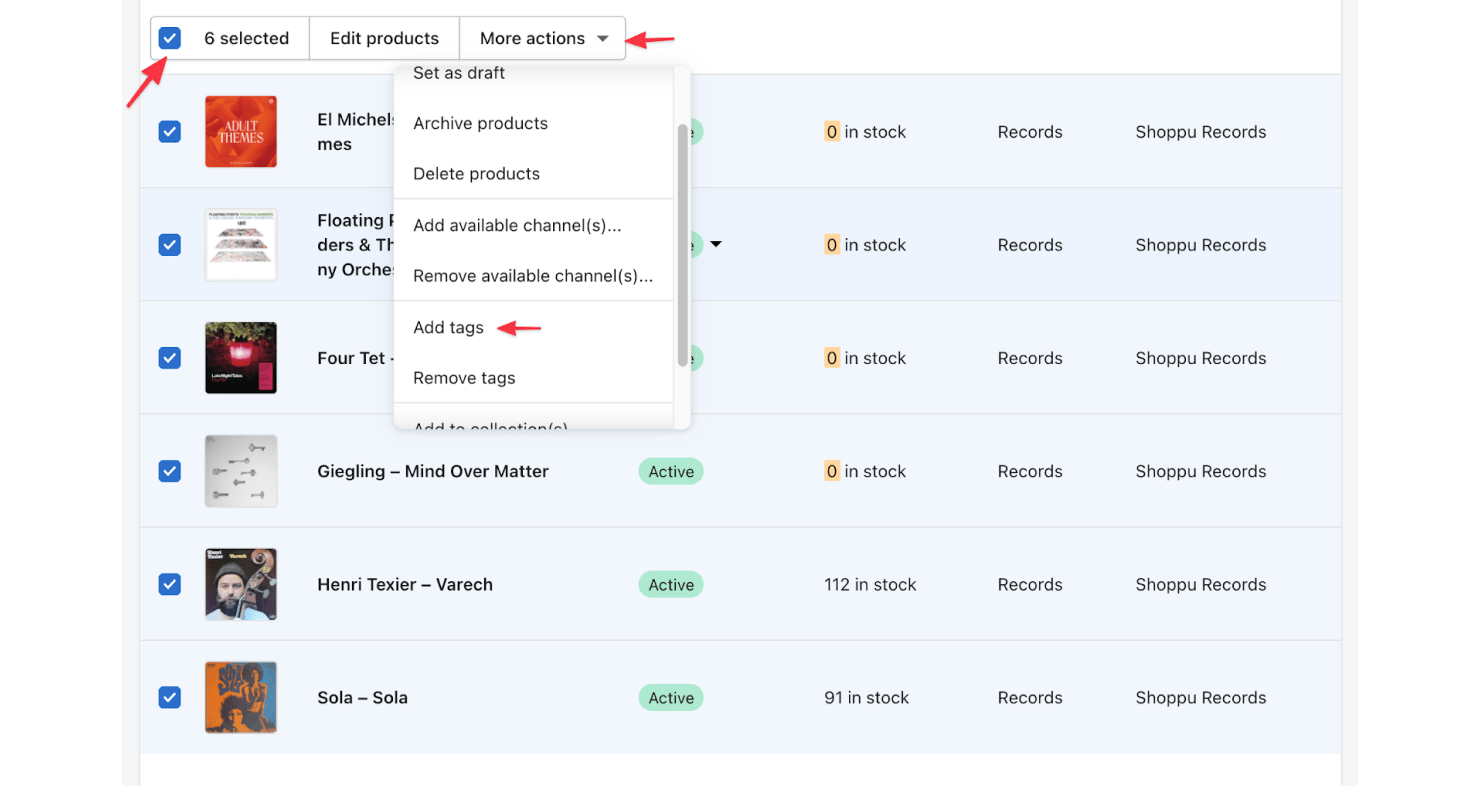
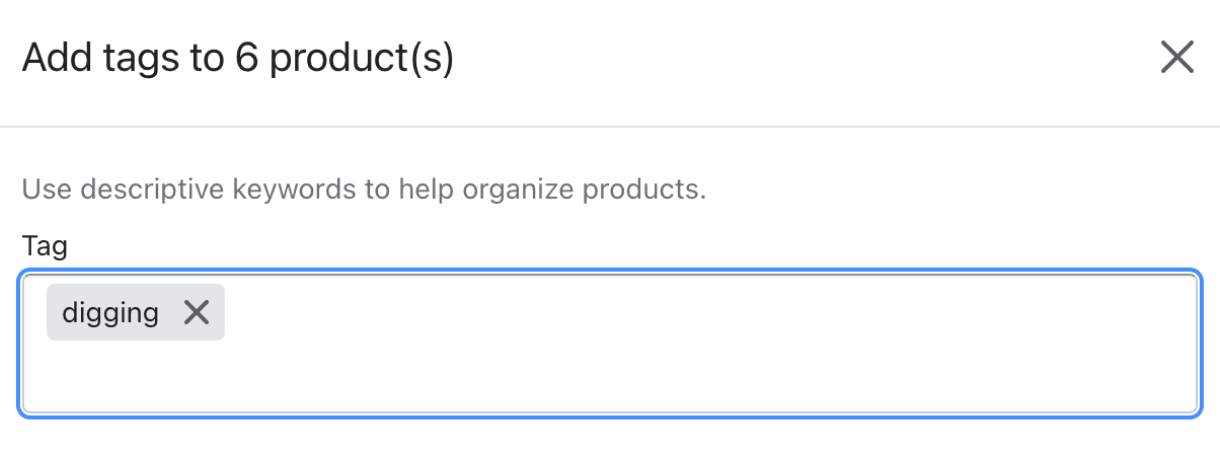
Now we can bulk tag all the products. I'll tag them with 'digging' for records we are digging:
We can now create an automated collection that uses the digging product tag as the filter:
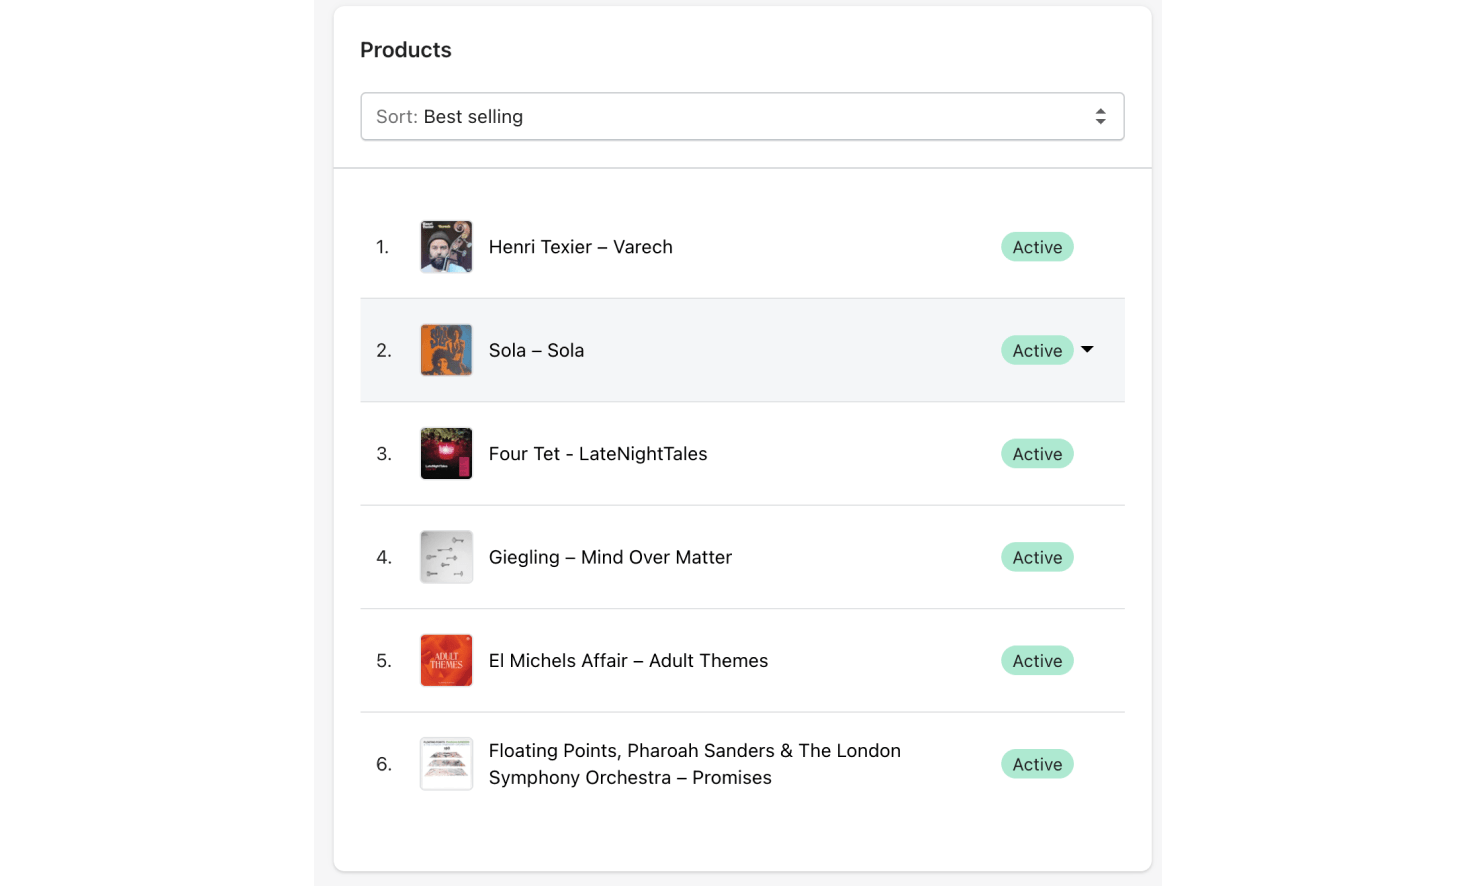
And all those products are automatically added:
How to export Shopify collections
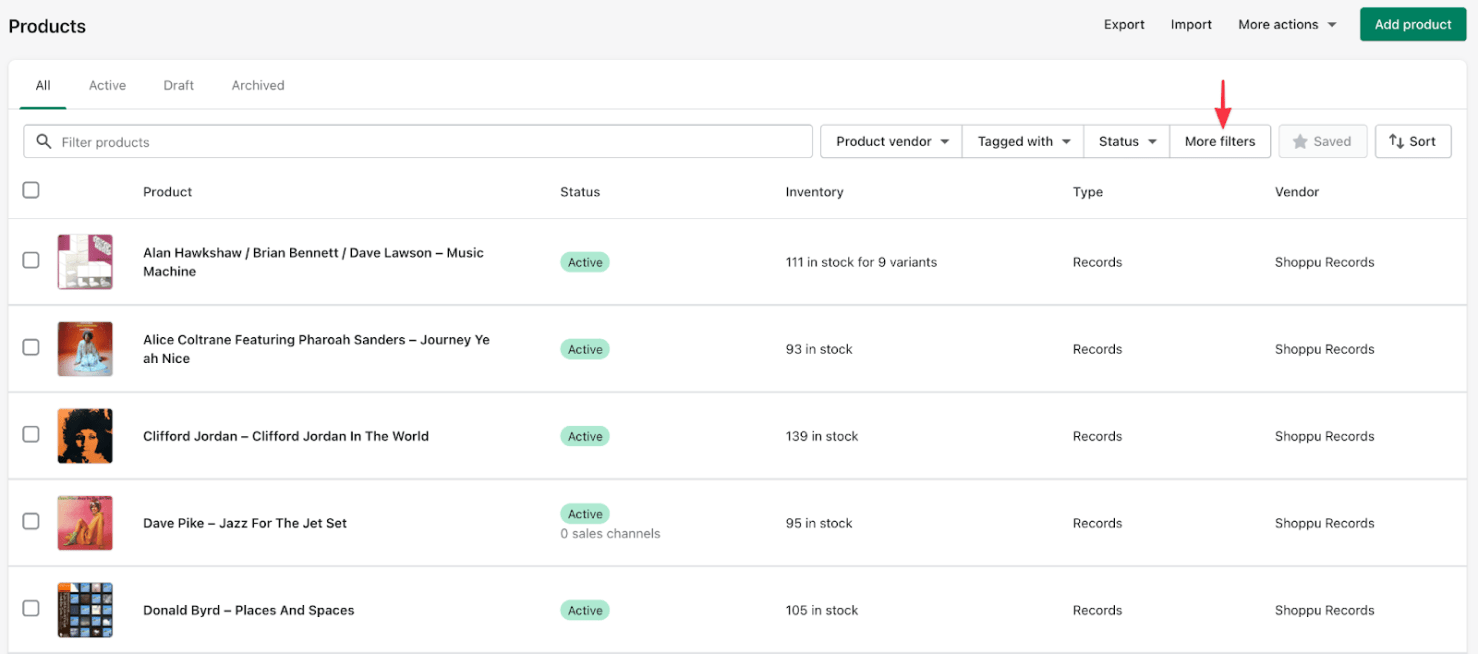
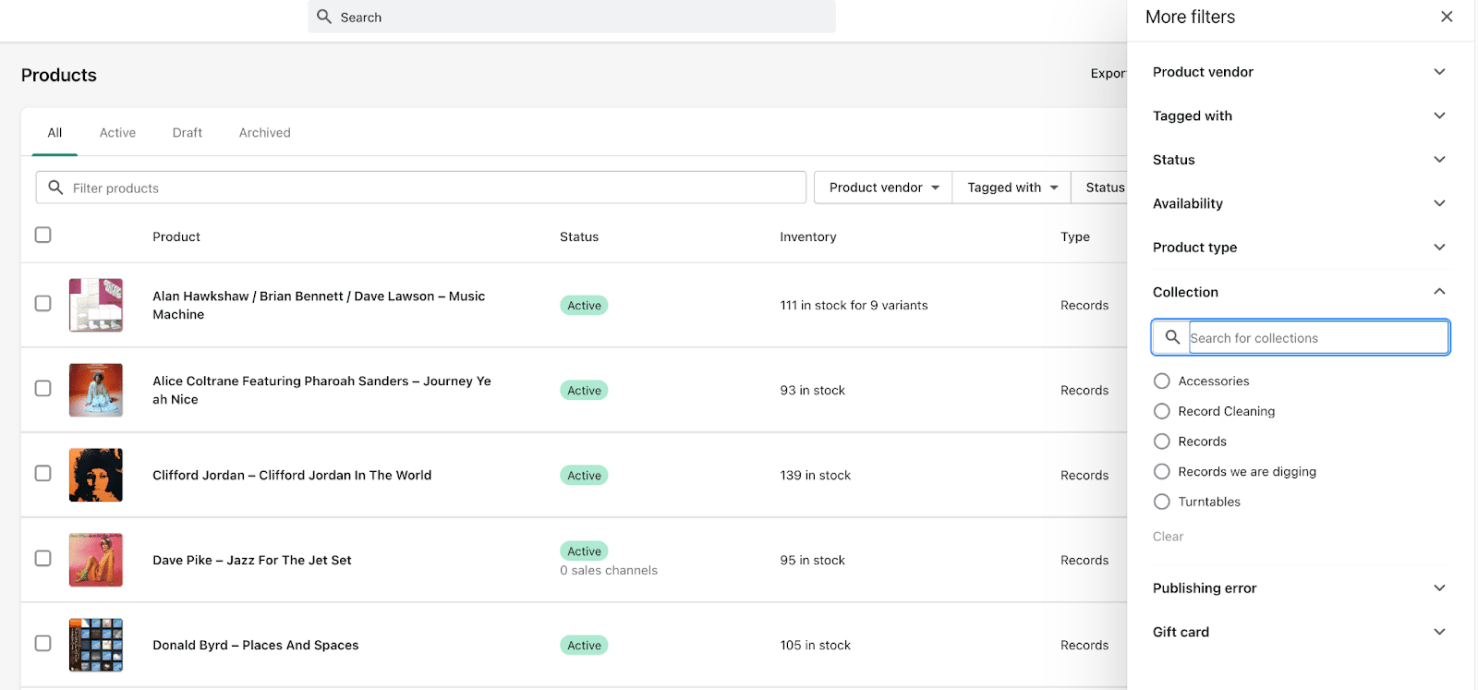
Just as a quick aside, to export Shopify collection all you need to do is add your collection as a filter on your products. So head to your products page and then click more filters:
Then just select the collection you want:
Then click the export button:
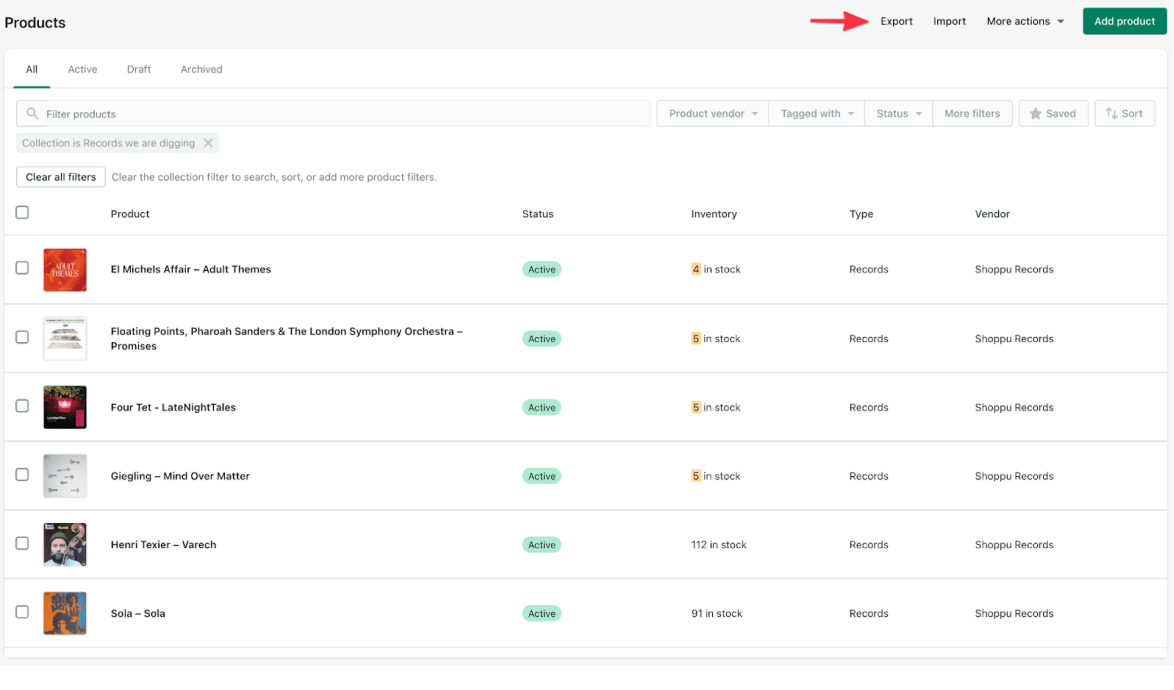
And for more information on exporting from Shopify, you can check out our exporting from Shopify guide.
Adding collections to your Shopify theme
In 2021, Shopify made some big improvements to how its platform worked. This update has changed the way that users interact with their theme (for the better). As such, adding collections to new themes that use the new Online Store 2.0 system architechture is a little different to old themes.
We have split the next part of the post into two sections, one showing you how to add your collections using Shopify's new Dawn theme, and the other adding collections using the old Debut theme. You can jump to either section using these links:
How to show collection products in Shopify (Dawn Theme).
If you are using Shopify's Dawn theme that uses the new Online Store 2.0 architecture, follow along from here.
Now that we have created our collection on our back end, we can display them to our customers to make their browsing experience smoother. We are going to make the following changes to our store:
Add our collections to our menu.
Add our collections to our homepage.
Add a feature collection to our homepage.
How to add collections your to Shopify menu
In your admin sidebar, navigate to Sales Channels > Online Store > Navigation:
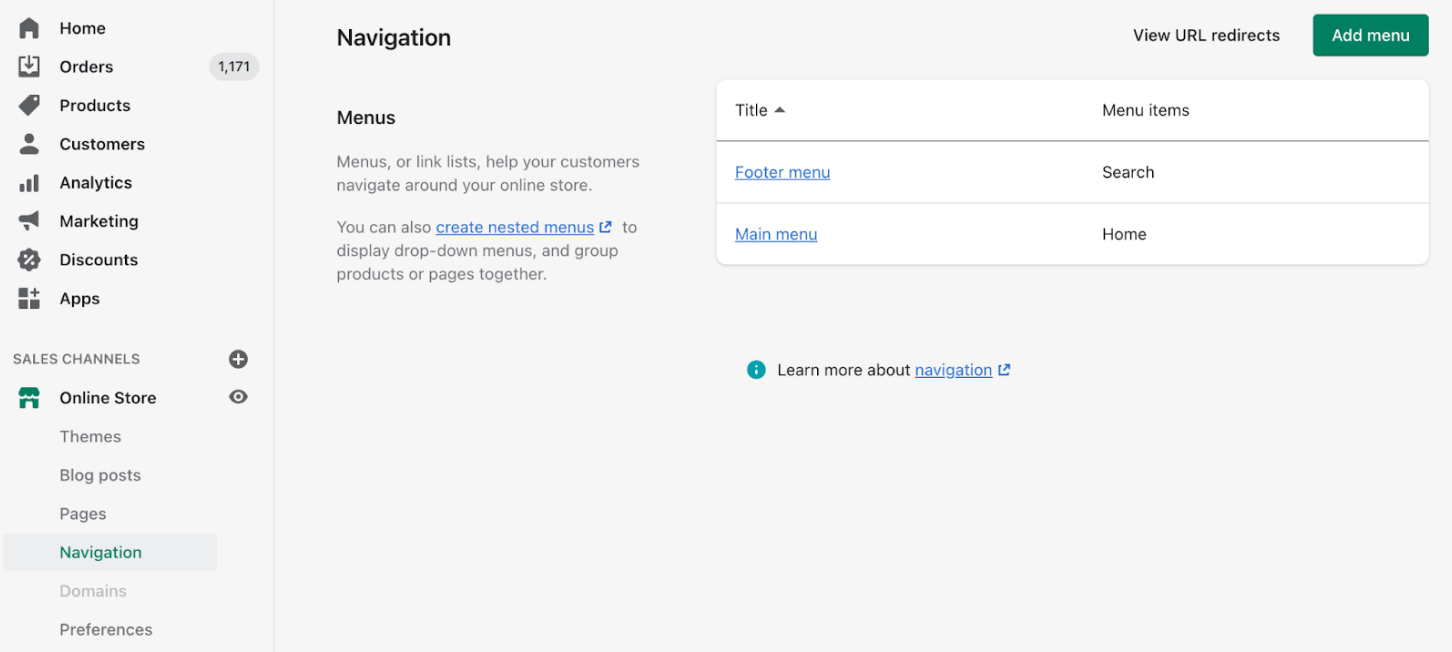
Click on Main menu > Add menu item:
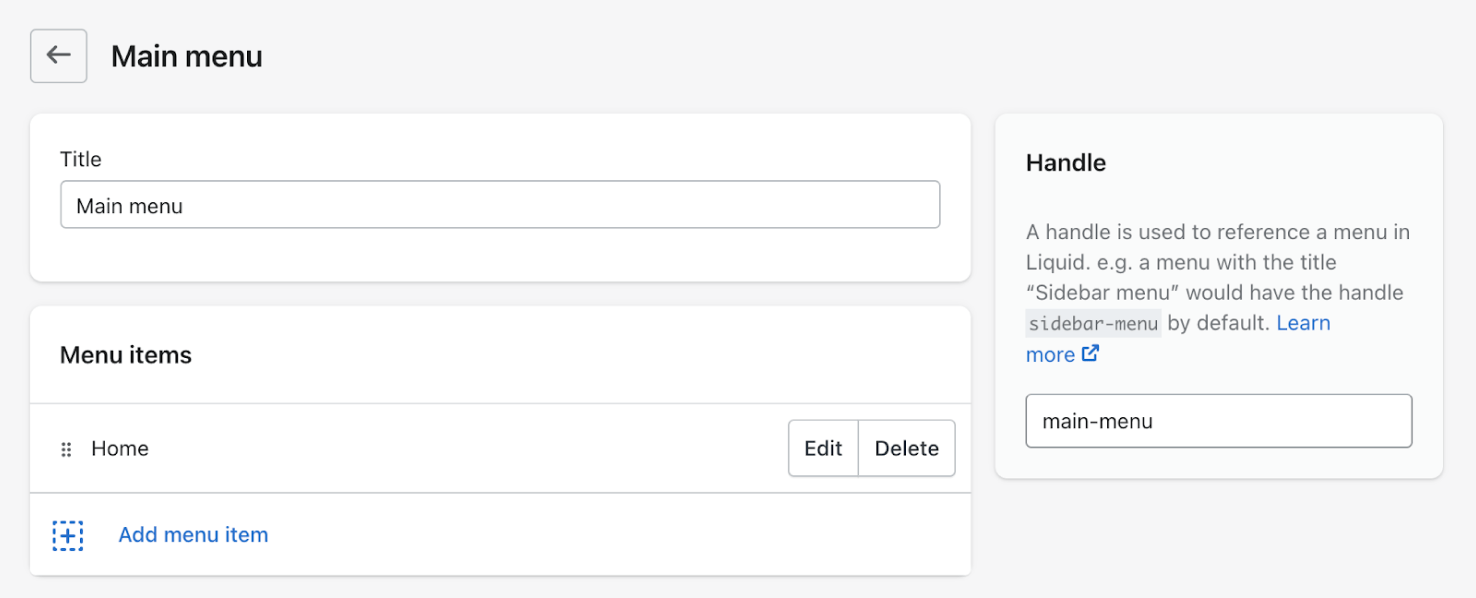
For the name of the link, you can call it collections, however, customers might be confused by this. It might be better to just call it ‘All Products’ for the sake of clarity. For the link field select Collection > All Collections:
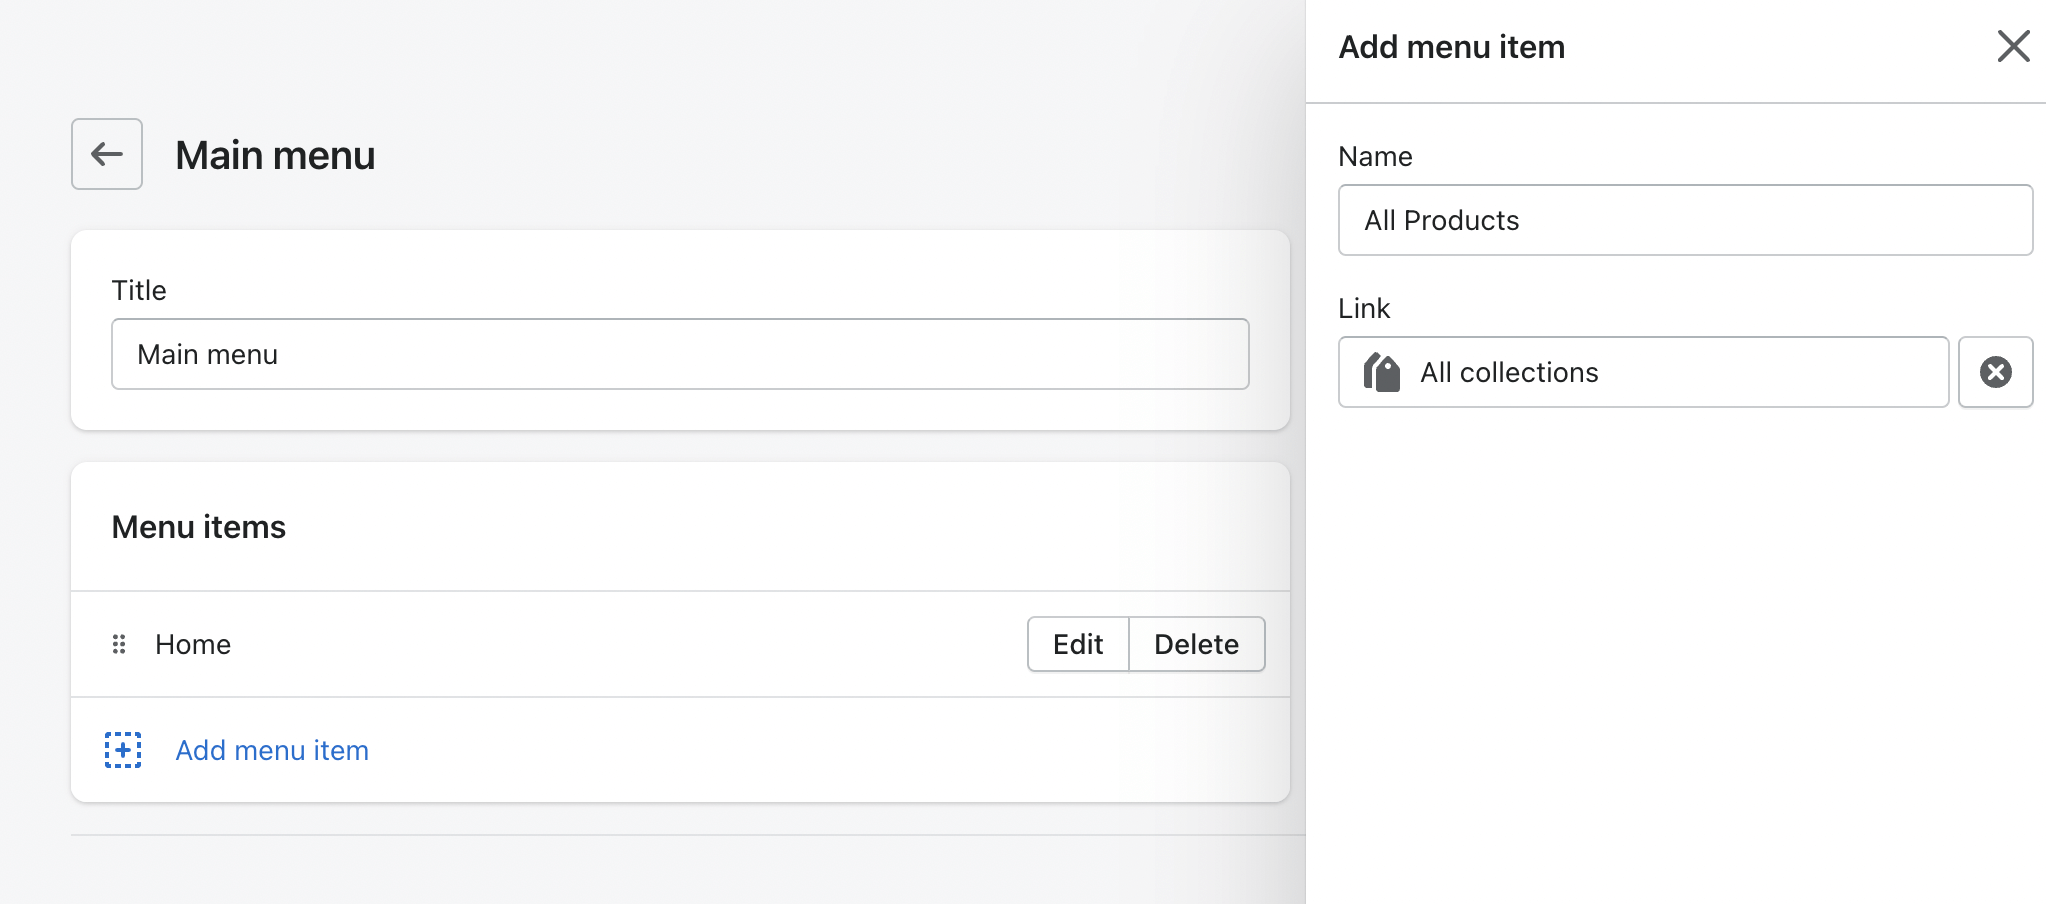
Then make sure to save the menu.
If you now head to your shop, you will see a new link to your products in your navigation and all your collections beautifully displayed:
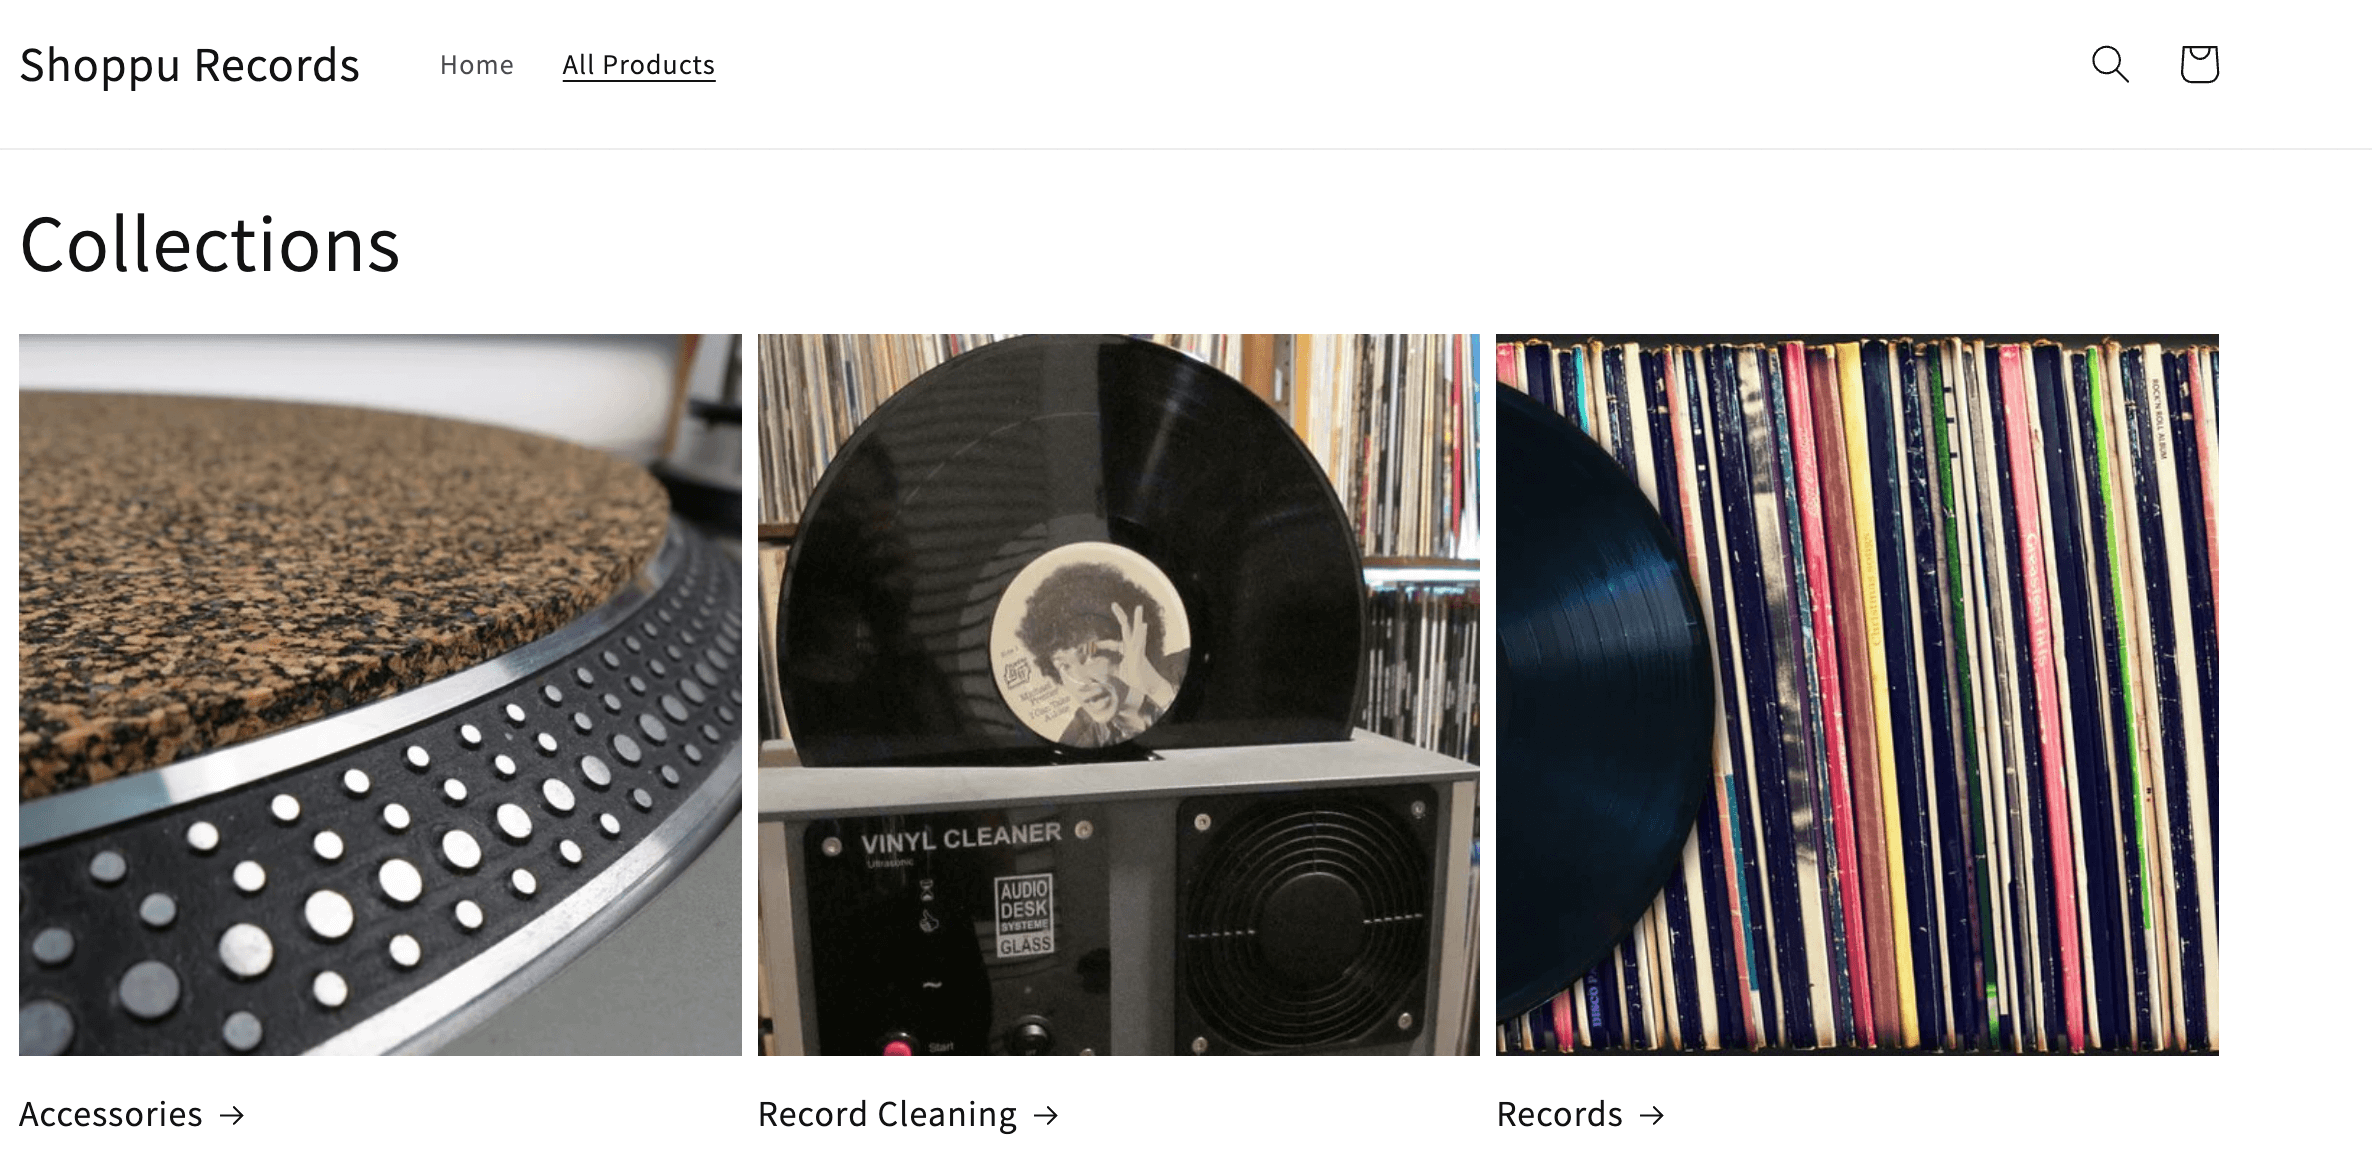
You can make this navigation even better by creating a nested menu with a link to each collection.
How to create a Shopify nested menu
You can easily create a Shopify nested menu from the same navigation area.
Let's add a new menu link, this time to our record collection:
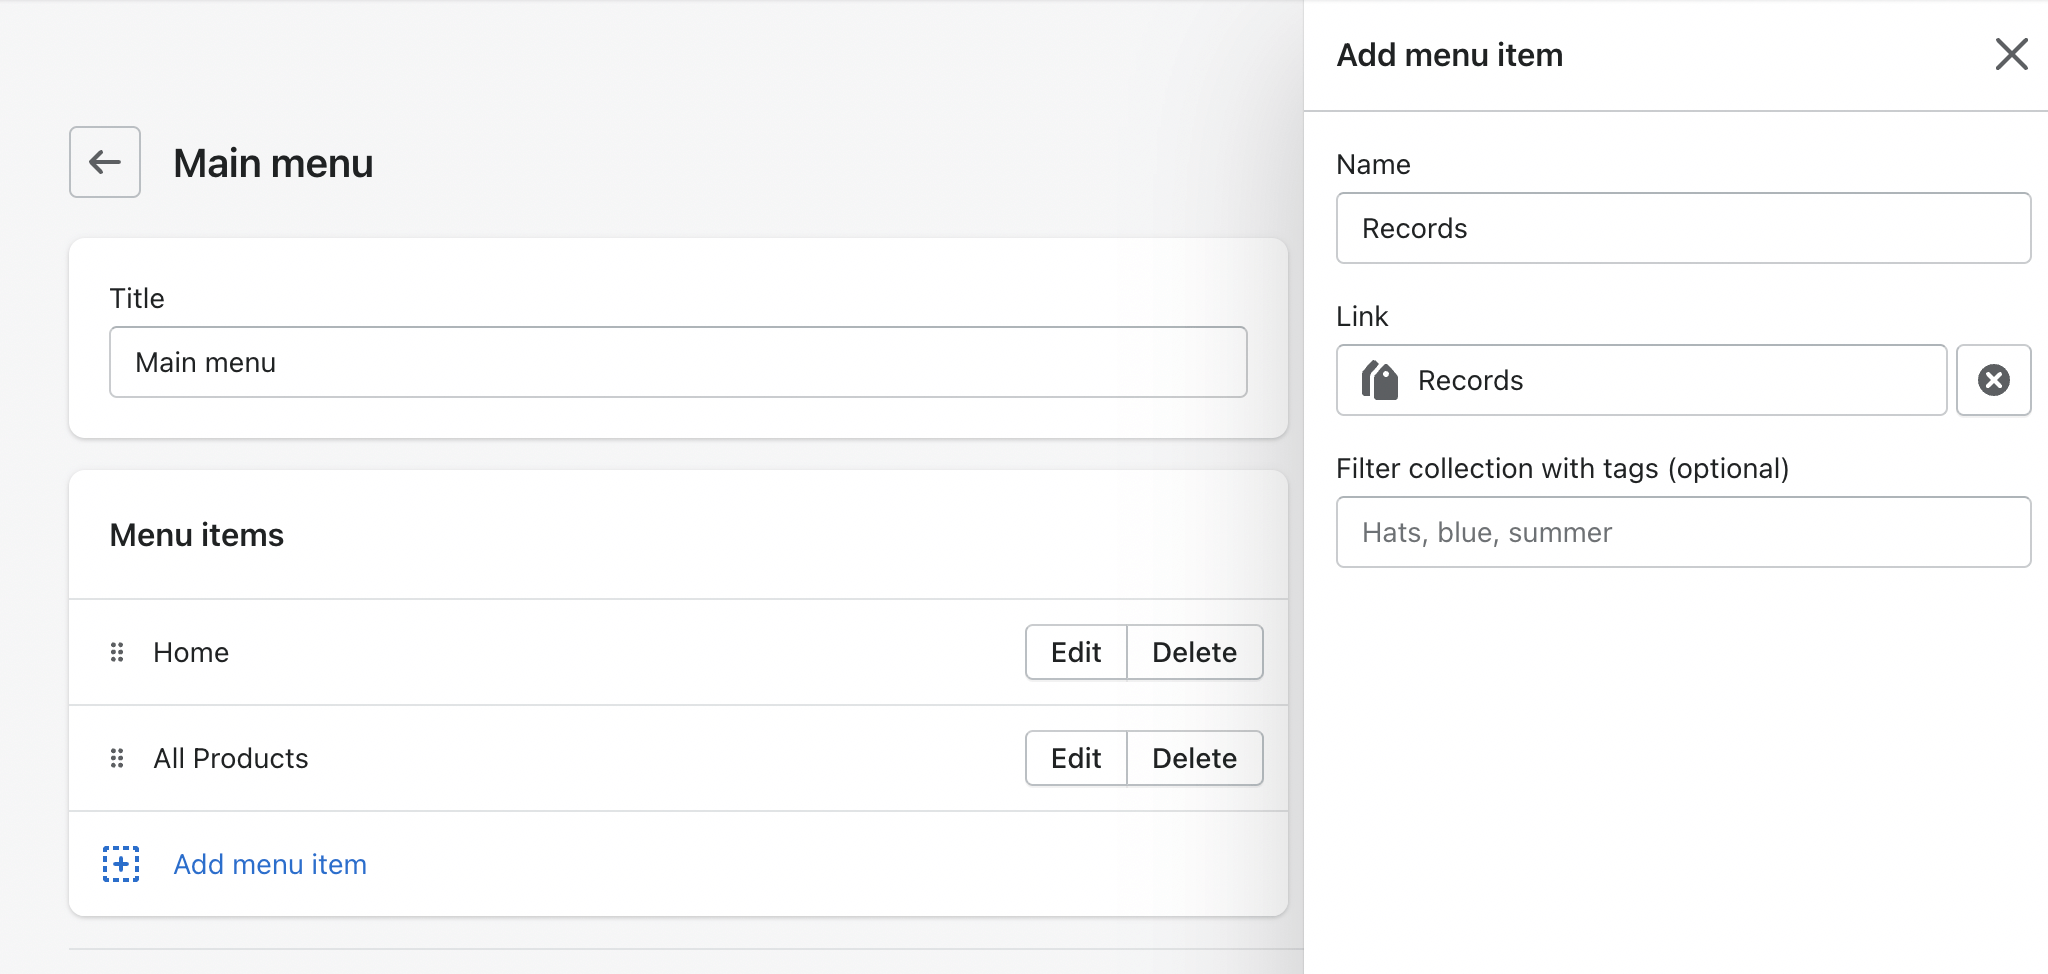
Then we just need to drag it under All Products (and slightly to the right of it, you will see it lock into place):
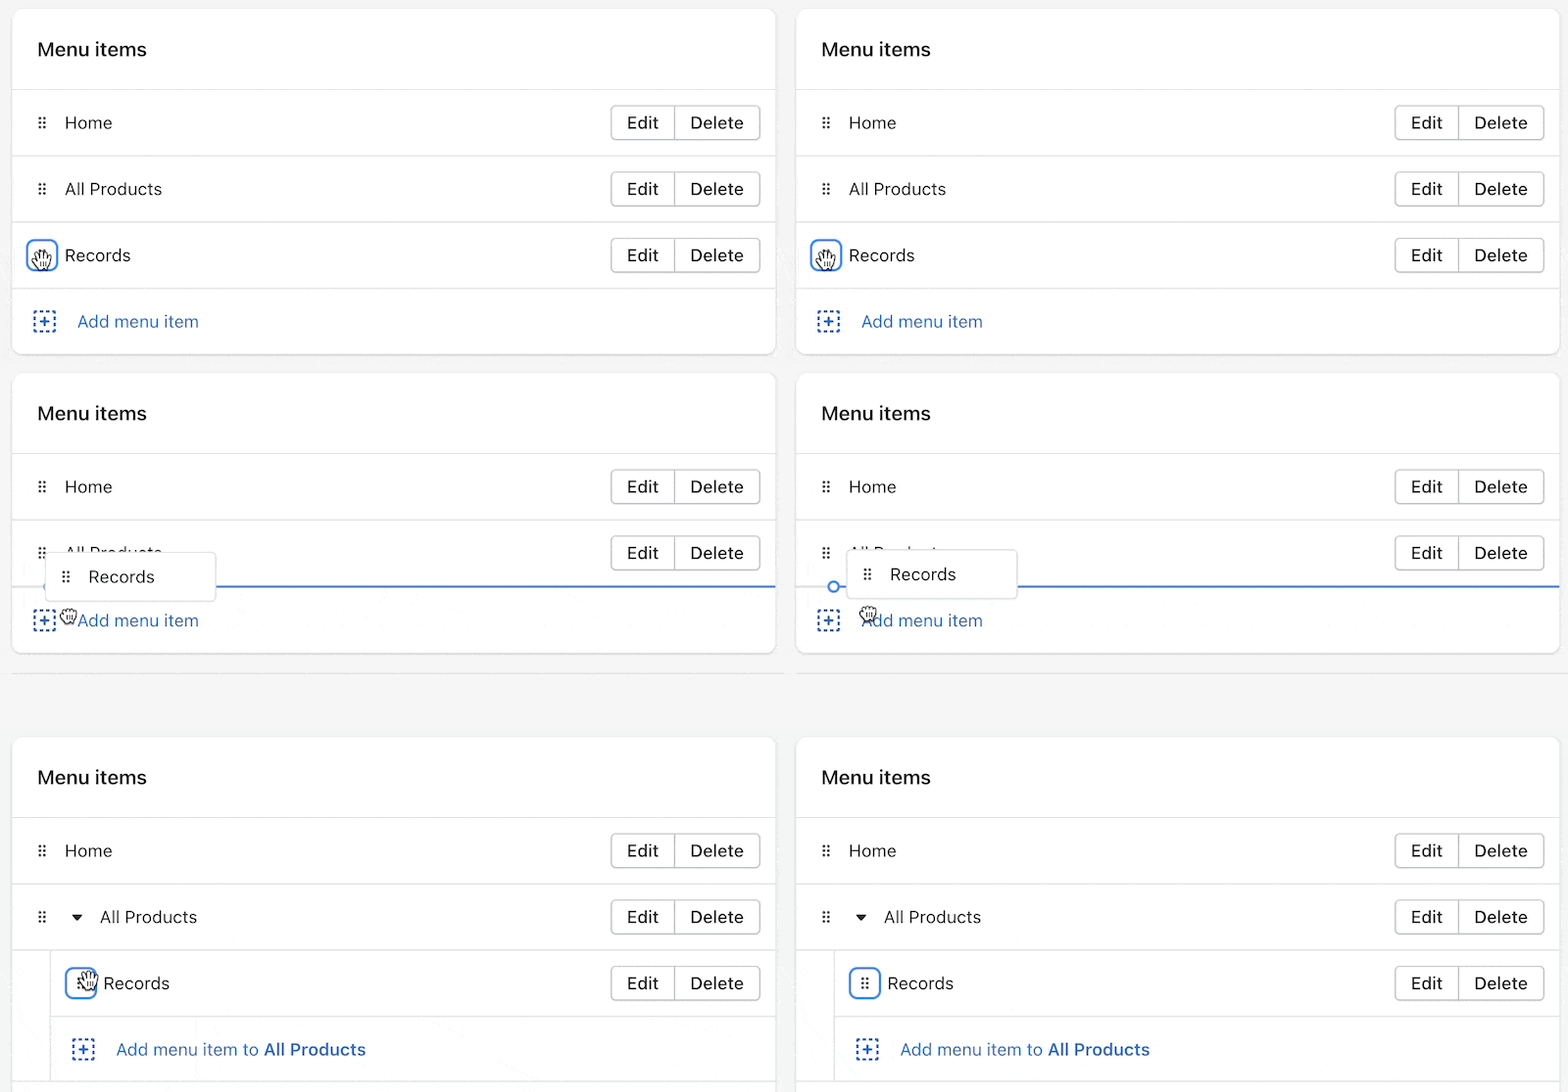
Now if we look at our menu again and click on All Products, we will see the records collection as an option:
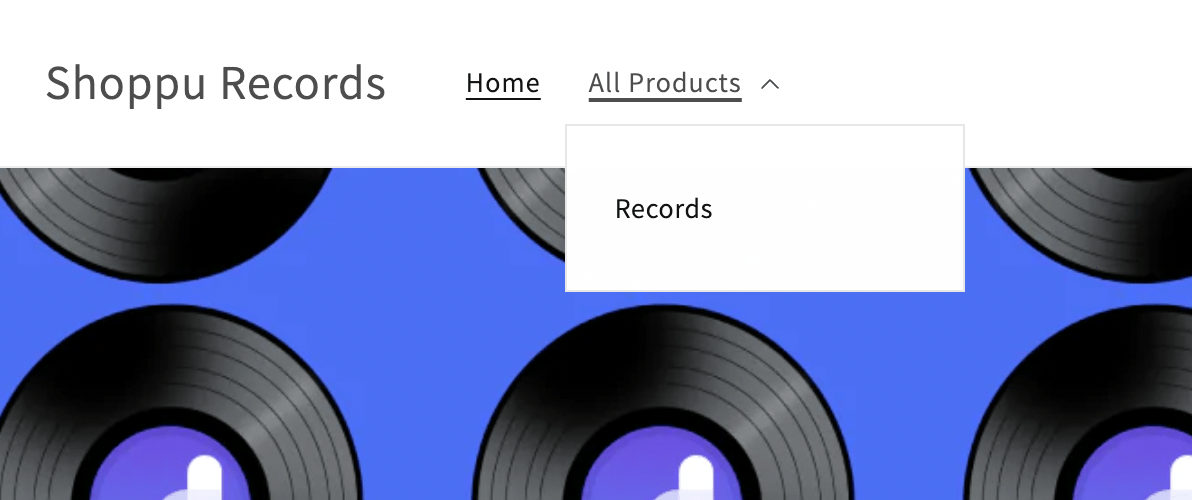
We can now repeat these for all our other collections too.
How do I add collections to my Shopify homepage?
The Dawn theme makes it very easy to add your collections to your home page.
I'm going to navigate to Online Store > Themes > Customize:
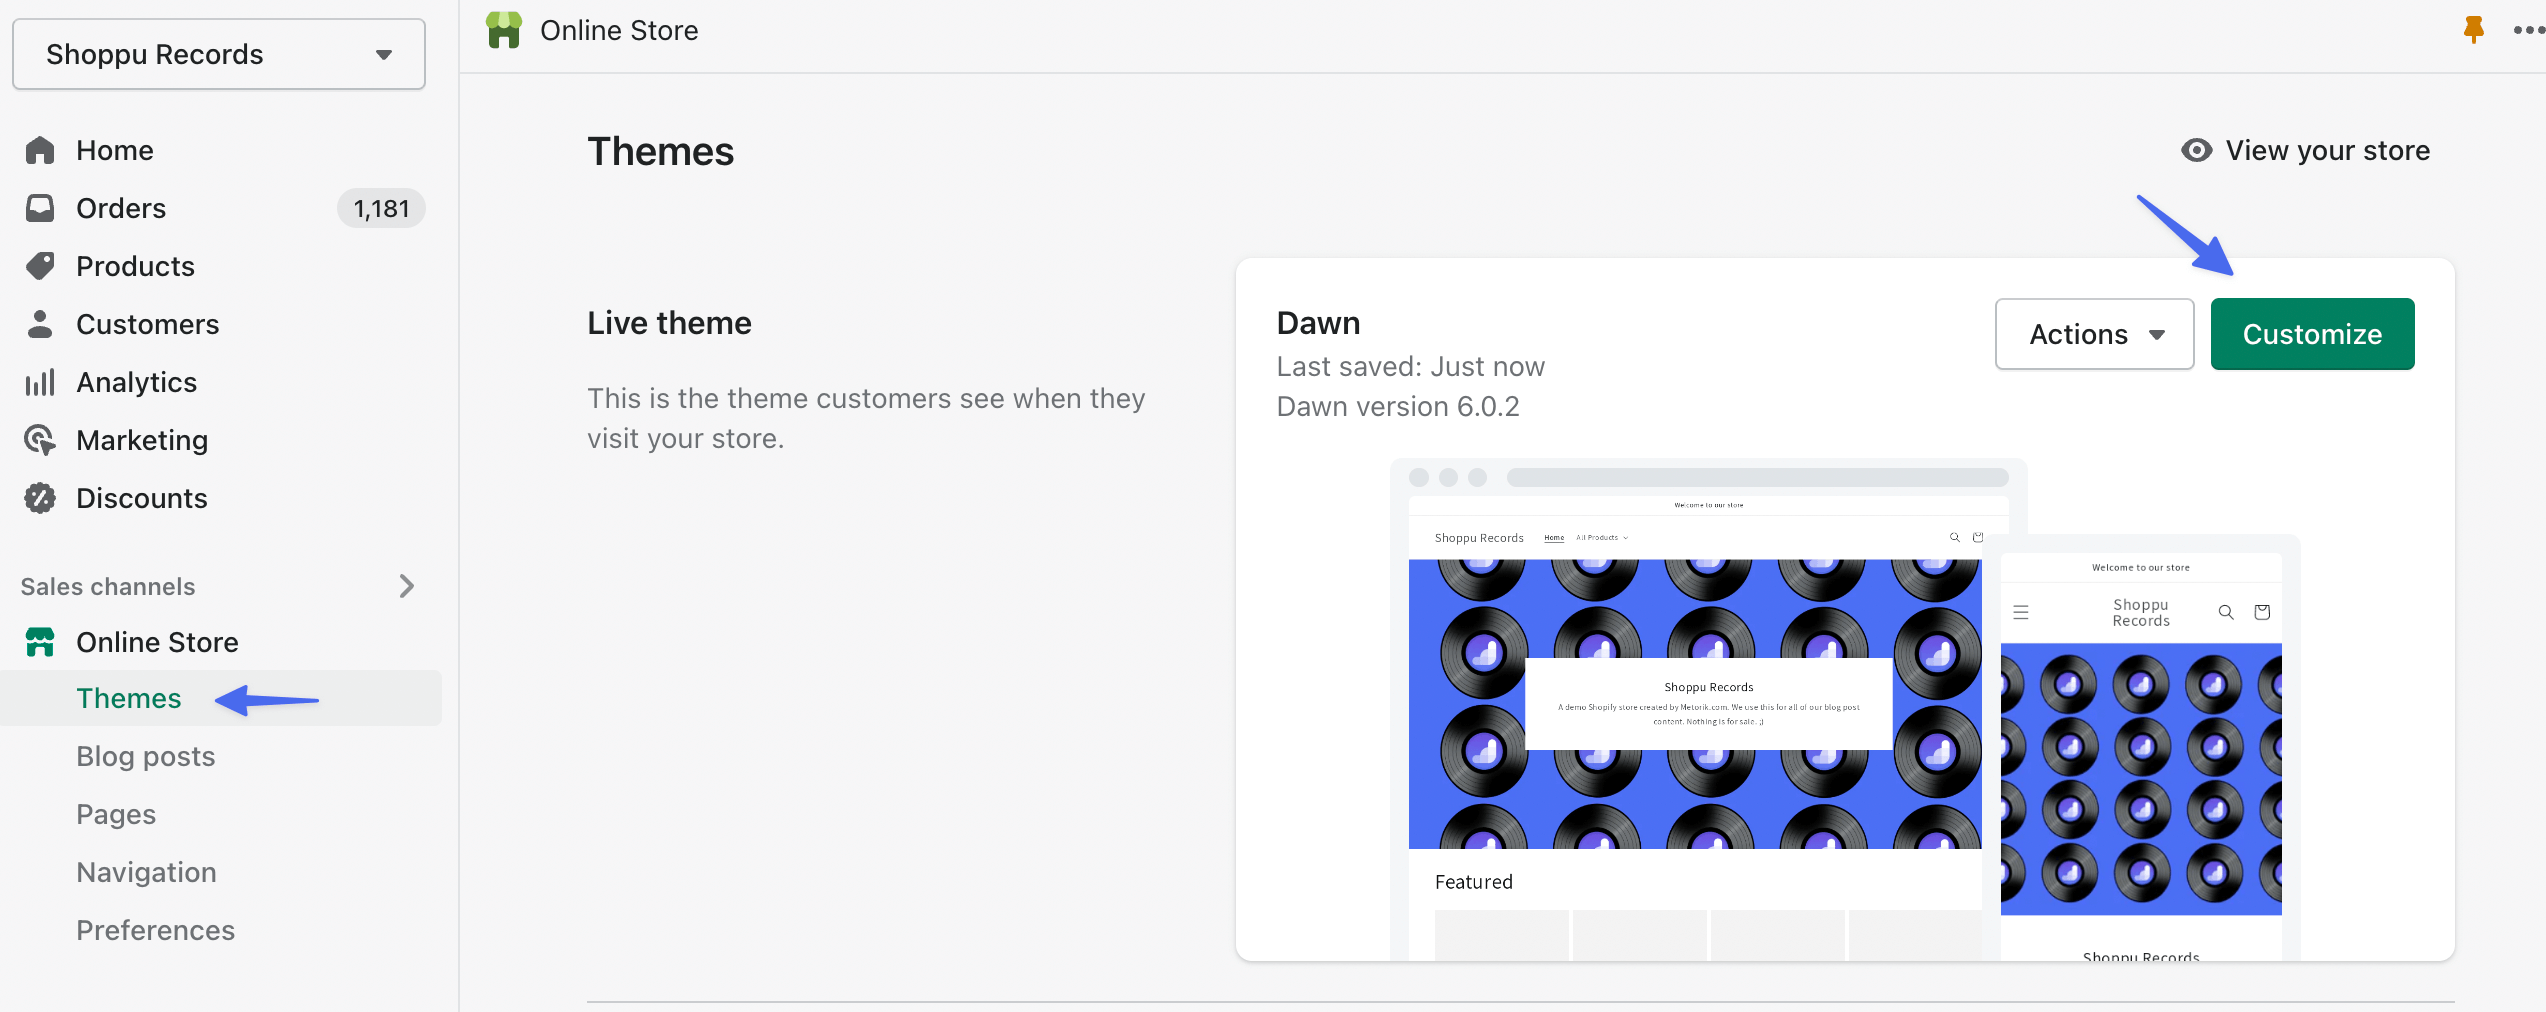
Just a quick disclaimer, if your site is live and operational, be careful with editing the live theme as any changes will be displayed right away. If you are making big changes, it could be a good idea to duplicate the theme, work on the duplicated draft version, and then swap out the live theme with the edited one.
In the editor, I'm going to hover over the hero section and then hover over the blue plus button:
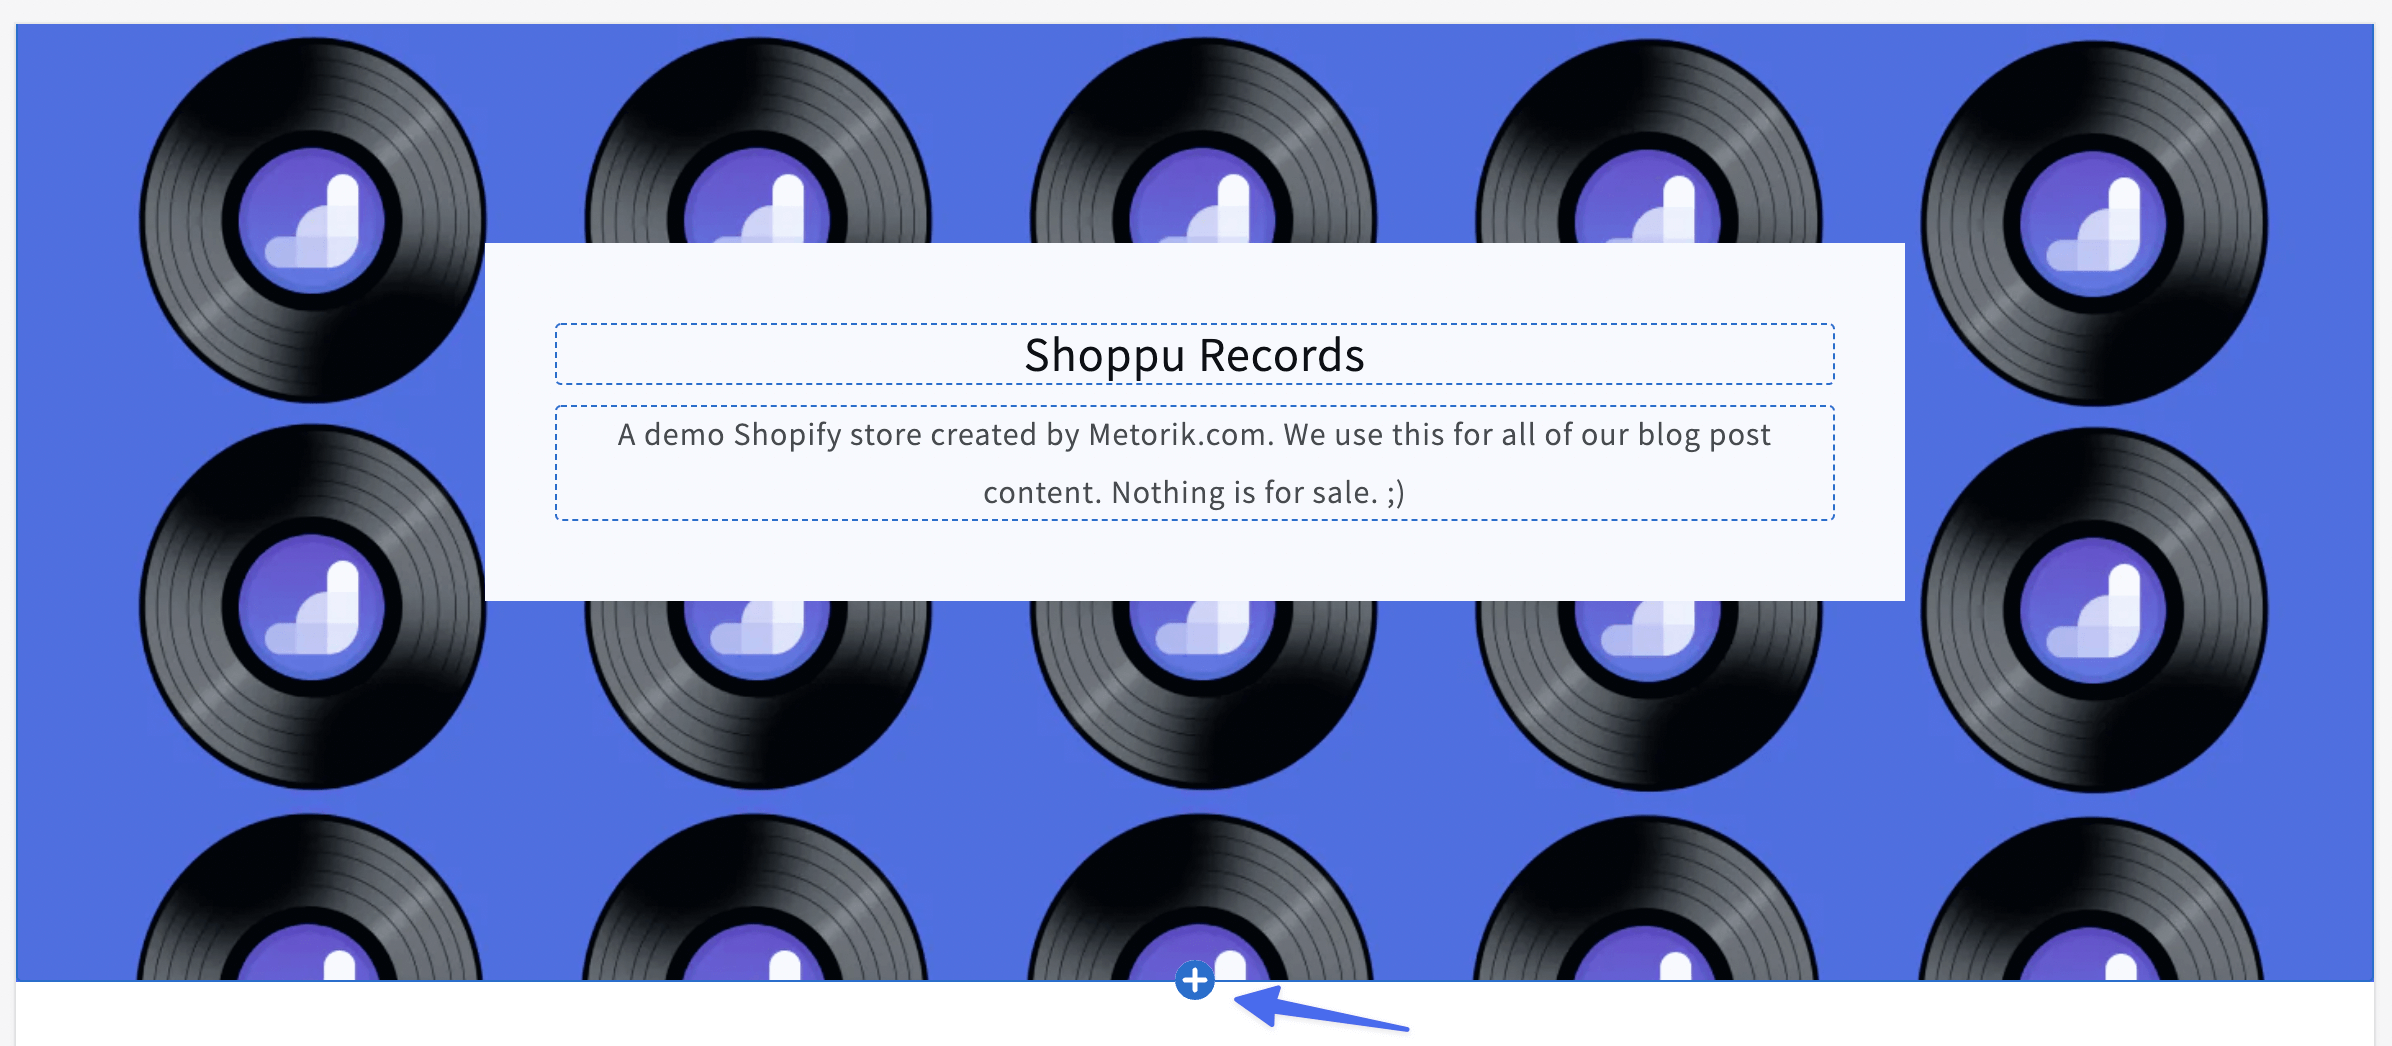
Then click Add Section > Collection List:
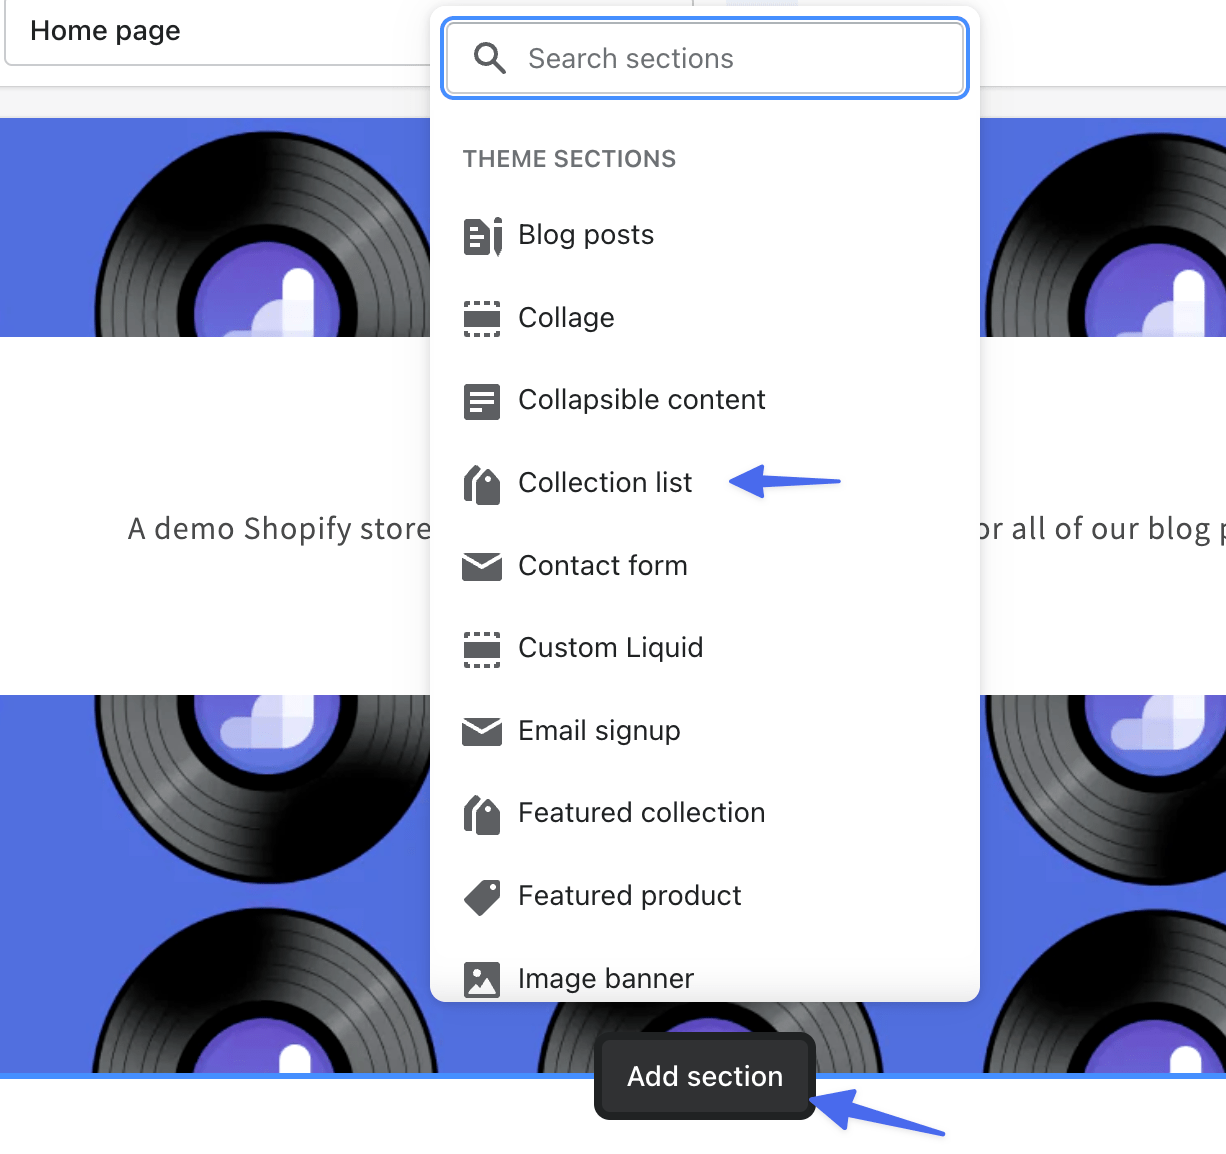
This will drop in a new block where we can then choose our collections.
We can click on one of the boxes and then click Select collection and choose Records:
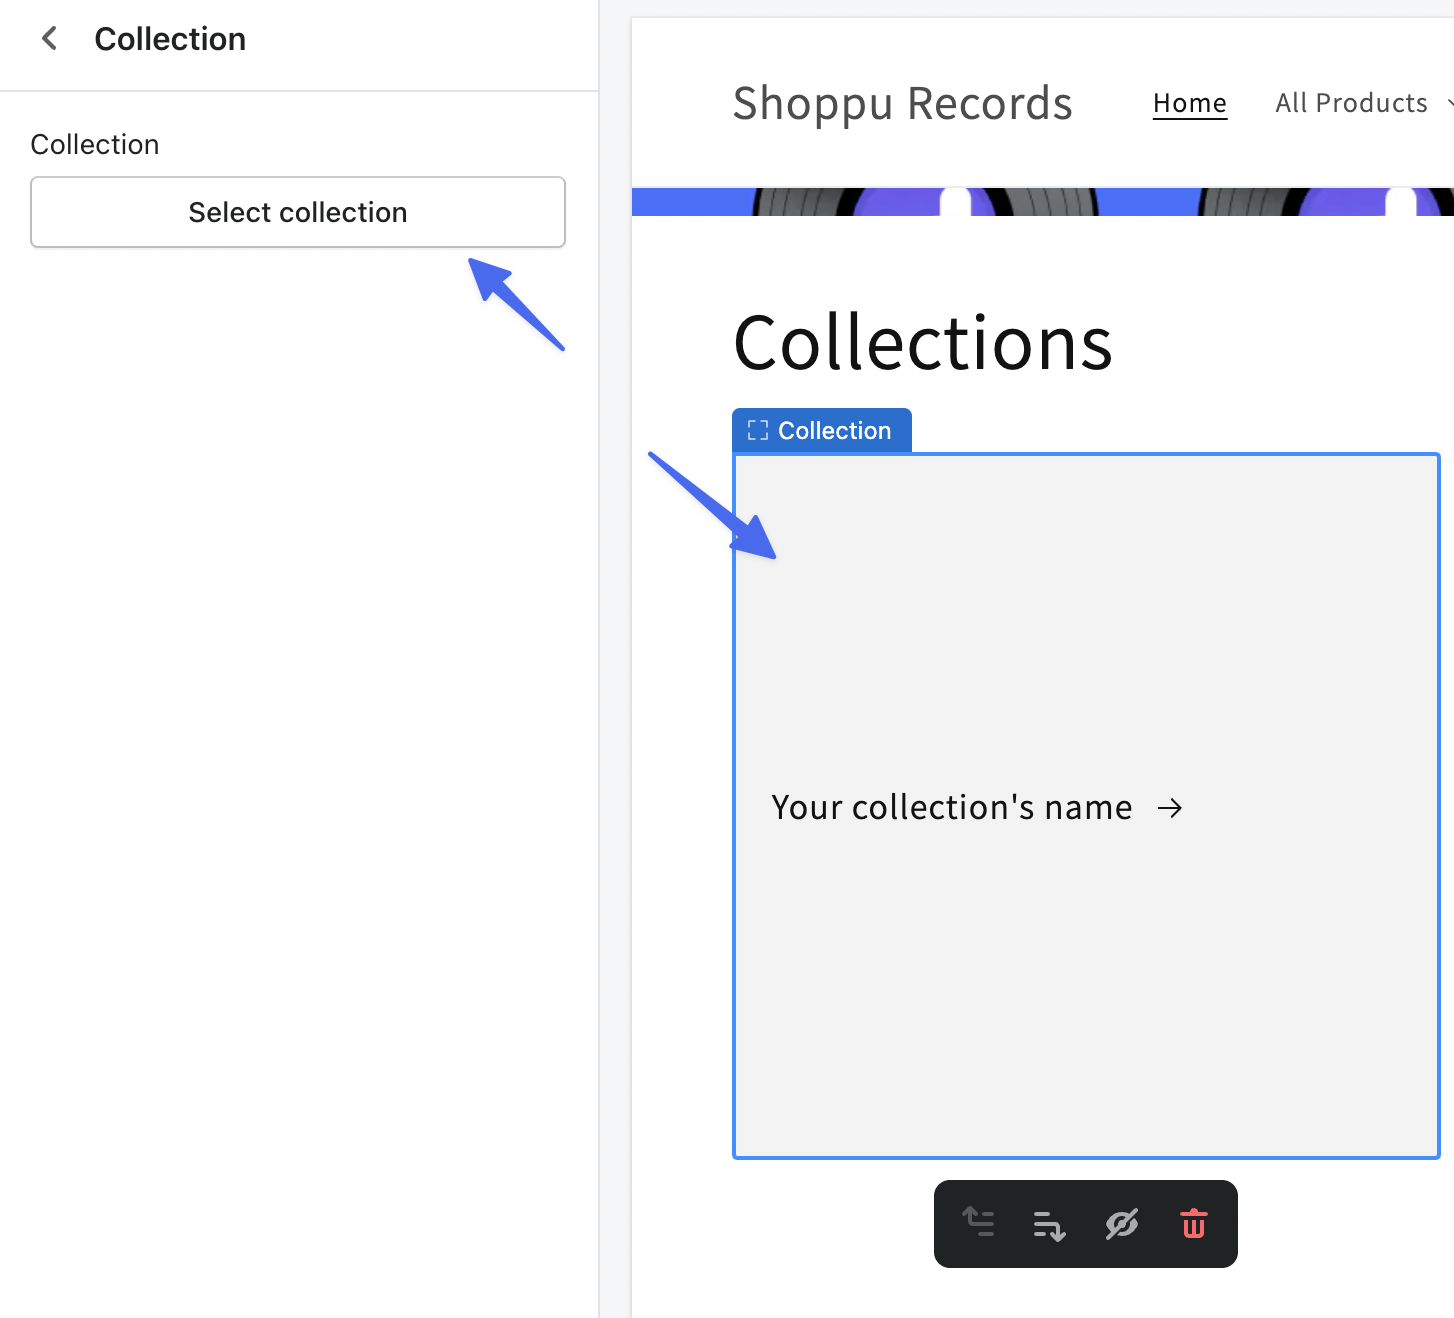
I'll go ahead a repeat this for 2 other collections.
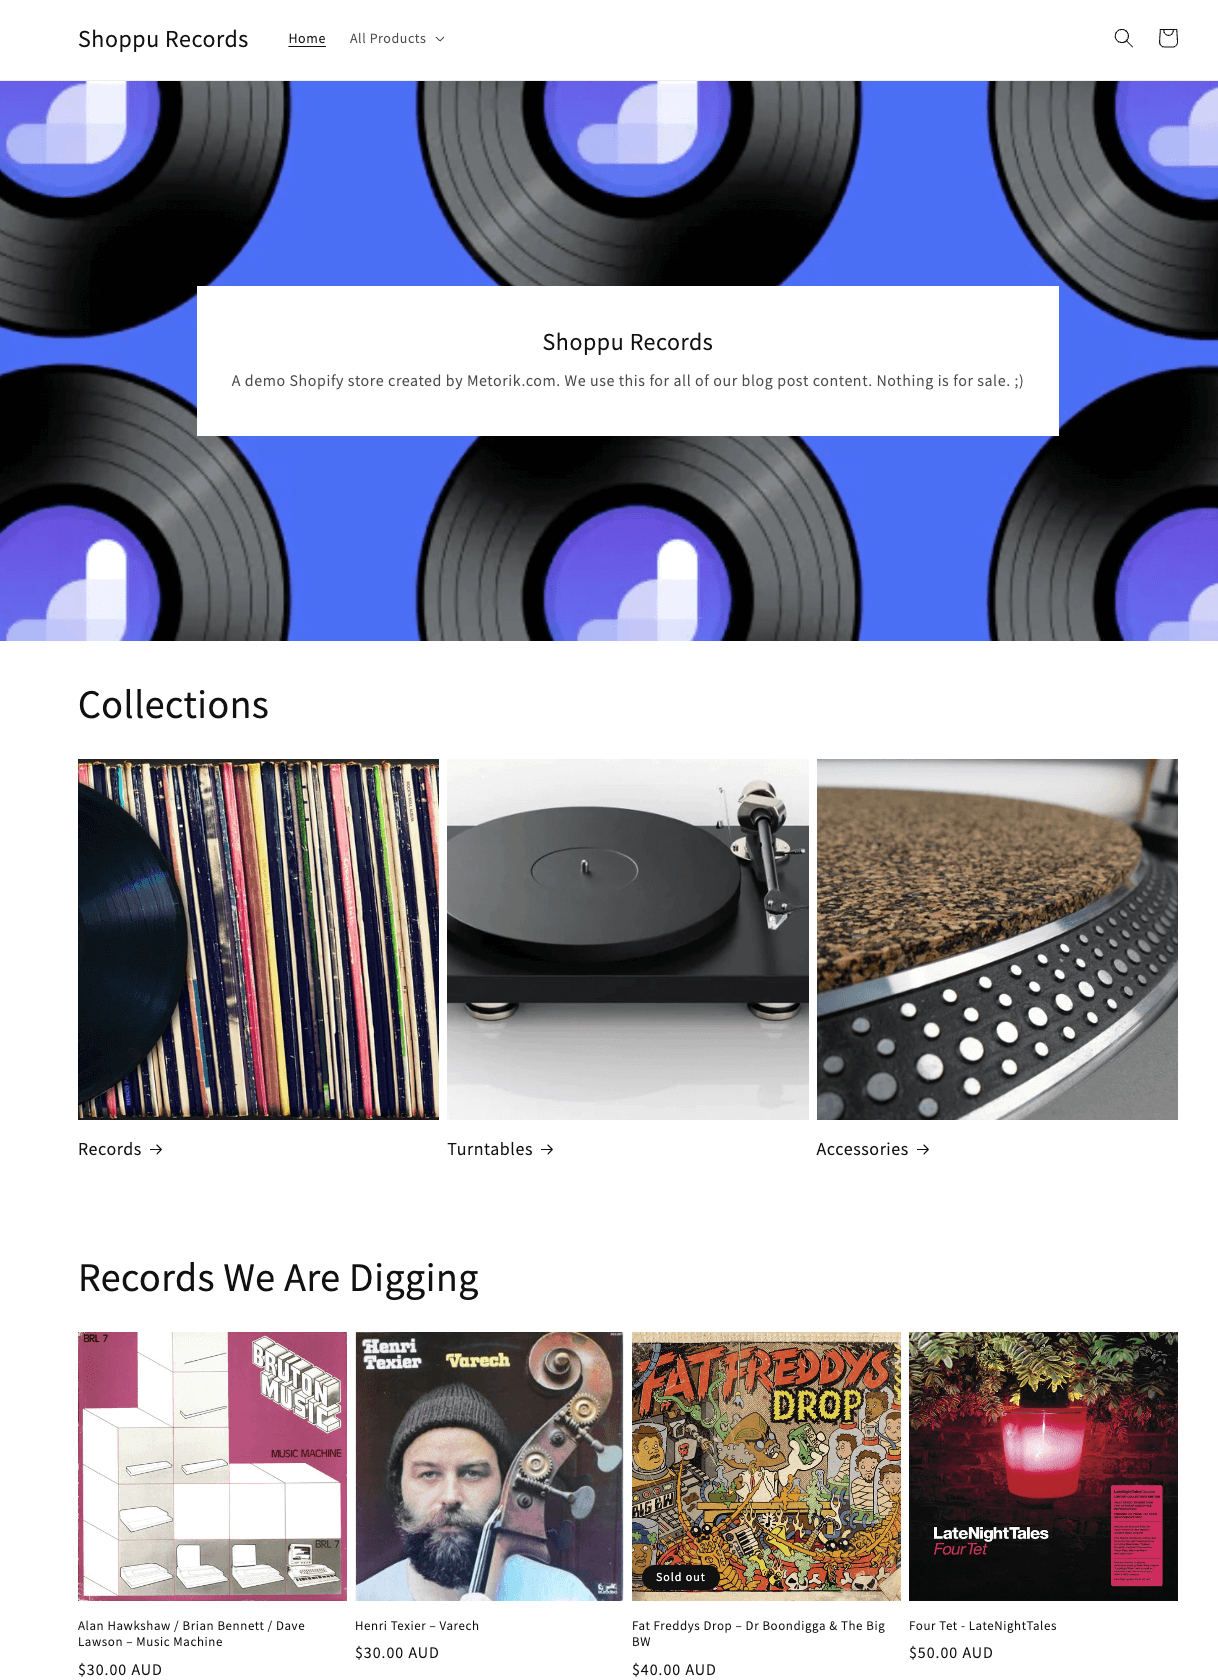
And now we have this section under the hero section:
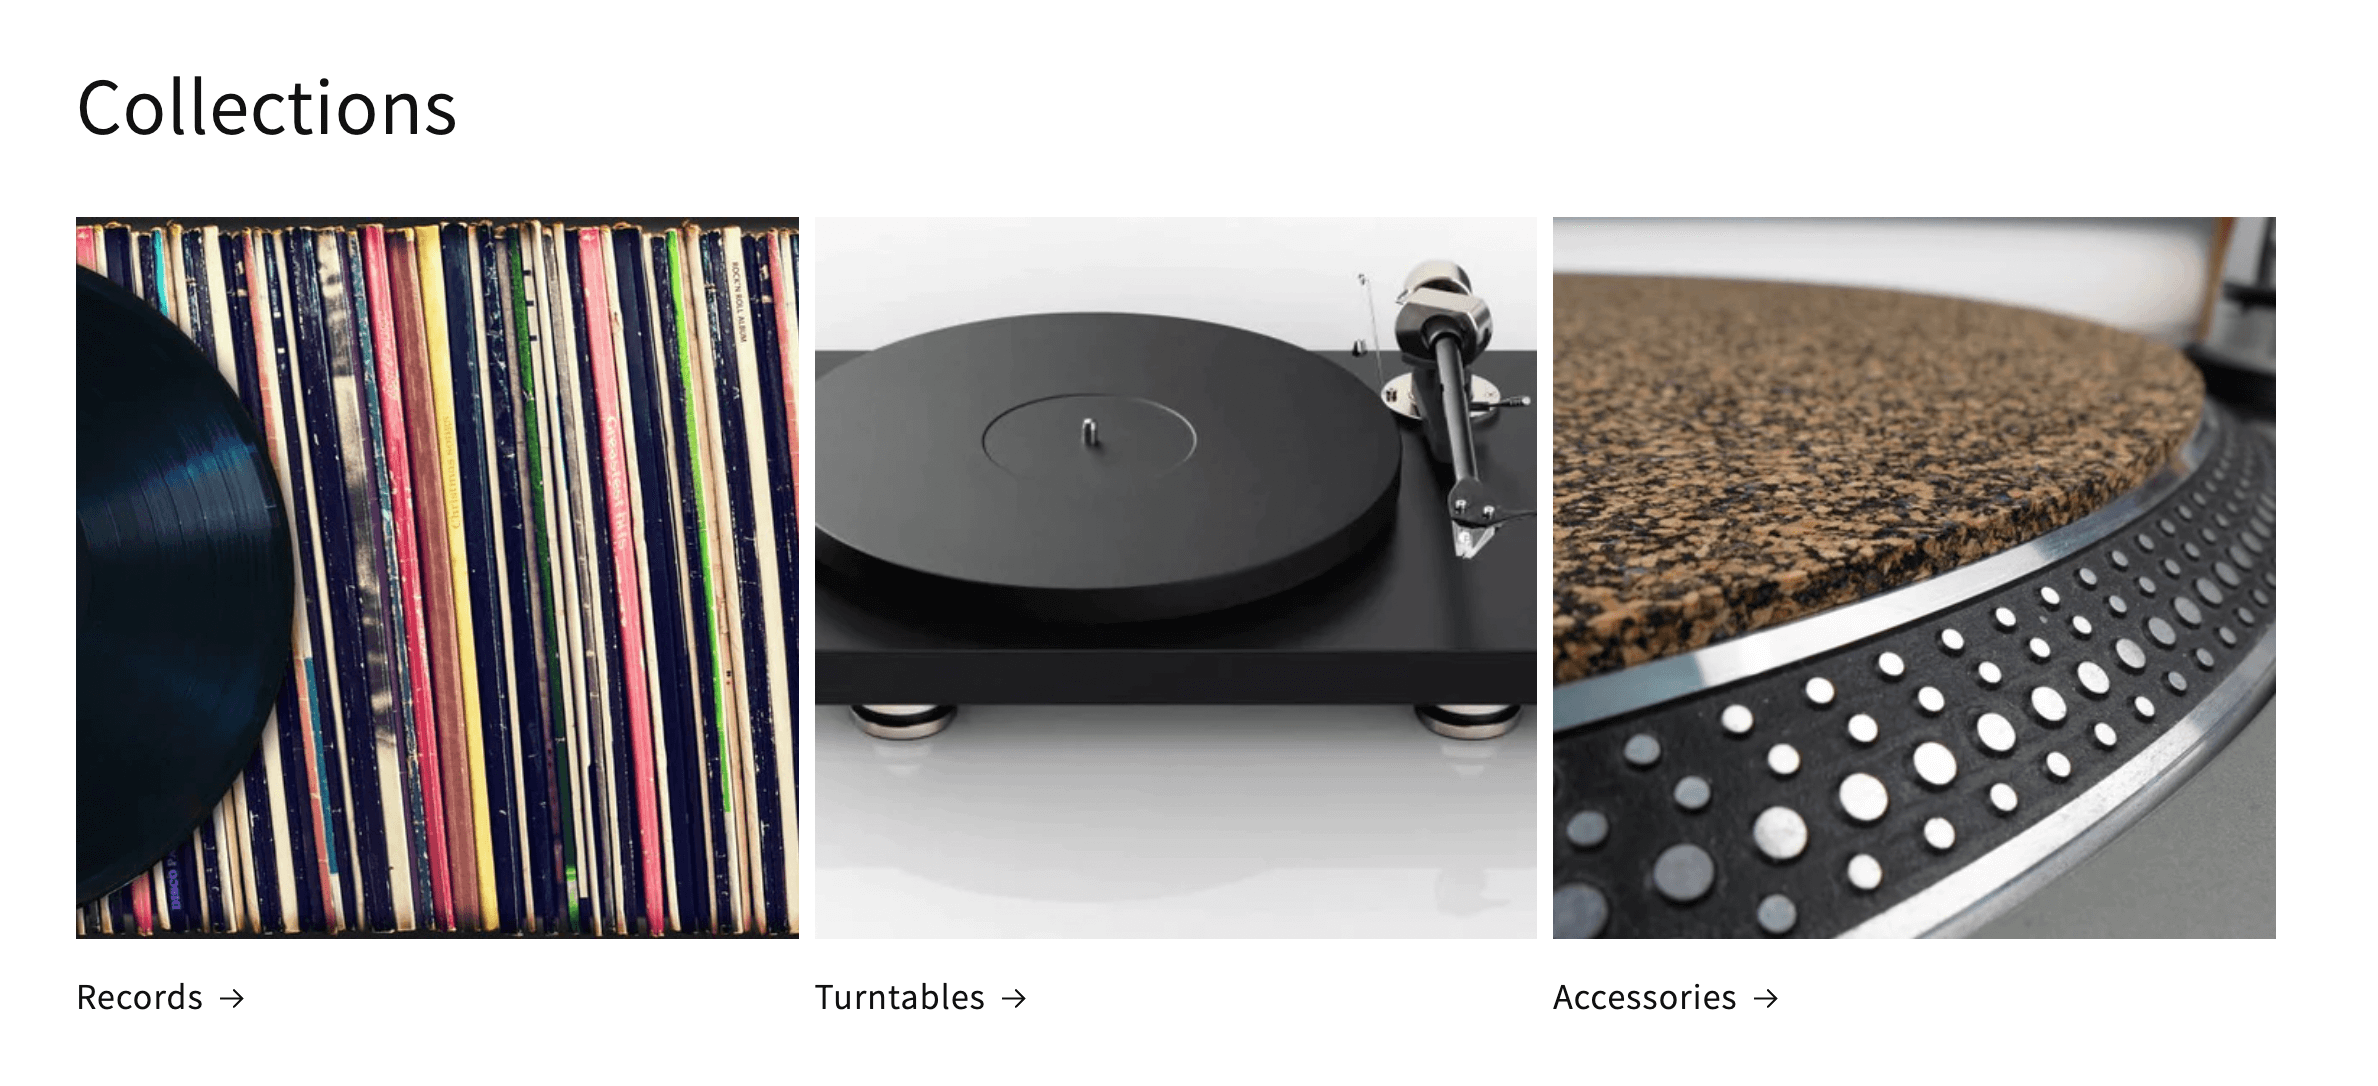
How to add your Shopify featured products on the homepage
Dawn ships with a featured collection section as well which is on the homepage by default. If we click on it we will see some options:
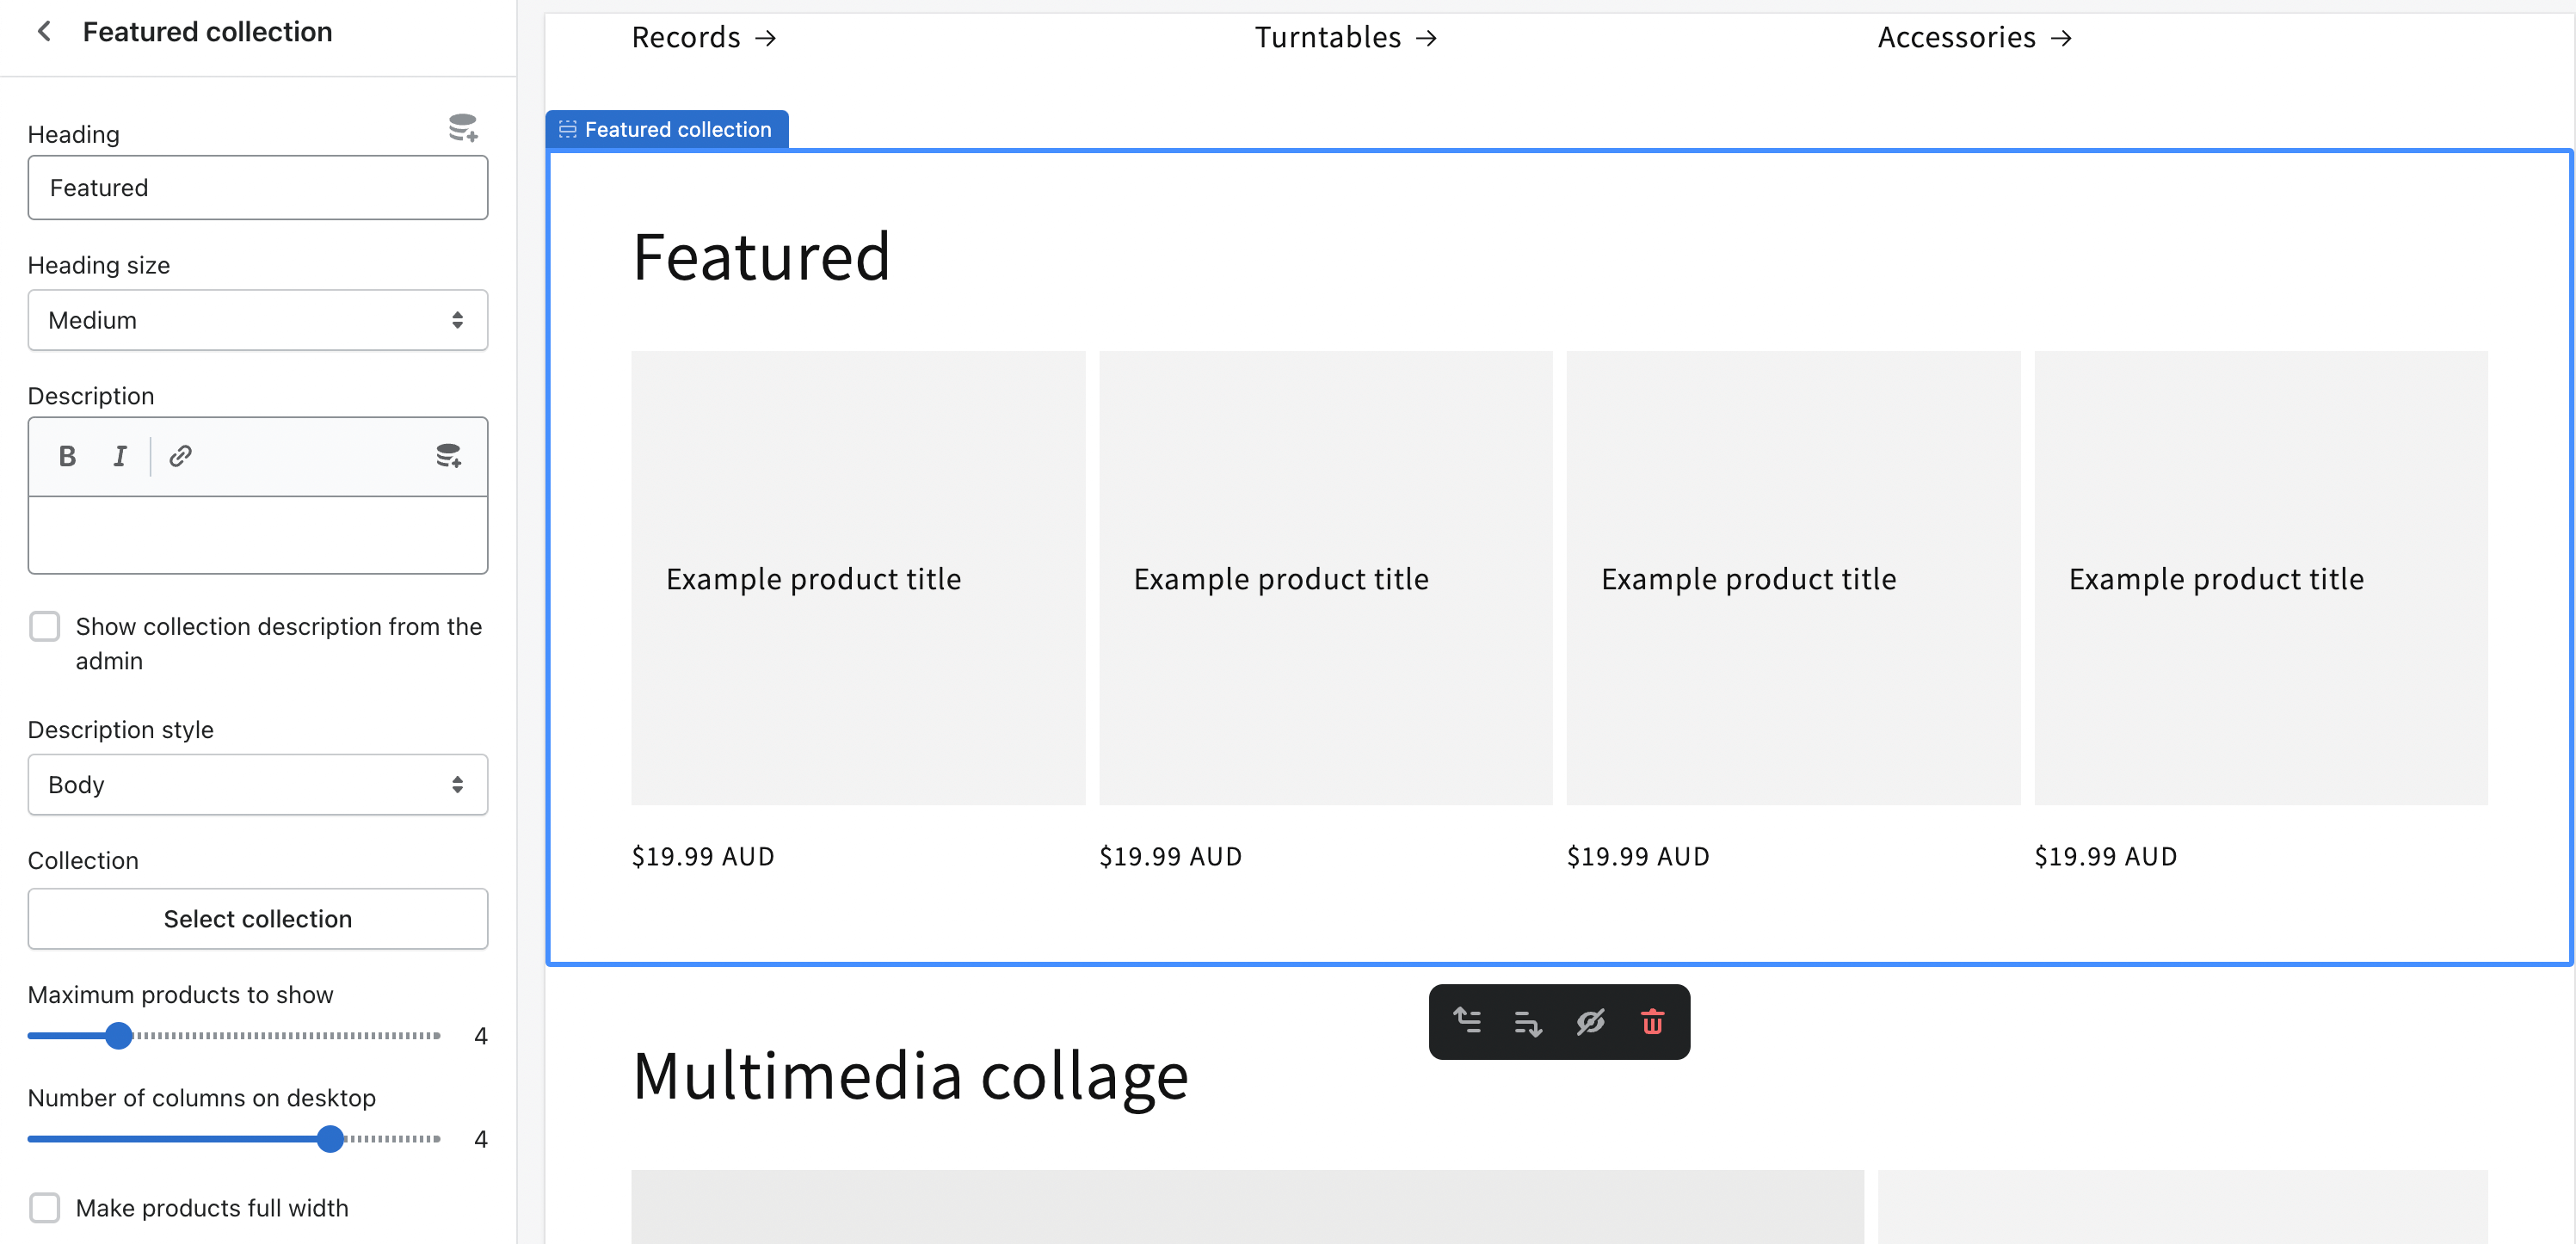
In our case, I'm going to change the title to 'Records We Are Digging' and then select that collection by clicking the Select collection button:
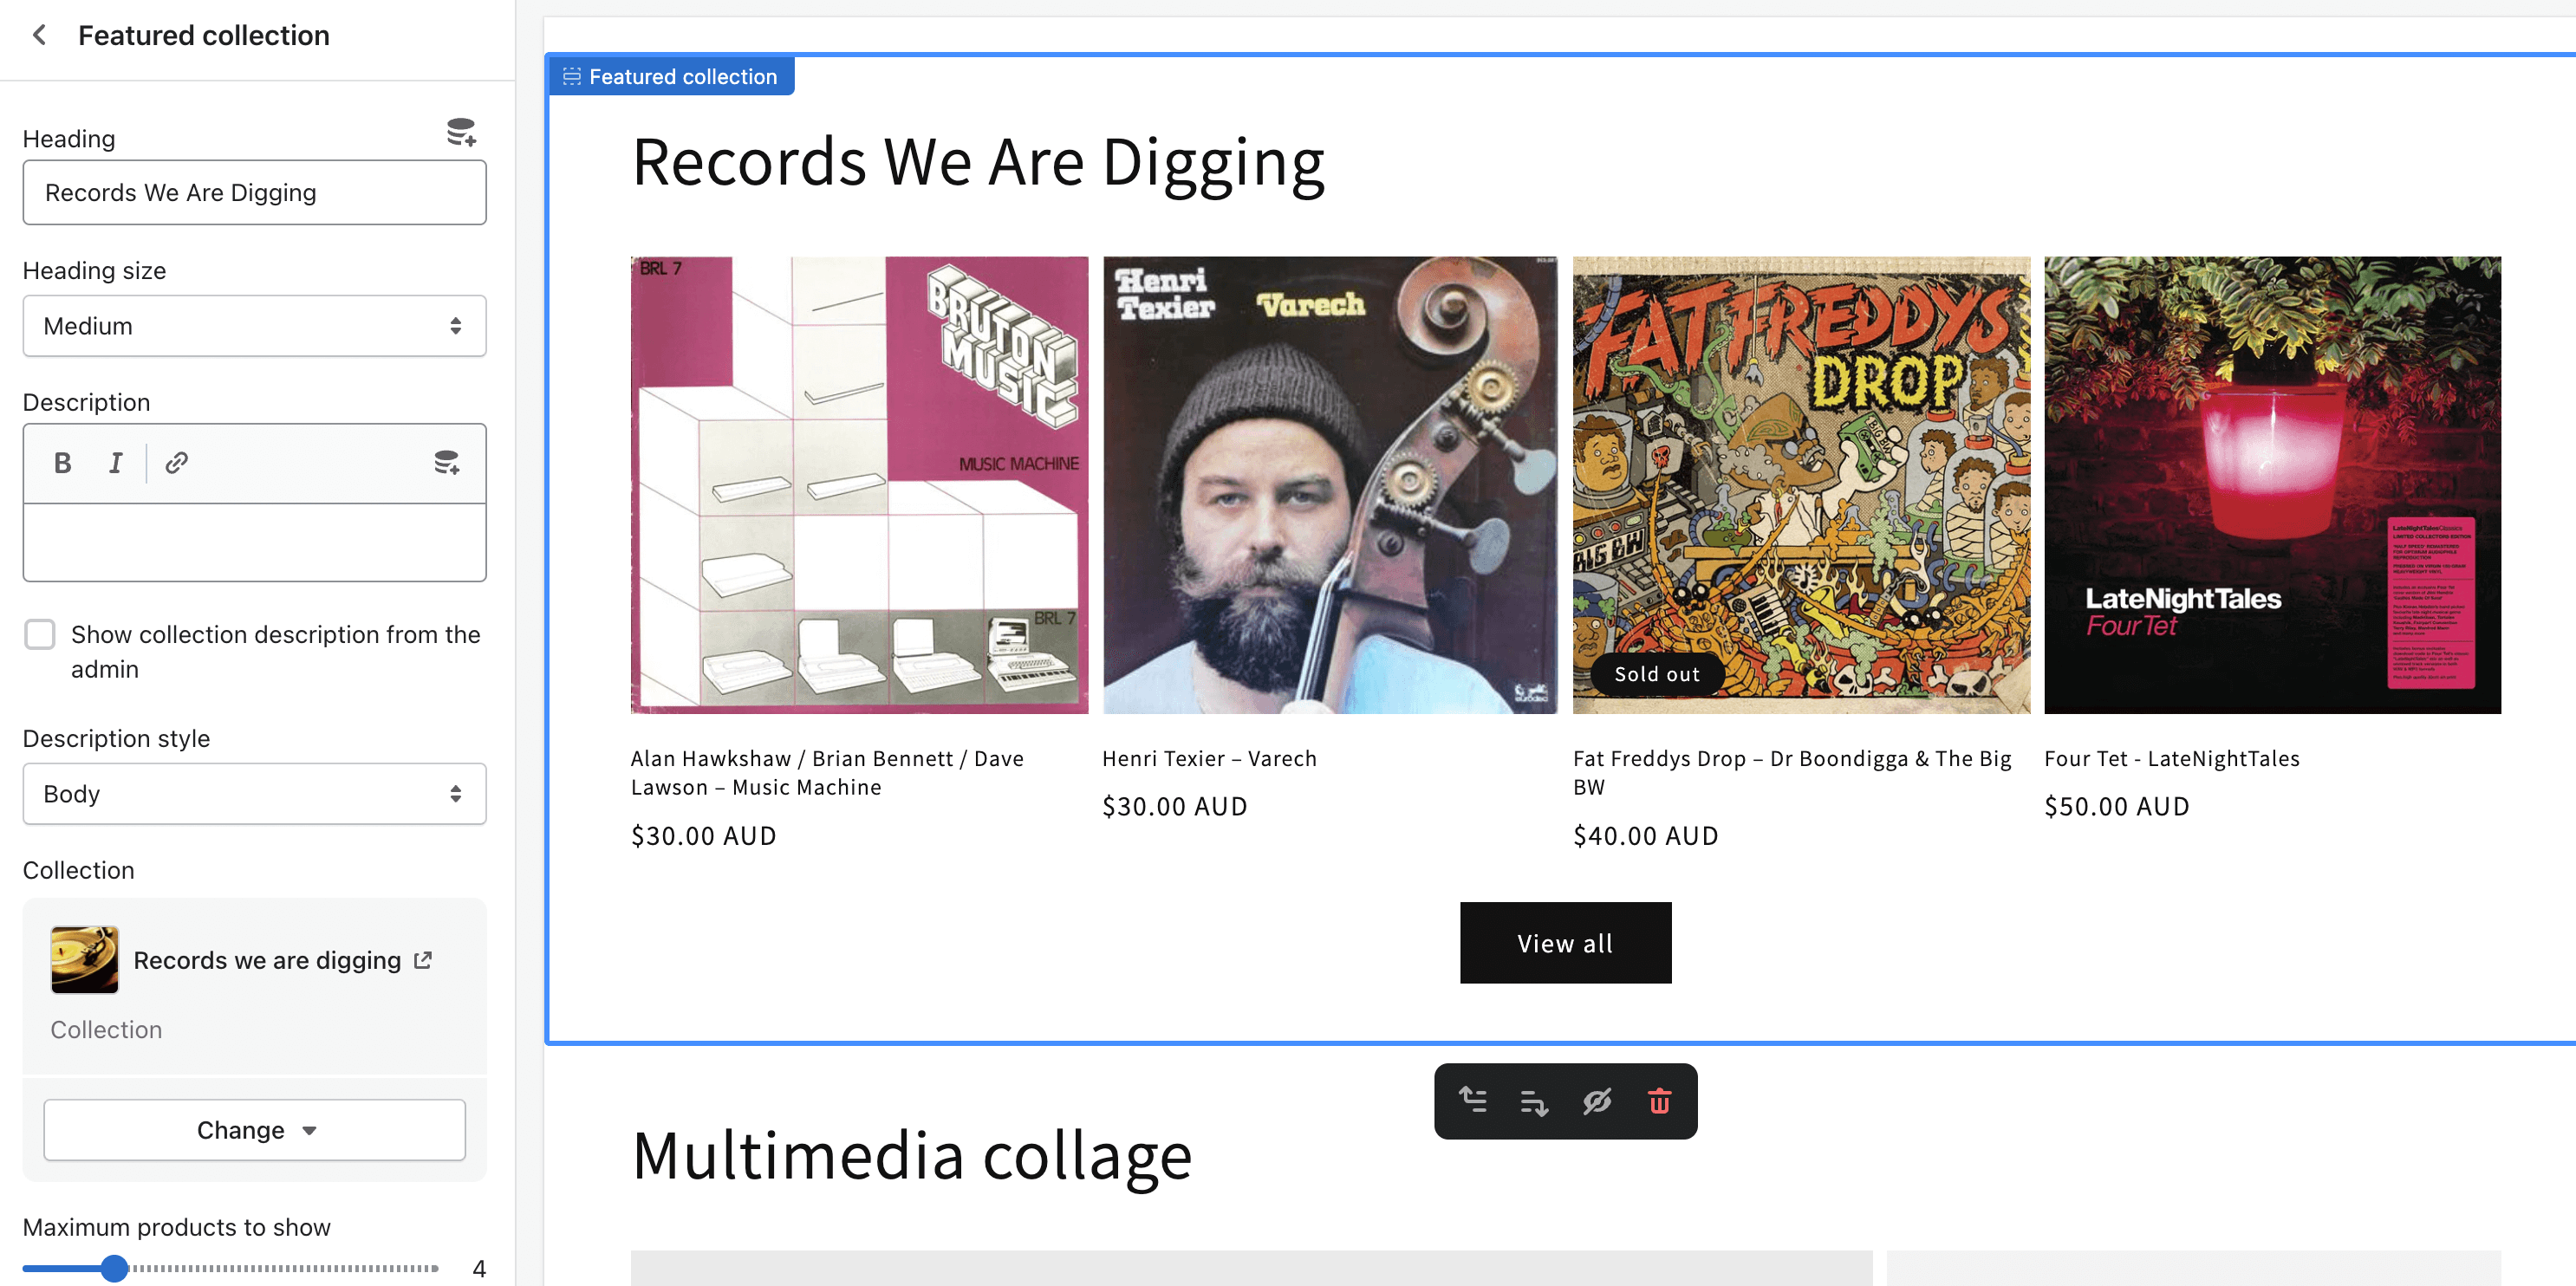
And that's it! If we click save and head to our homepage, our site now has all our new sections and new navigation:
How to show collection products in Shopify (Debut Theme).
If you are using Shopify's old Debut theme (or an older theme) follow along from here.
So now that we have done the work on the backend to actually create our collection, the next step is to now actually display them on a page on our website. It’s good practice to have a link to all your collections in your navigation. You also most likely will want to show off some of your collections on your home page too.
How to add collections your to Shopify menu
In your admin sidebar, navigate to Sales Channels > Online Store > Navigation:

Click on Main menu > Add menu item:

For the name of the link, you can call it collections, however, customers might be confused by this. It might be better to just call it ‘products’ for the sake of clarity. For the link field select Collection > All Collections:
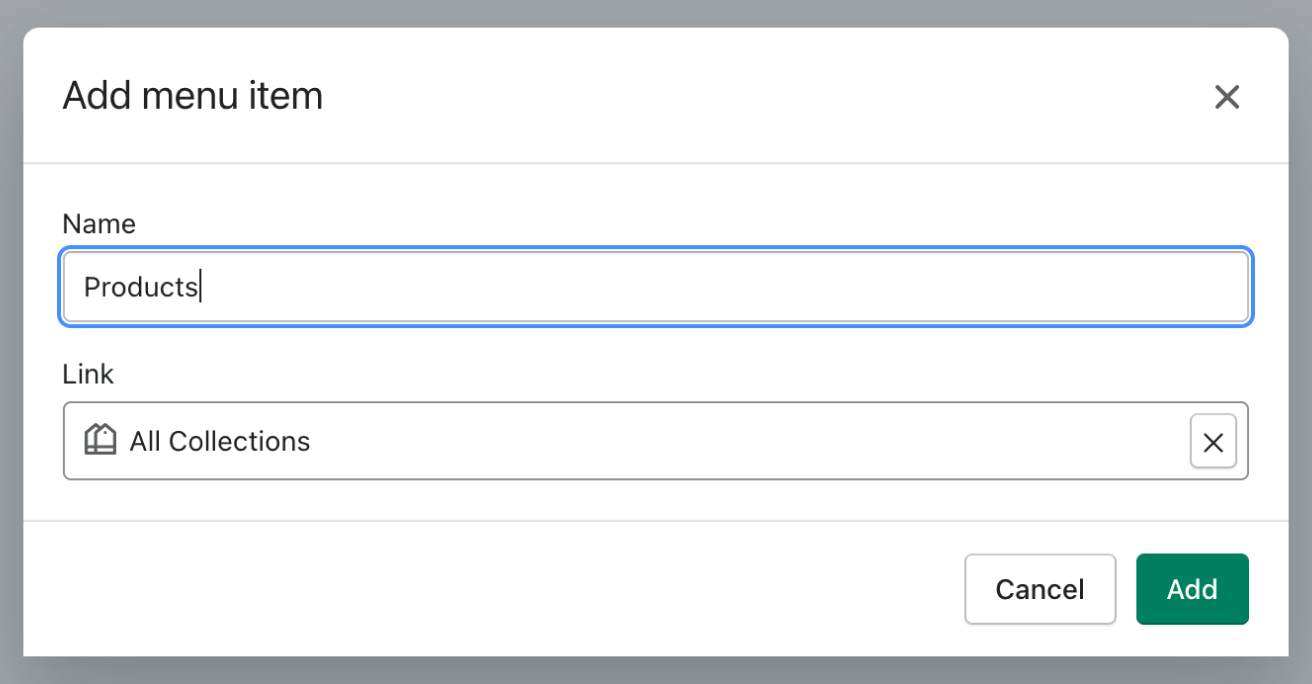
Then make sure to save the menu.
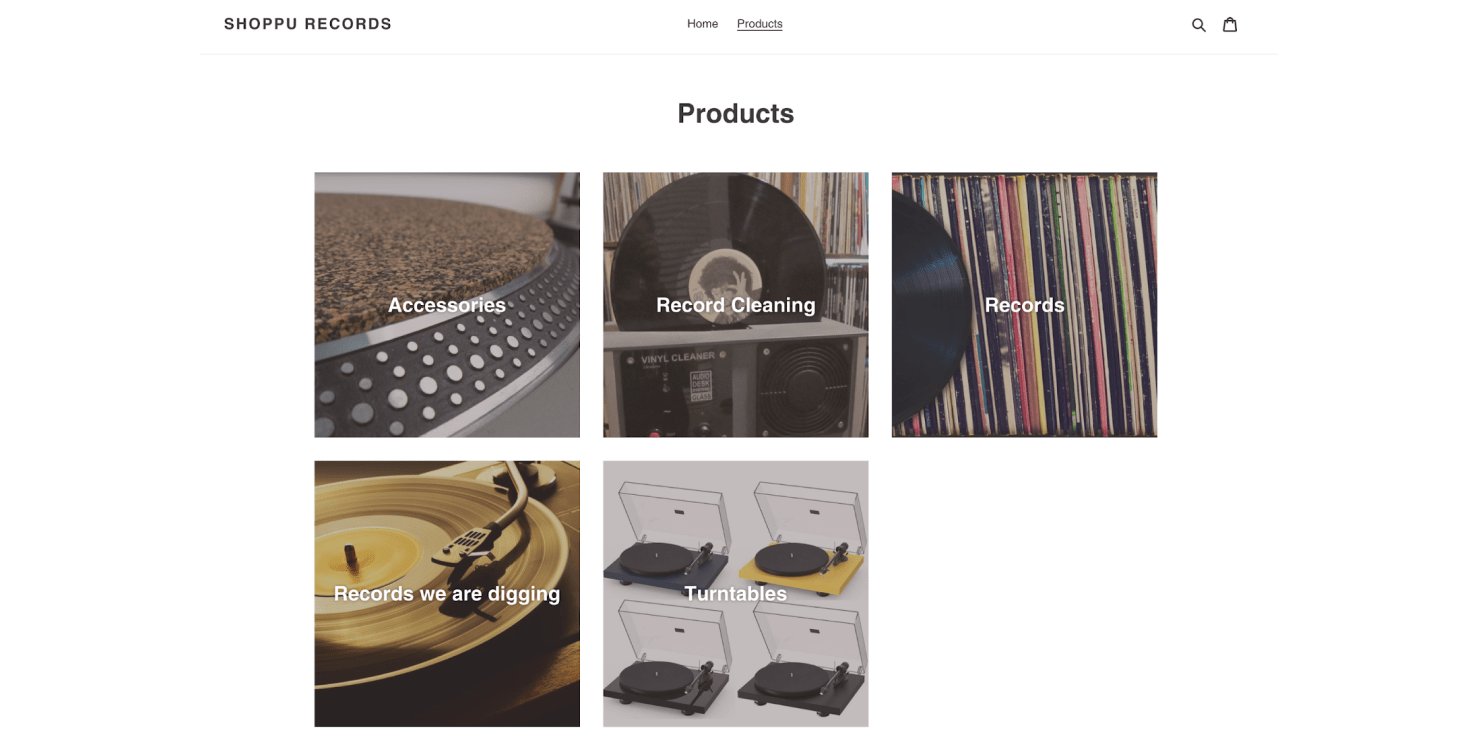
If you now head to your shop, you will see a new link to your products in your navigation and all your collections beautifully displayed:
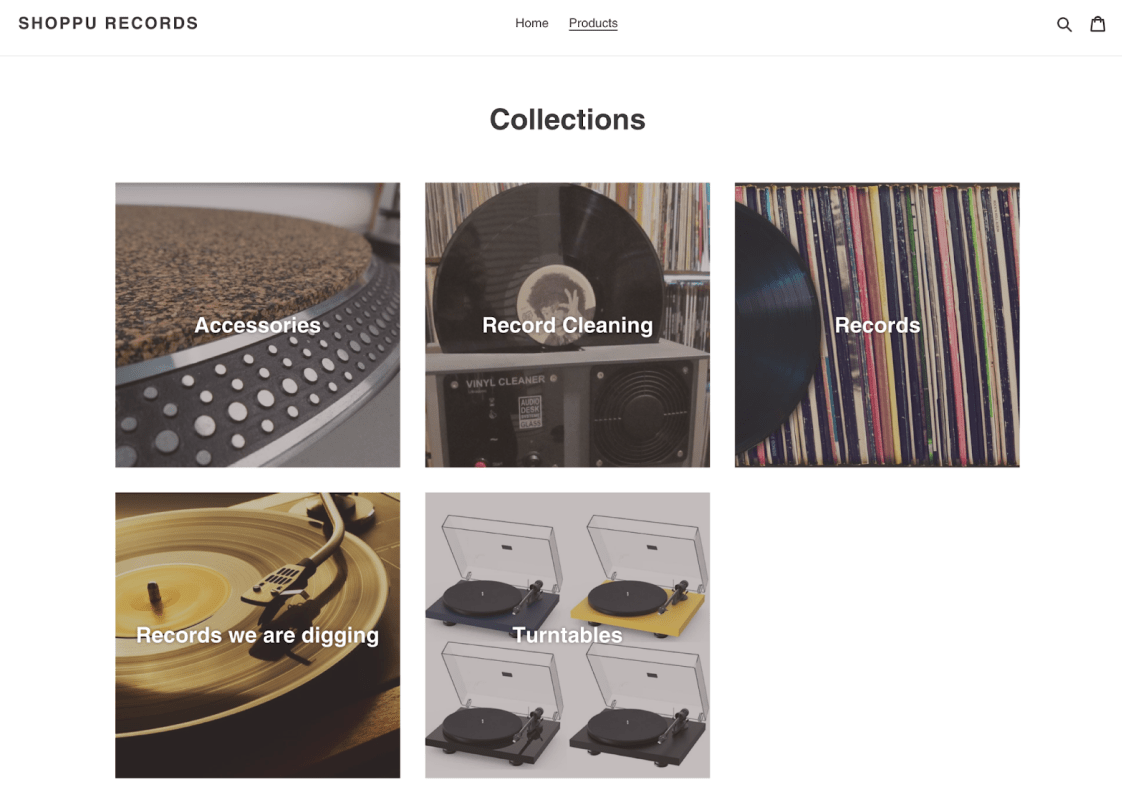
One thing to note here is that although we named the navbar link ‘products’, the actual heading of the page still says collections. This is easy to change — to do this in your sidebar click Sales Channels > Online Store > Themes.
Then click the Actions button and then Edit languages:
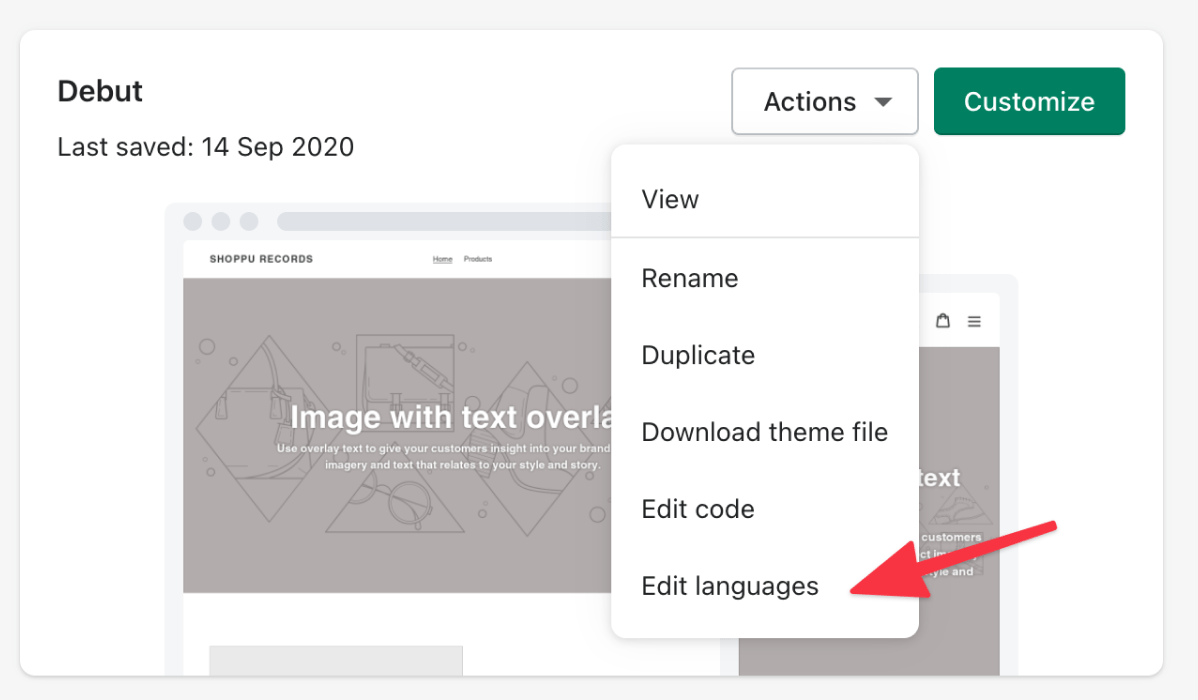
Then filter for collections page title:

Then change the Checkout & system / Page titles from Collections to Products:

Click Save and then navigate back to the collections page and the heading should be updated to Products:
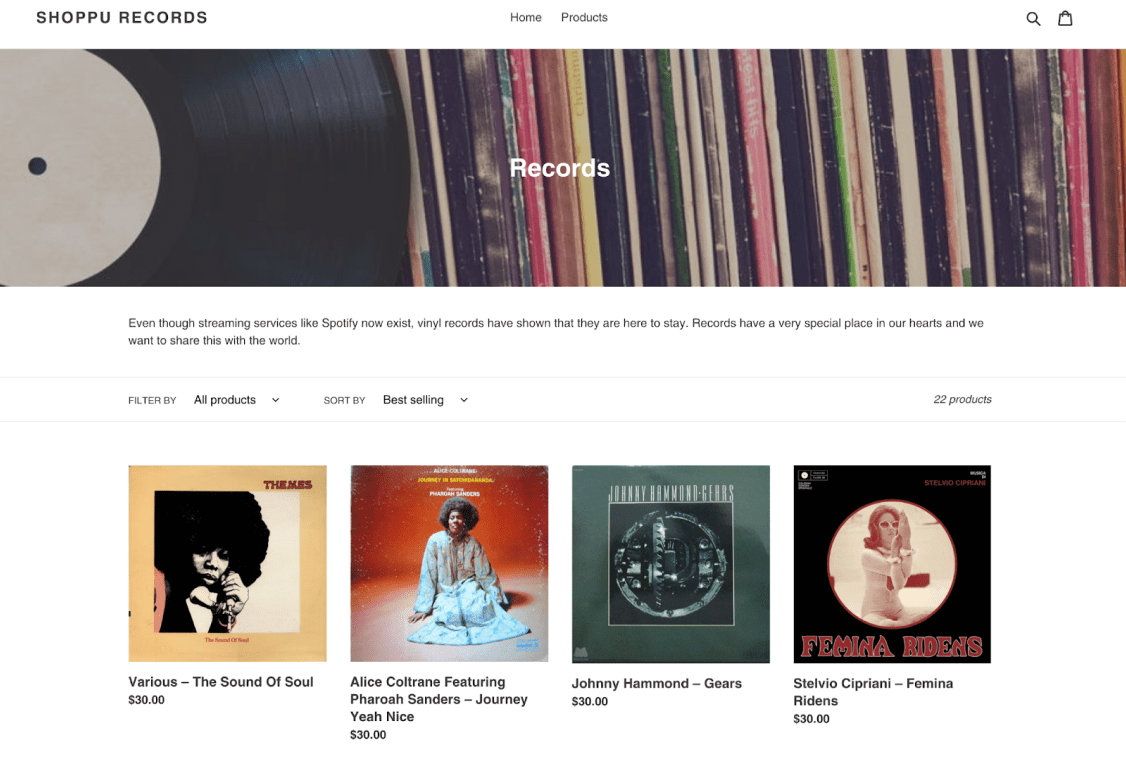
And here is our record collection:
How do I add collections to my Shopify homepage?
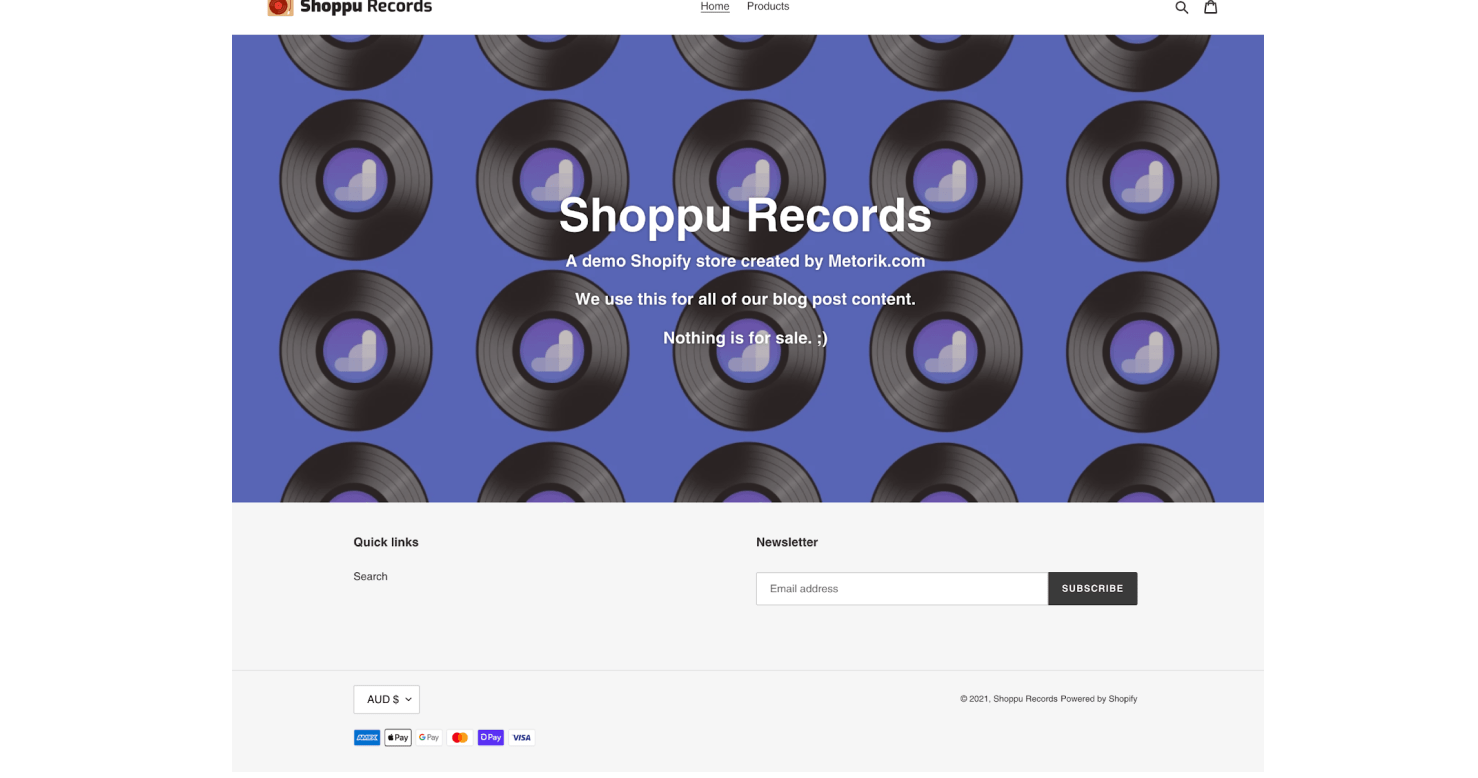
You can add Shopify collections to any of your pages, but let’s use our homepage as an example. Currently, our homepage looks like this, just a hero section:
But you can easily add your collections by customizing your theme. Our store is currently using the default Debut theme. In the themes section, click the customize button:

Then add a new section from the sidebar:
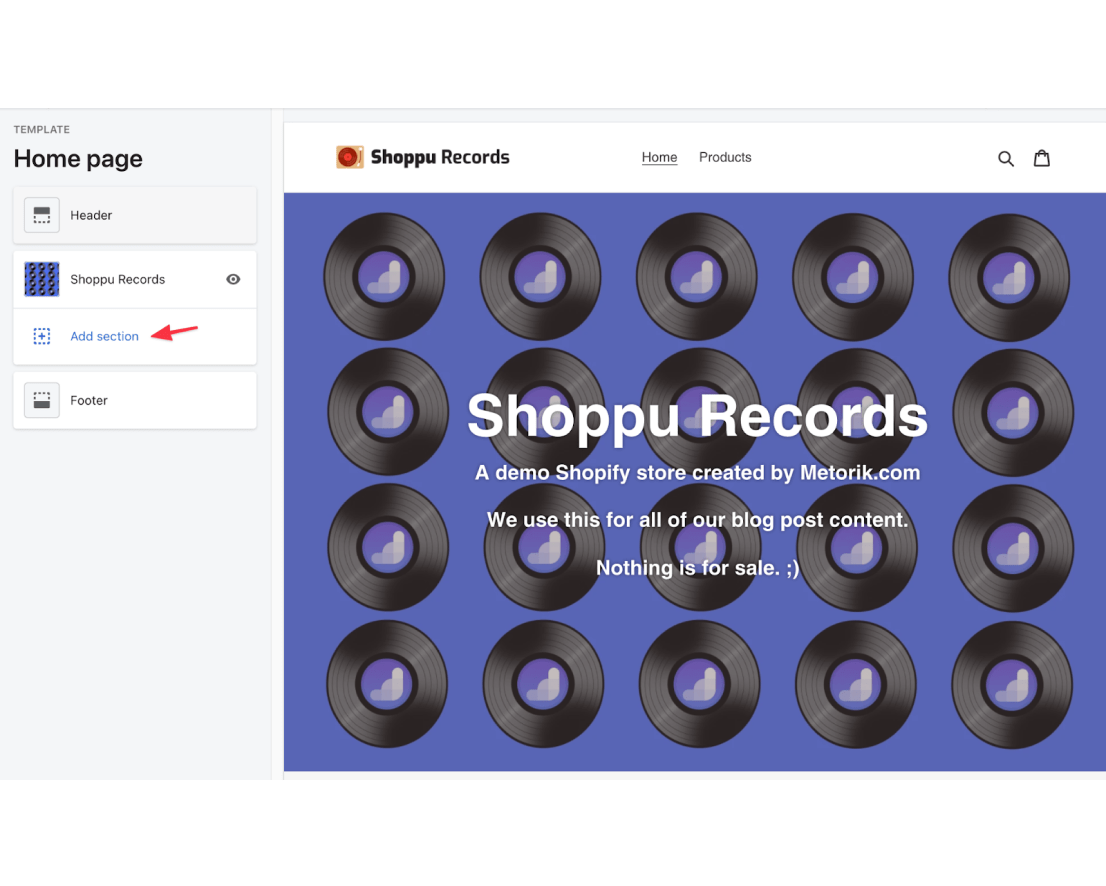
Select collection list:
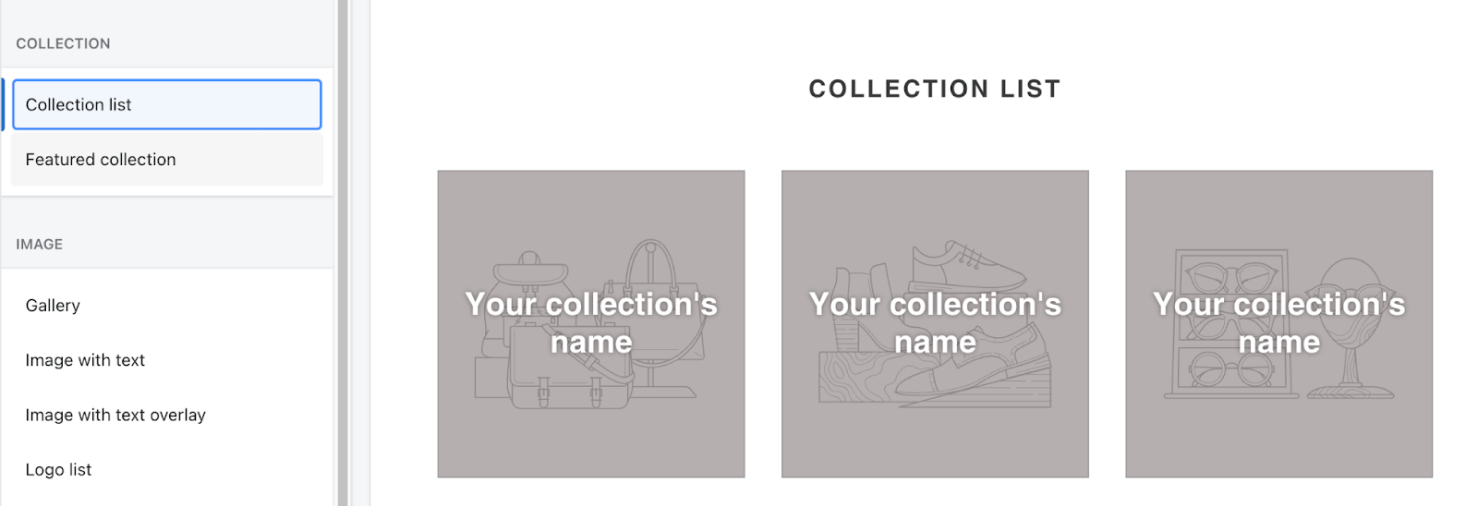
Click select button at the bottom of the sidebar:

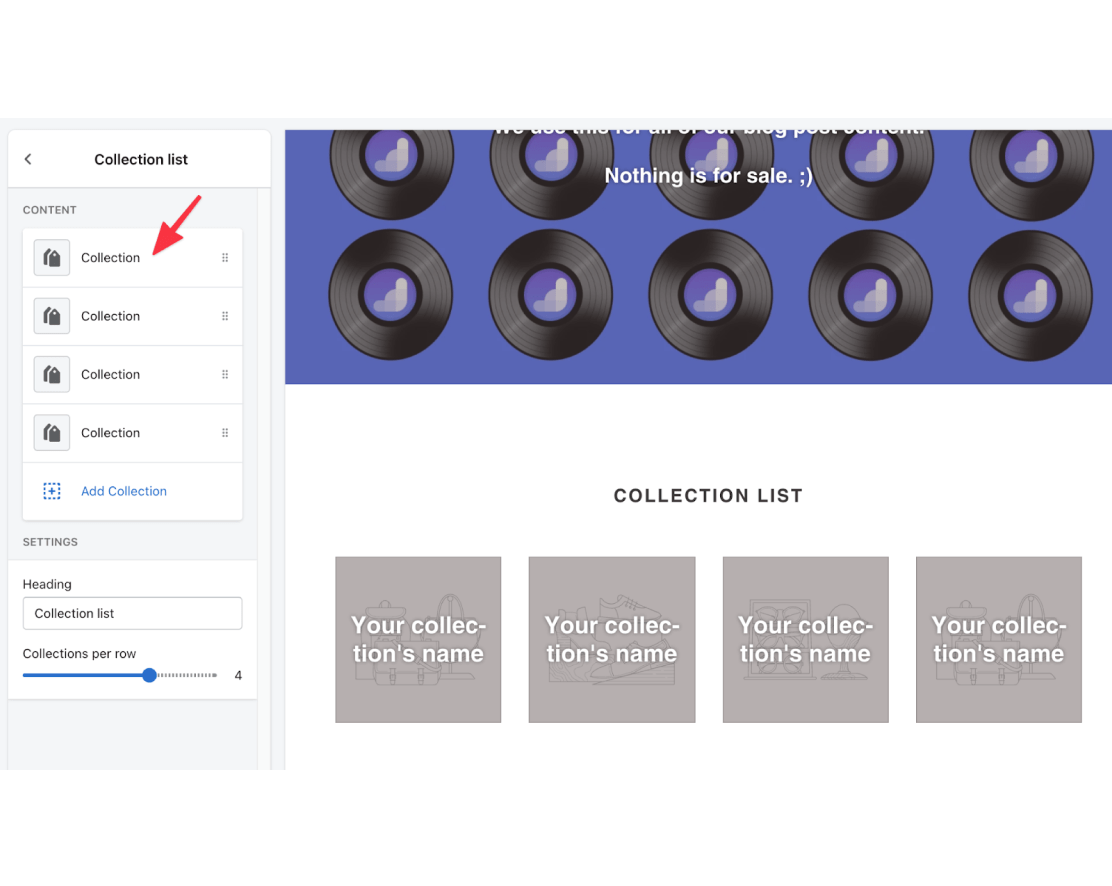
You can select how many collections to display per row — I’ll change it to 4 to display our 4 main product type collections. To select a collection just click the first empty collection:
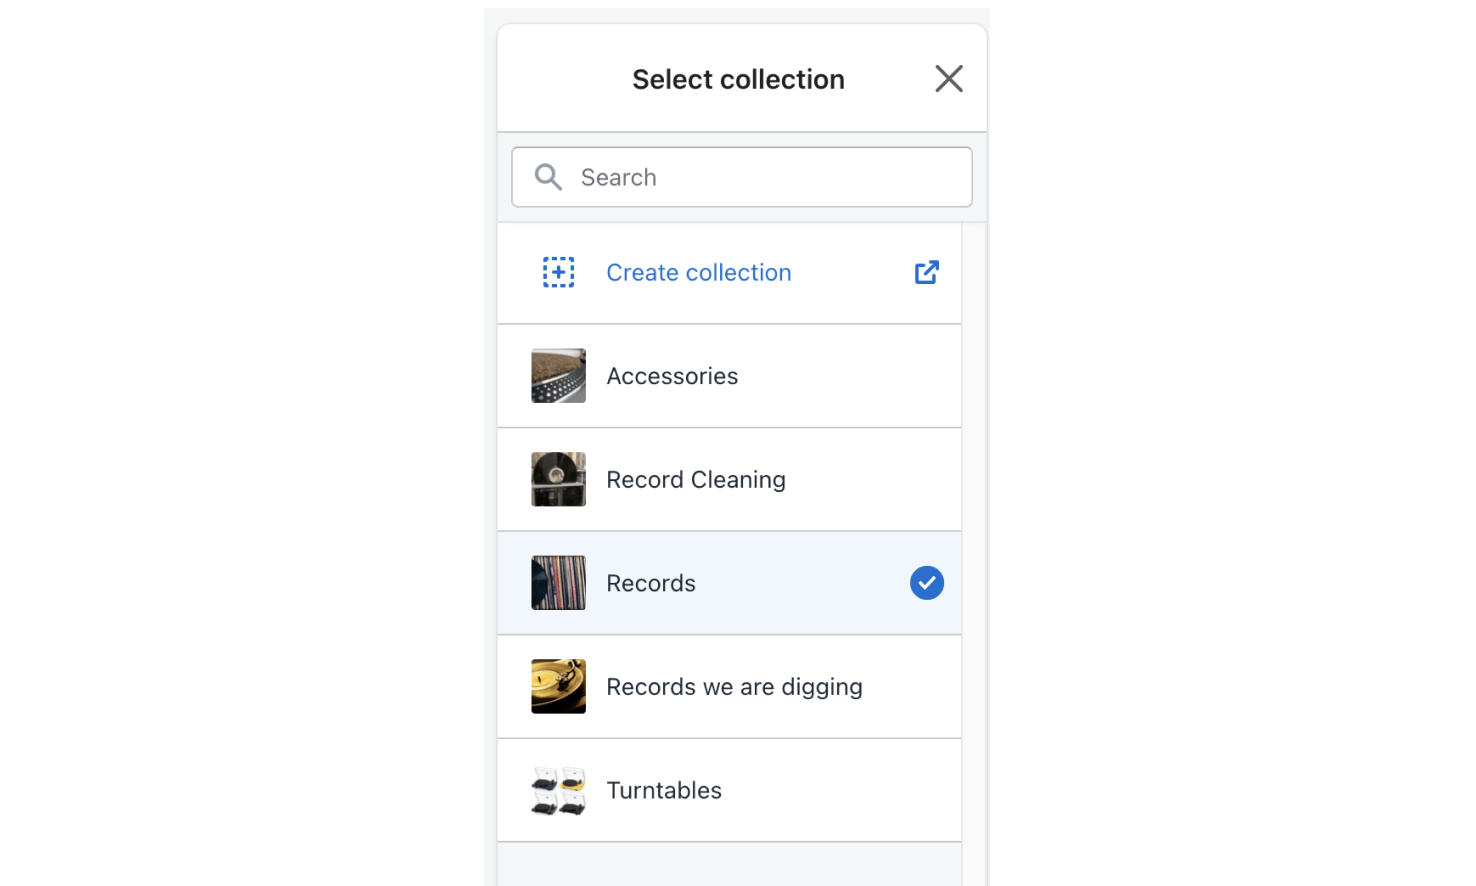
And then select a collection from the list:
Then just repeat for your other collections:
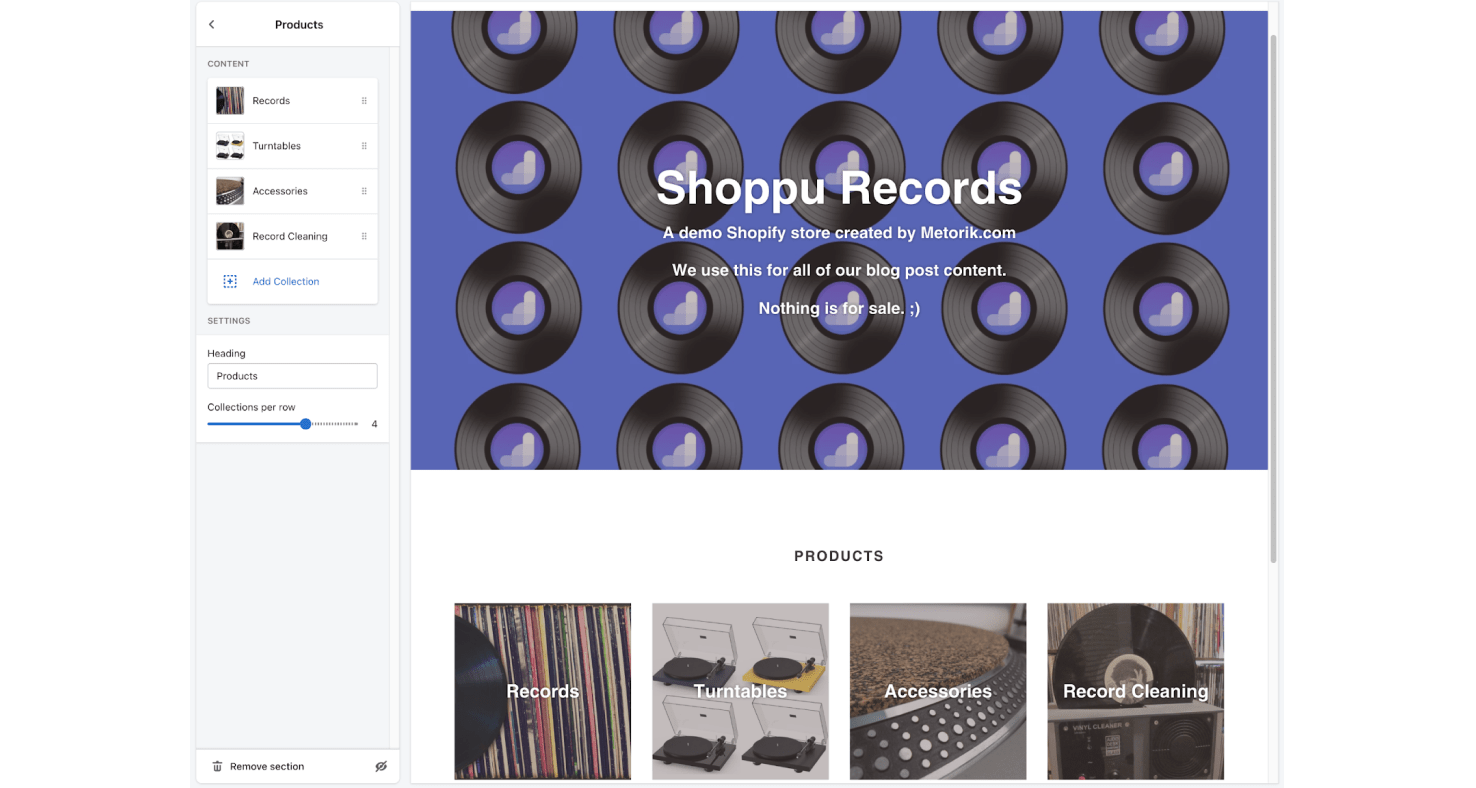
How to add your Shopify featured products on the homepage
Let’s now add a featured collection to our homepage. We can use the “Records we are digging” collection as our featured collection.
To do this, add another section:
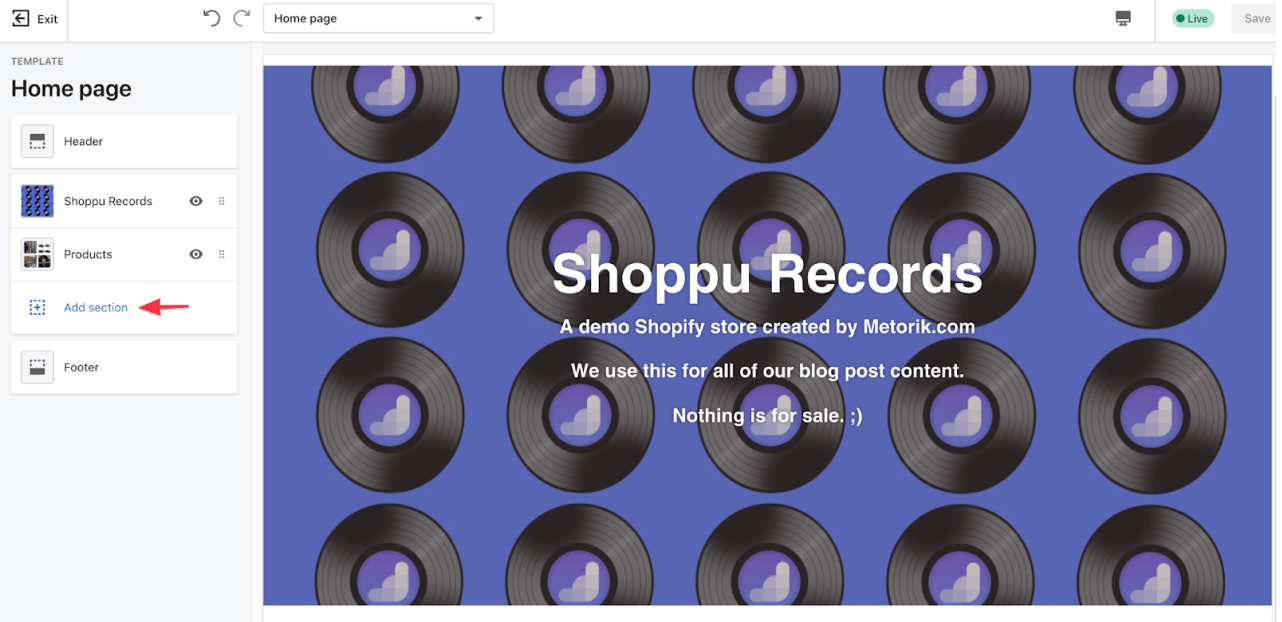
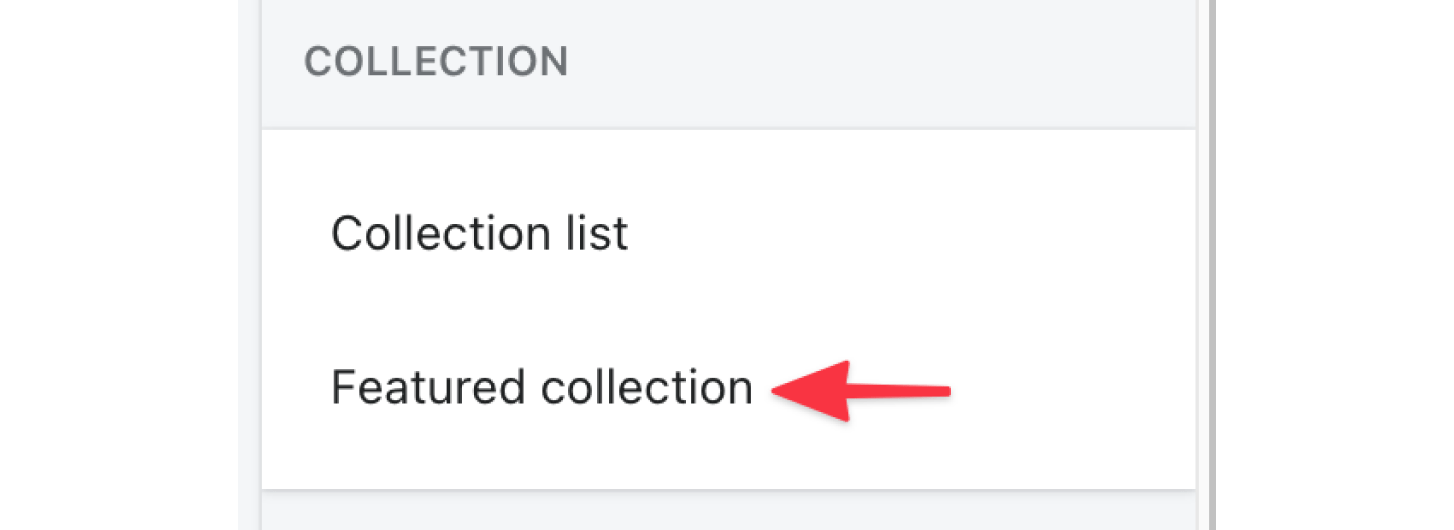
And select featured collection:
Select the collection. You can keep the heading as is, but I’ll change ours to “Records we are digging”:
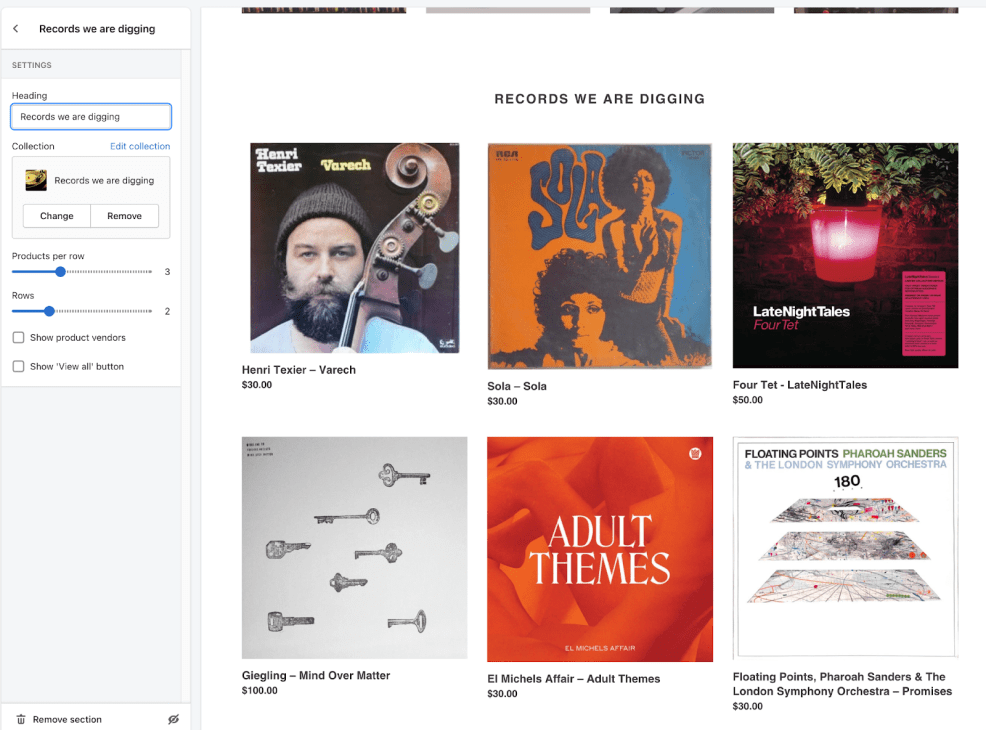
Click save and you’re done!
Now if we head back to our actual website, our homepage is looking fresh with our new collections!
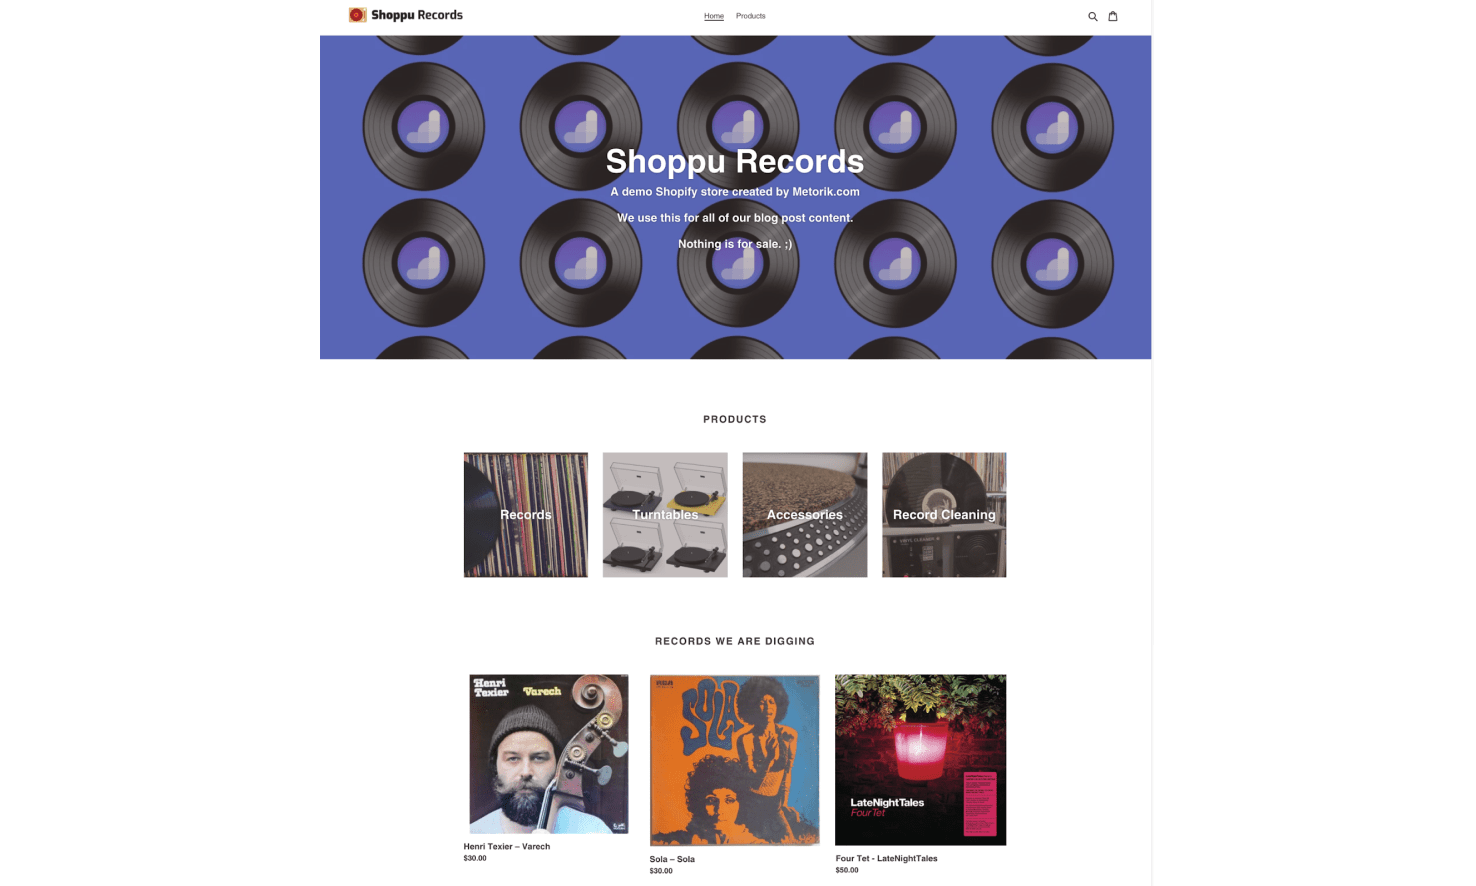
As a side note, all our collections have their own URLs without us having to do anything, they can be found at yourdomain/collections/collectionName. So for example our collection records we are digging has the URL: shoppu-records.myshopify.com/collections/digging:
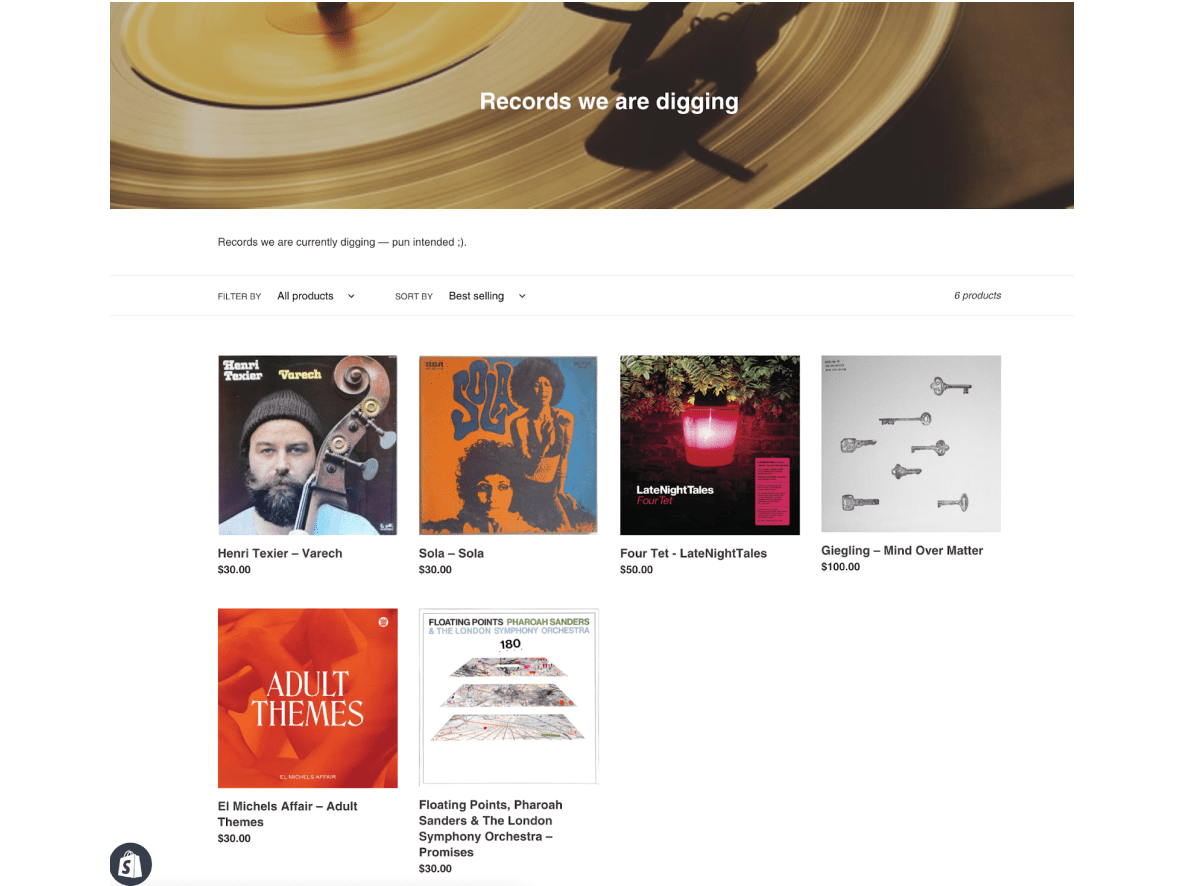
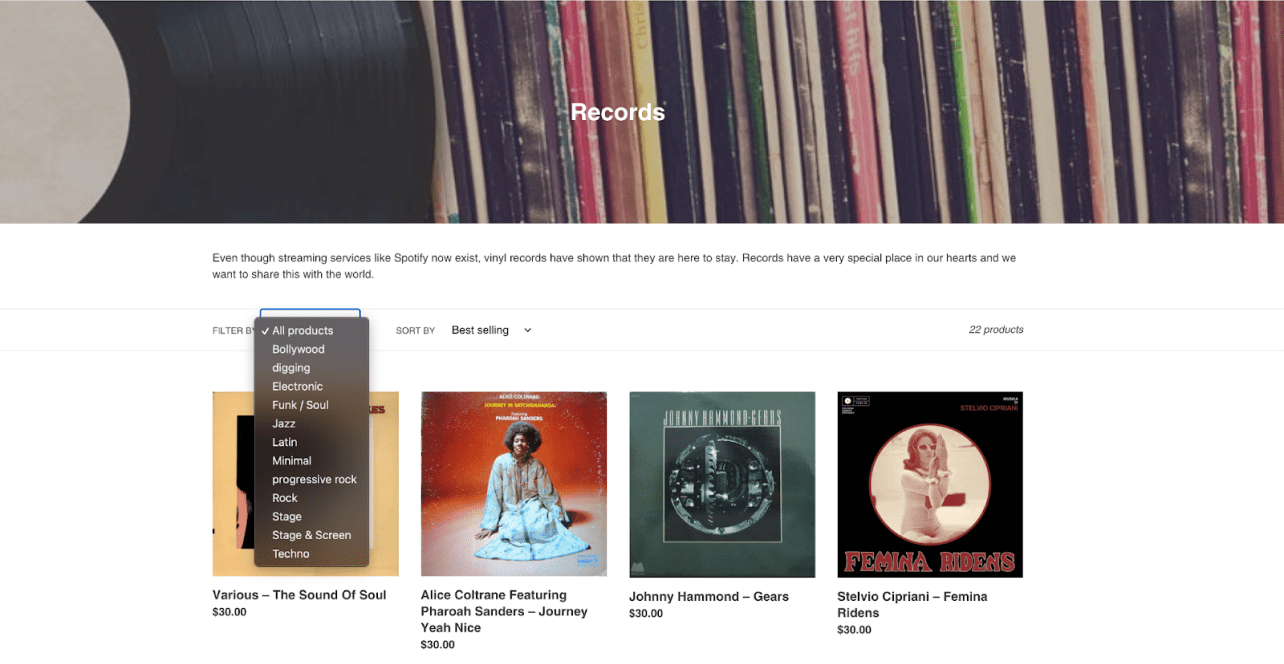
One cool thing is that on the collection pages, customers will also be able to use the tags you add to products as filters on collections. I’ll go ahead and add some more tags to the records based on their genre. So now when a customer is looking at our records collection (shoppu-records.myshopify.com/collections/records), they can see all genres:
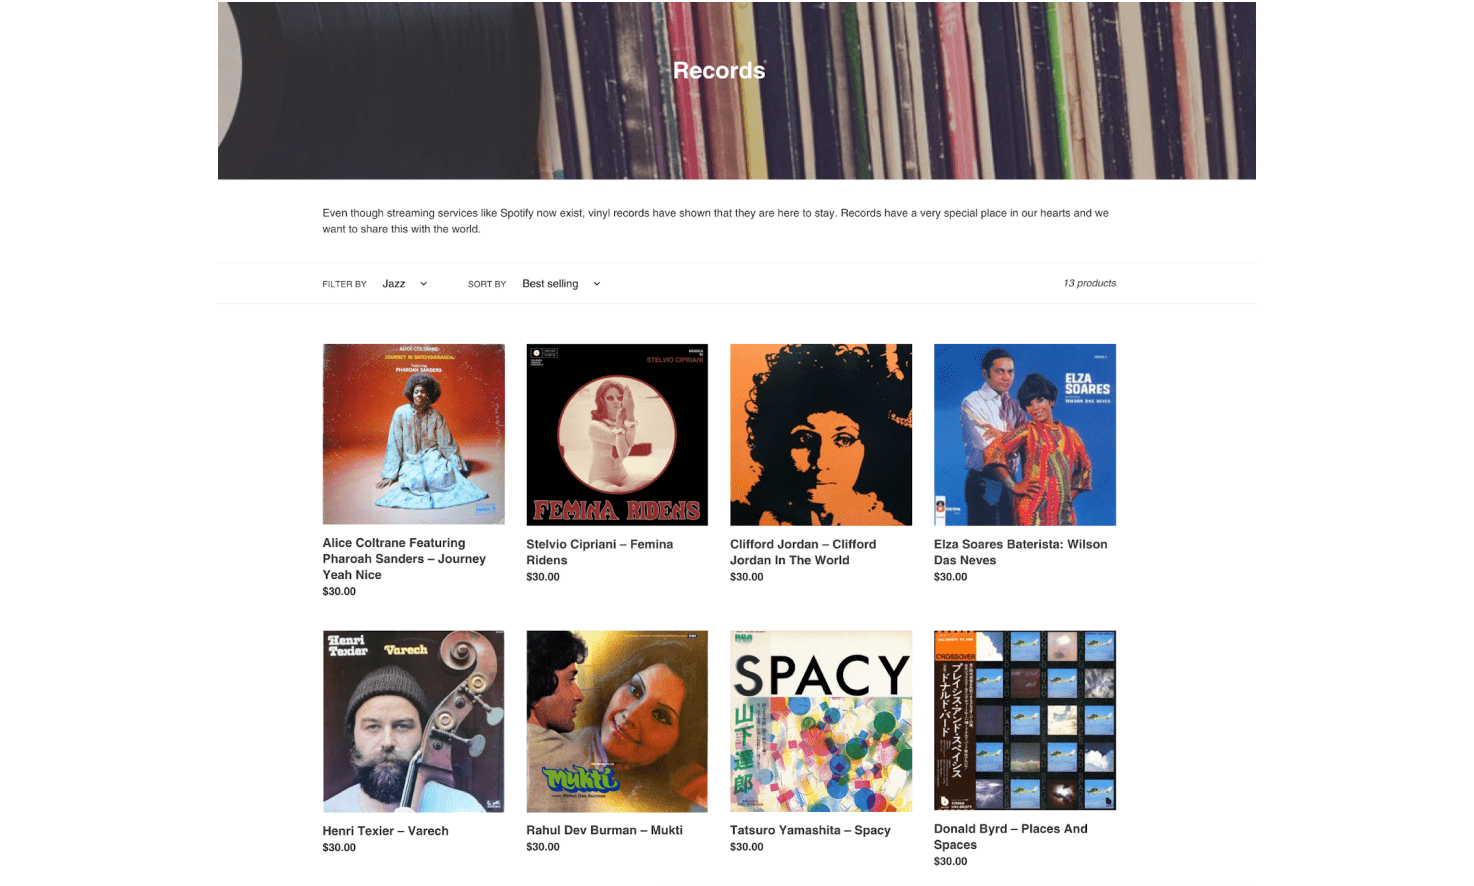
And easily use them for filtering. Here are all our jazz records:
Collecting our thoughts
Shopify collections are an extremely powerful organizational tool that is easy to set up. And with Shopify automated collections, you can easily spin up dynamic collections based on certain filters which can then be easily displayed to your customers. Now, go forth and organize!

-1549438730.jpg)
