If you run a Shopify store, you may have heard the term 'metafields' thrown around quite recently. It's a concept that is important to understand as it will help you customize your products and offer a better shopping experience for your customers.
Meta, not as scary as it sounds (except in the case of Facebook).
The word meta is one you would have heard quite a bit on the web. It's a common word when we talk about website SEO, for example, the phrase meta description. And while meta descriptions and Shopify metafields are different concepts, they serve similar purposes for different parts of your website; to provide extra information.
The role of metadata is to provide search engines — like Google — extra information about a certain page on your site. This helps Google better understand what your webpage is about and display it for relevant search terms.
The role of Shopify metafields is to allow you as the store owner to add extra information to parts of your store like your products, collection, orders, and customers. So for example with your products, you may want to show your customers extra information in addition to the default fields offered by Shopify, like the dimensions of a product. This is where metafields can help you.
So in a similar sense to metadata offering Google more information about your webpages, Shopify product metafields offer your customers more information about your products.
In this post, we are going to focus specifically on Shopify product metafields.
What is Shopify 2.0 and how does it relate to metafields?
You would have also heard a lot about 'Shopify Online Store 2.0' so I just wanted to quickly touch on this as it is connected with Shopify metafields.
In 2021, Shopify made some big updates to how the platform worked — this update was called 'Online Store 2.0'. As part of the update, one of the big major changes was the native ability to add metafields (before this you needed to use an app to add this functionality). And most importantly, the ability to easily display dynamic metafields data within your Shopify themes (we will talk more about this later).
Understanding how to use Shopify product metafields
When selling a product online, we want to offer our customers as much relevant information about the product as possible. This results in customers being more informed the product they are purchasing, which will lead to higher satisfaction and less disappointment. In the long run, this will hopefully lead to better reviews and fewer refunds — a win for everyone involved.
When creating a new product in Shopify, we can see all the default options we have for describing our product:
Title
Description
Photos
Price
Product Type
Product Vendor
Product Tags
Weight
And the ability to create variants.
.png)
This covers a lot of the basics, but it's possible that you will want to add more information that's not included in these fields.
In Shopify's docs, they give some examples of when a merchant could use metafields:
A candle maker displaying the burn time of their candles.
A grocery store displaying the expiration date for canned foods.
Your metafields are going to depend entirely on the products you sell.
I'm going to show you how to add product metafields using our fictitious online record store:
-1662722388.png)
How to create metafields in Shopify
Our record store sells a number of different products, but for this post, we are going to focus on records. We have already added the basic product information for the records we sell — if we take a look at the product page for the record we can see this:
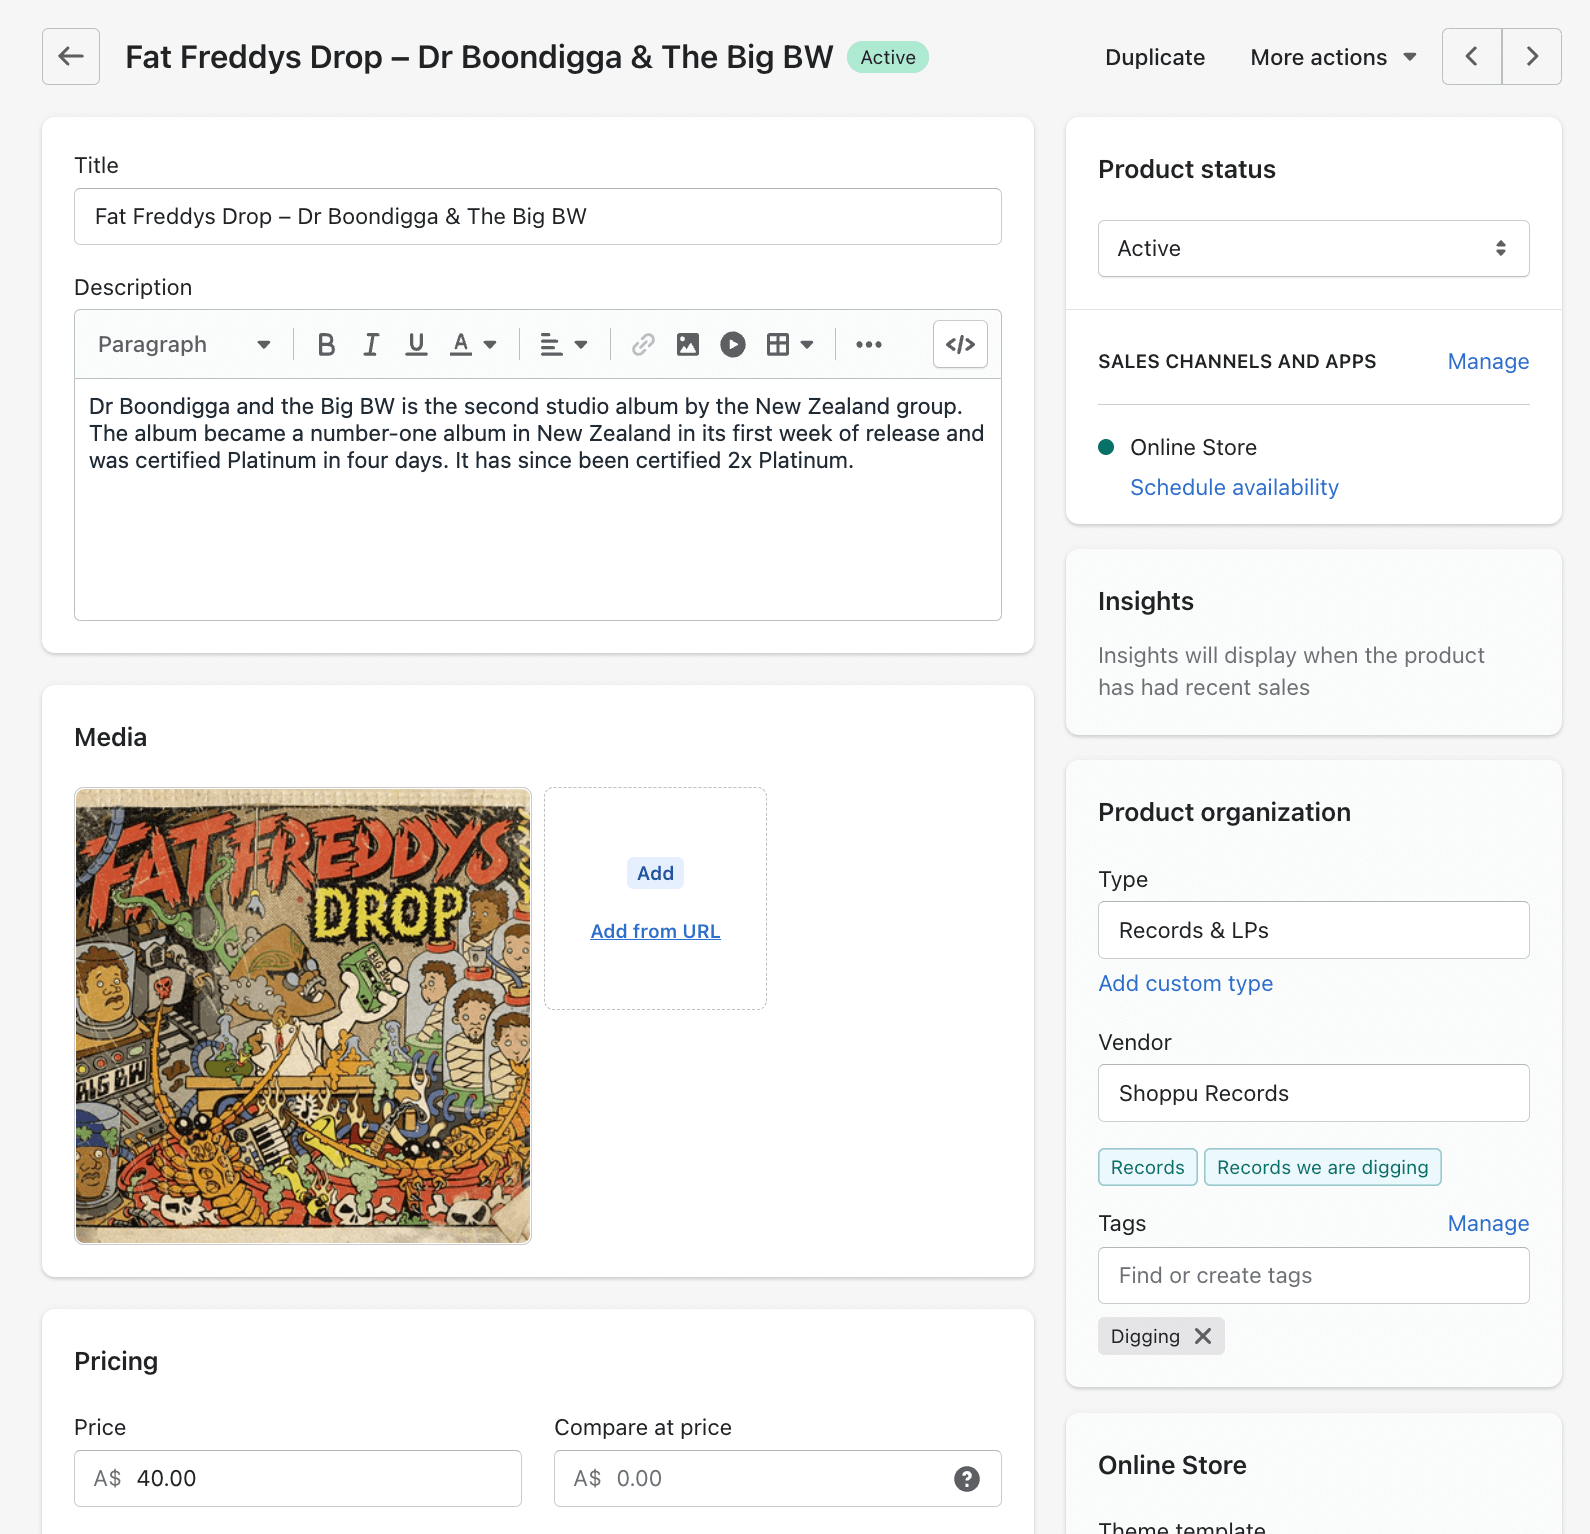
However, for record enthusiasts, there is some other information that is important when making a purchase; like when the record was released and the catalogue number. We can use metafields to store these values.
To create a new Shopify product metafields, head to your Settings in your admin sidebar:
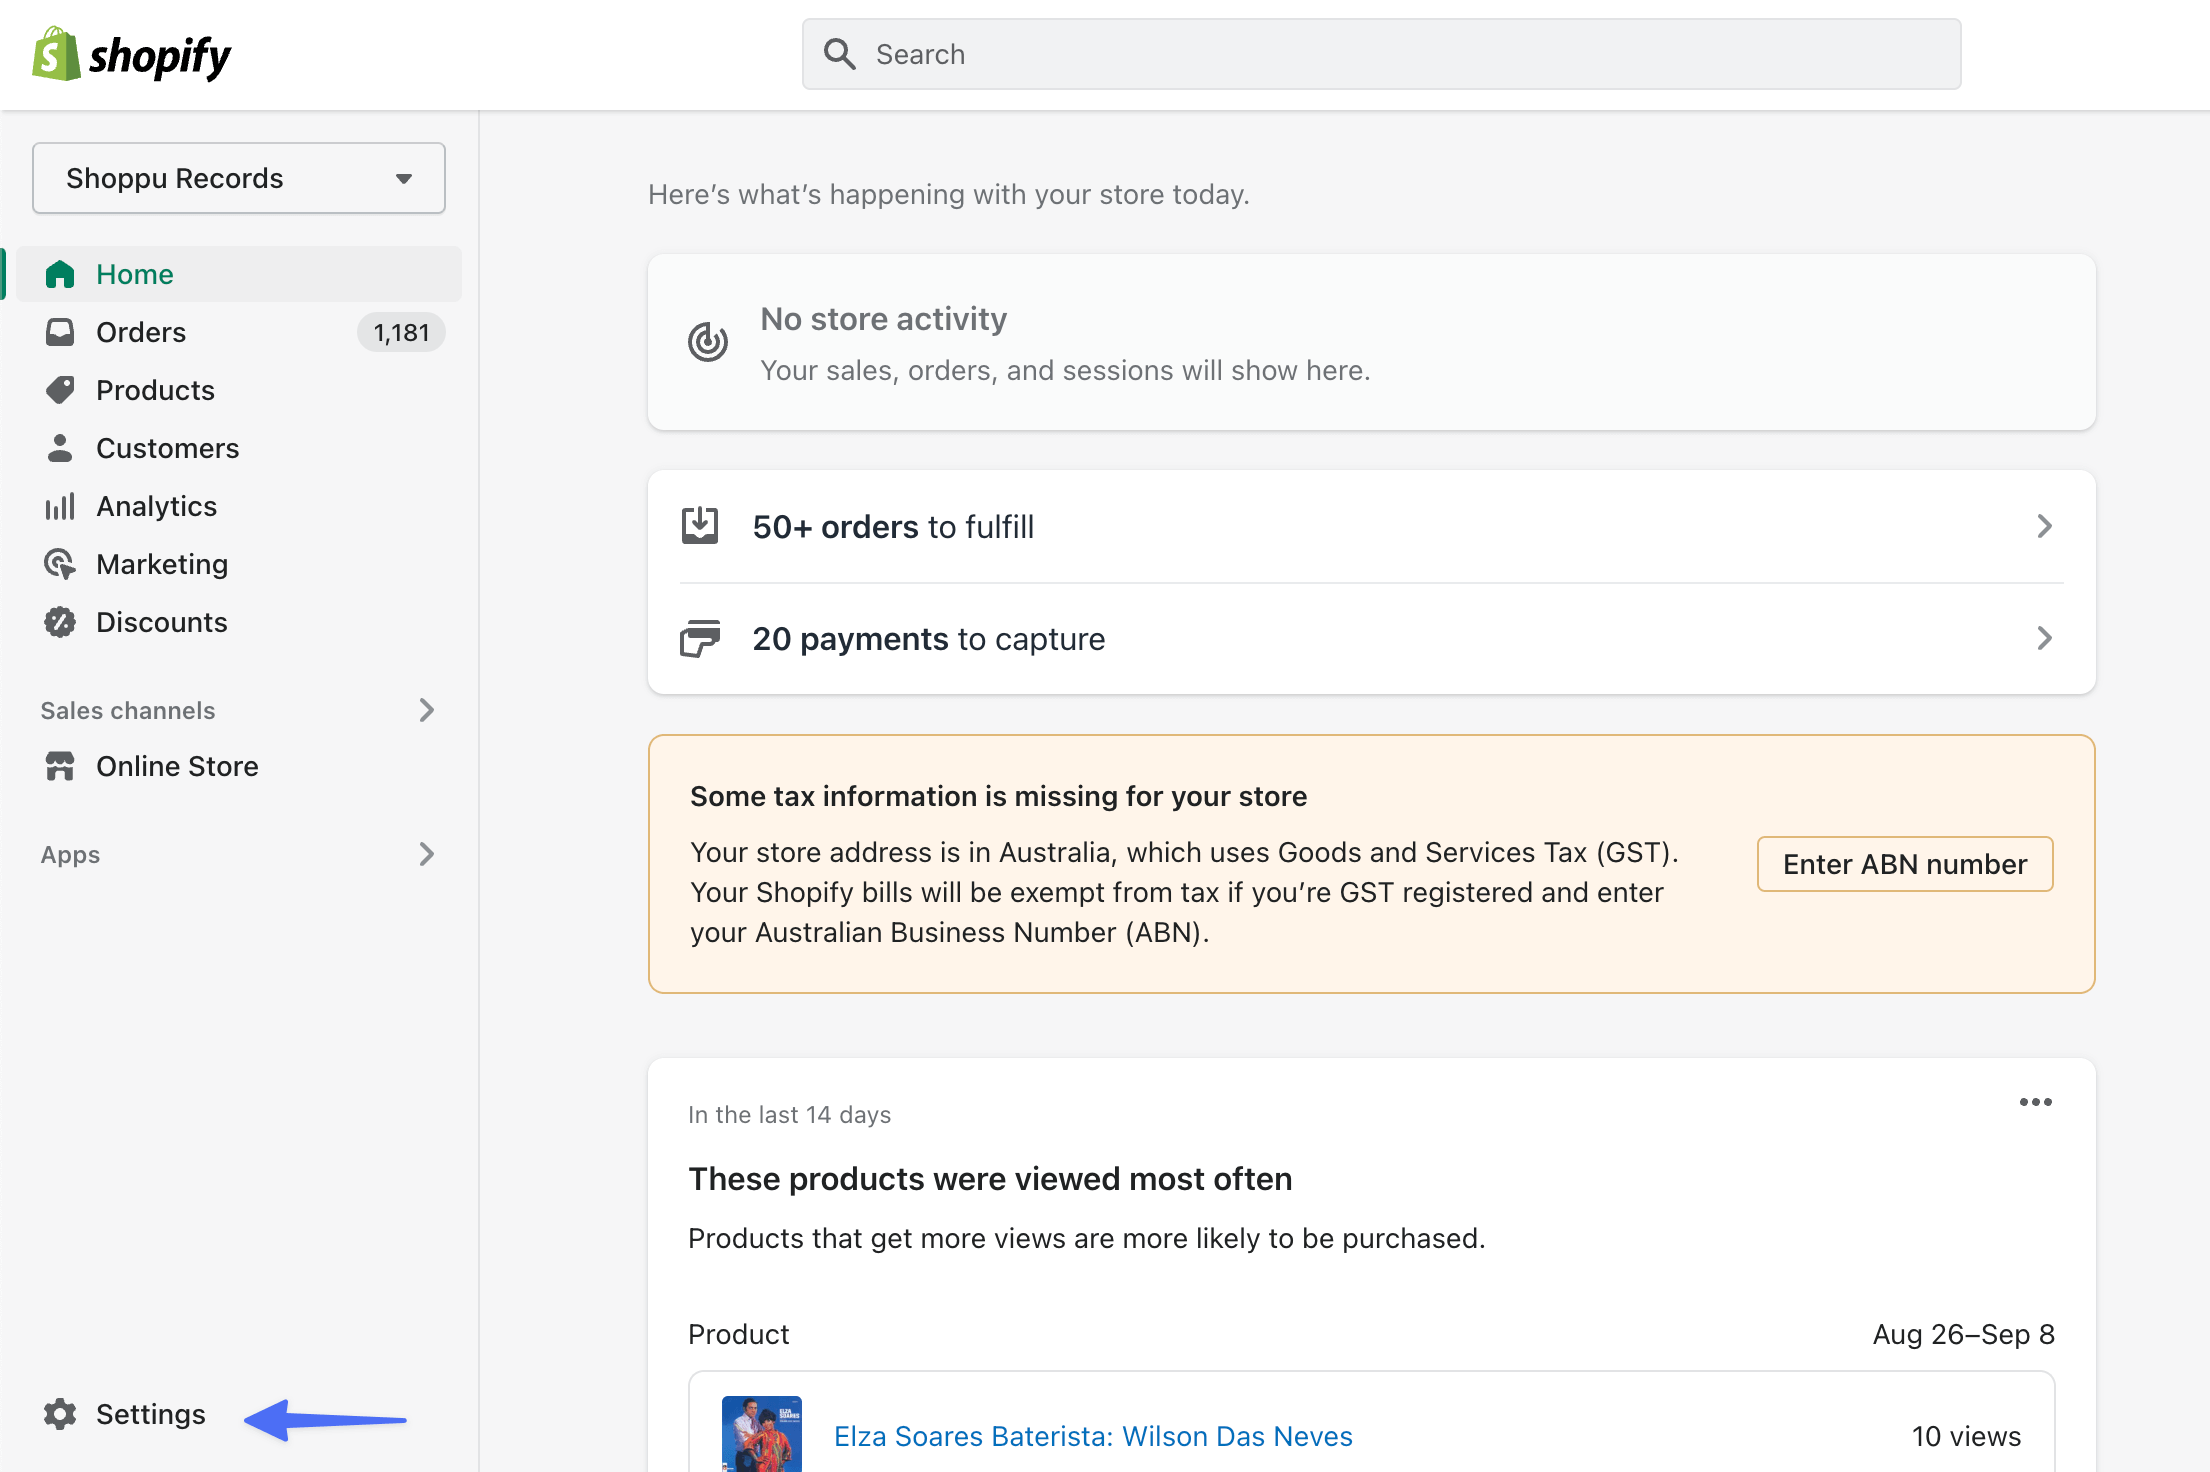
then select Metafields:
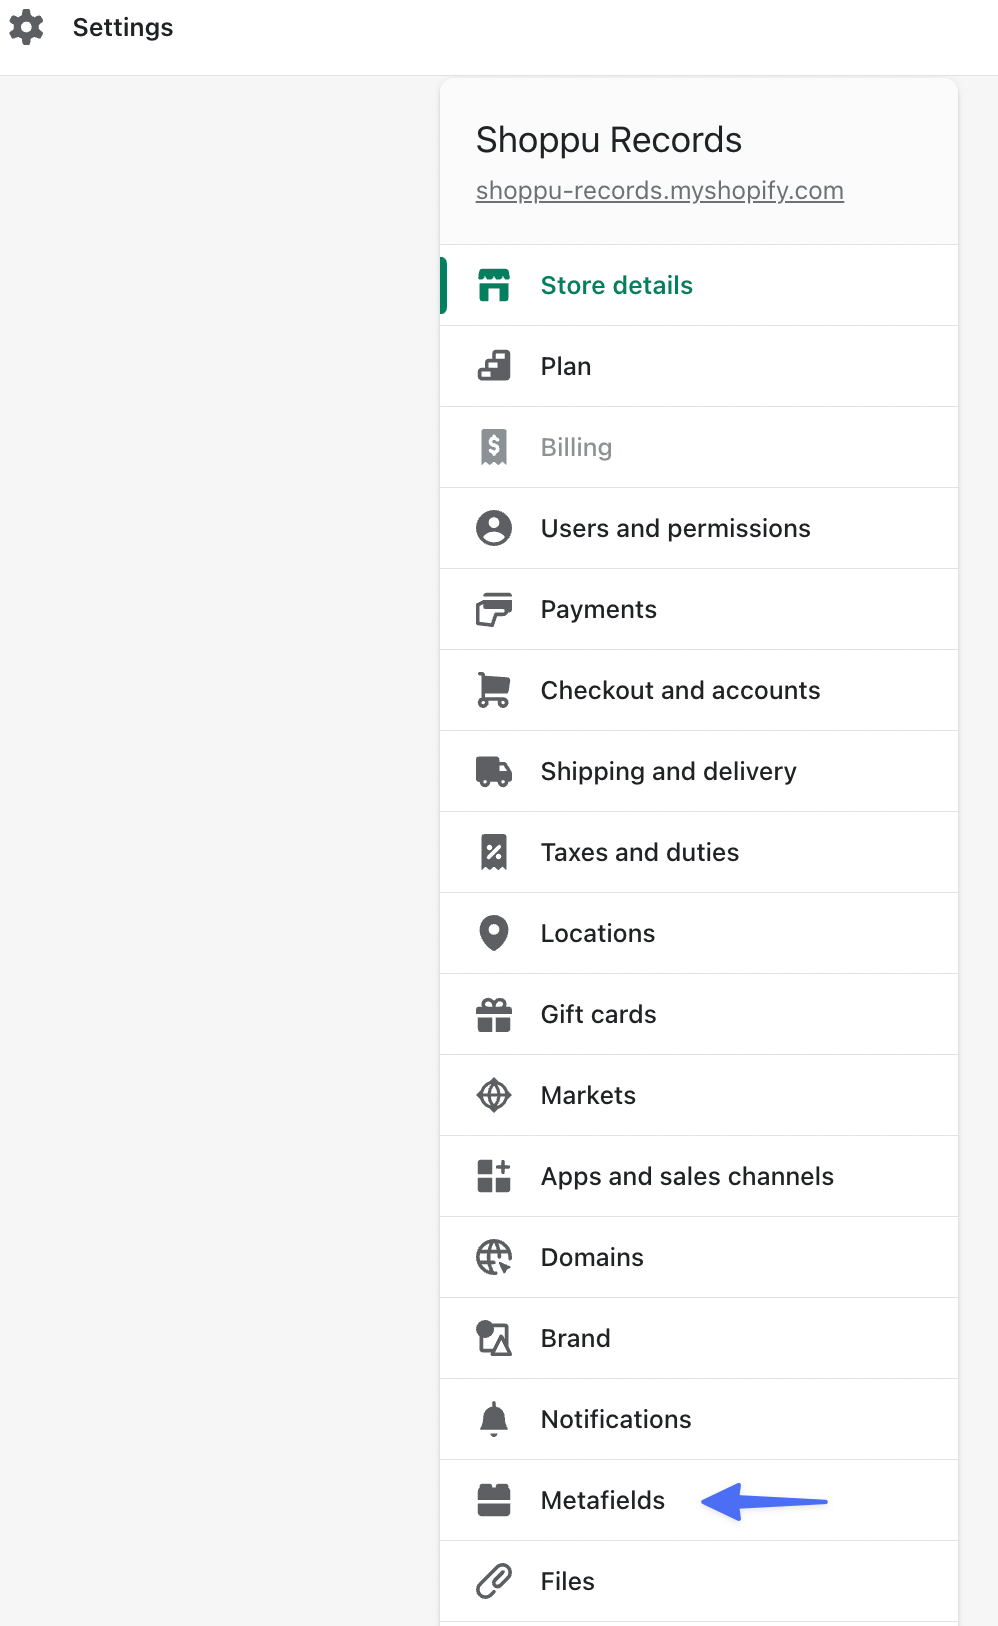
Select Products (and if you're adding a metafield for a different resource, select that one instead):
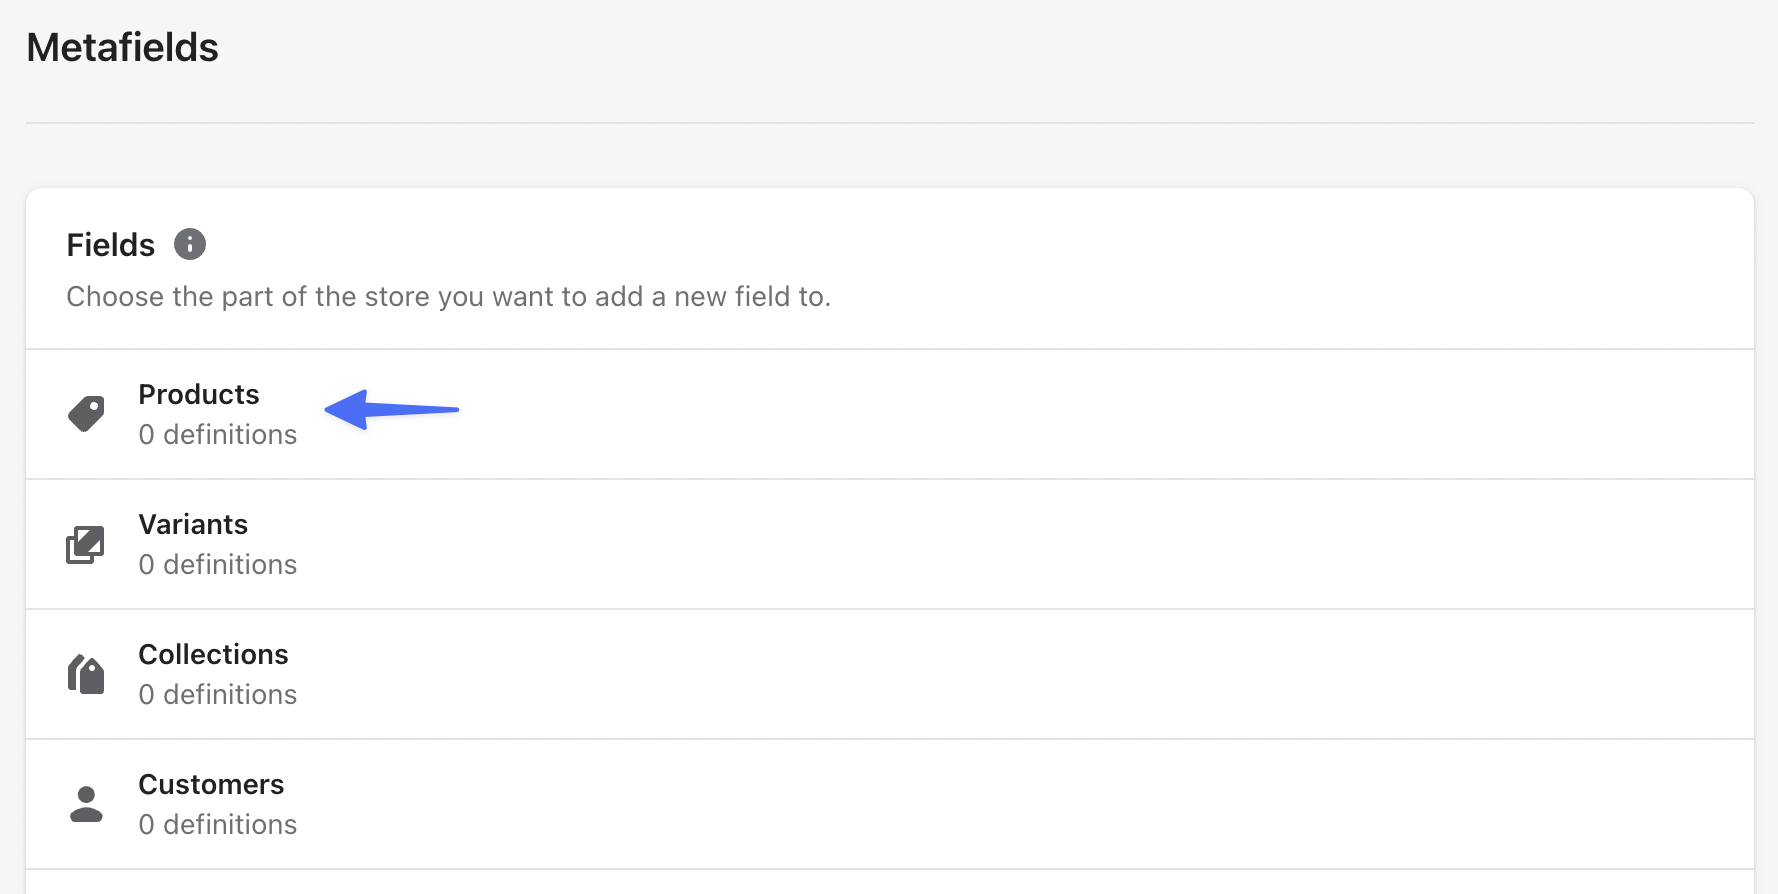
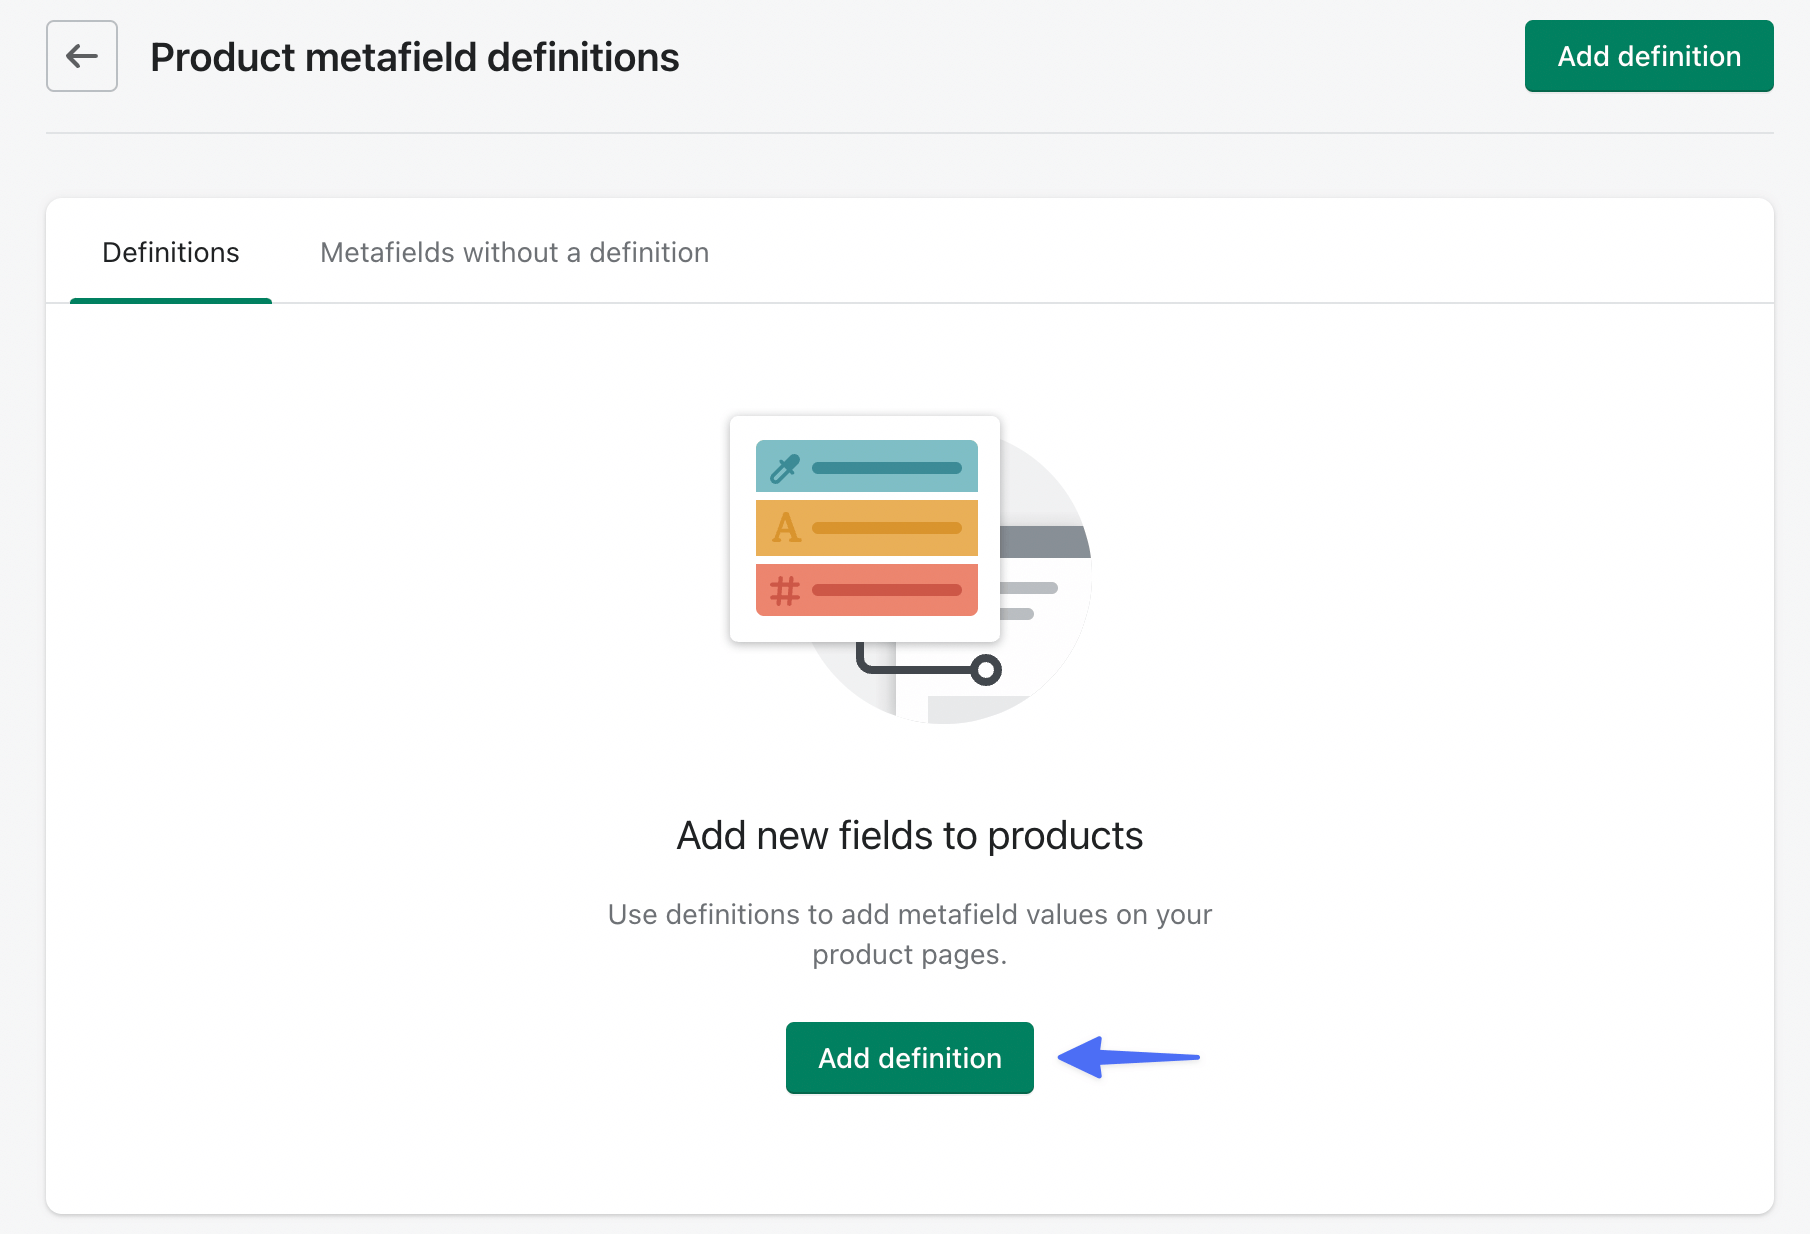
And then click Add definition:
Give the metafield a name and description. If your name/field comes up in the list as a suggested standard definition, select it from there, otherwise just select what you typed in:
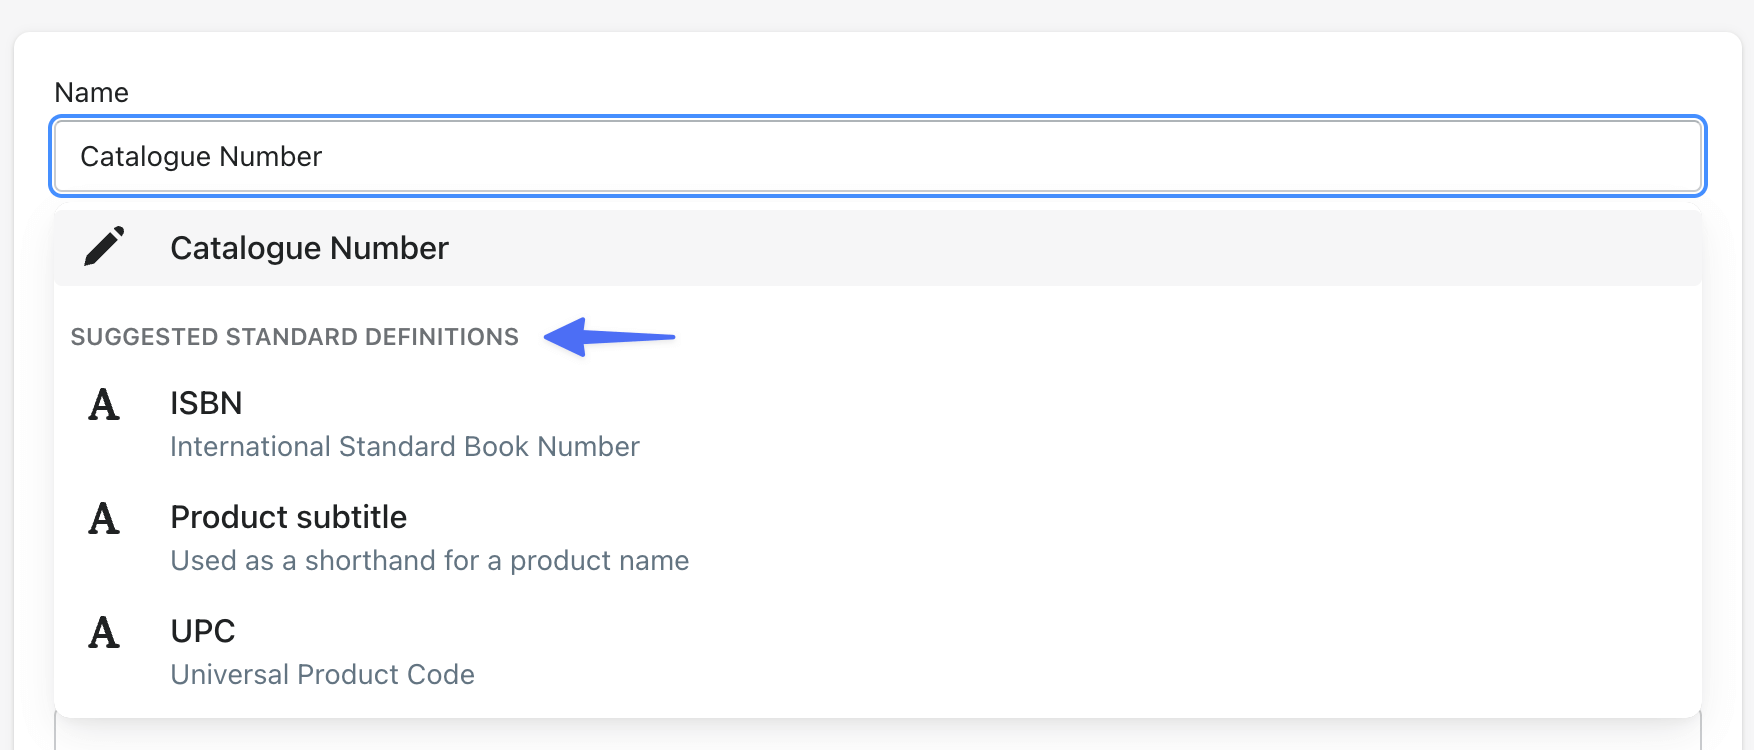
In this case, I'm just going to select Catalogue Number (which is what I typed in).
Underneath the name input, you will see Namespace and key. This is how we are going to identify and use the metafields in our theme later. The namespace is the part before the period, and the key is the part after. You can leave the namespace as custom, but it's good practice to change it to something more specific. Since it's a product metafield, I'm going to change the namespace to product. I'll leave the key as is:
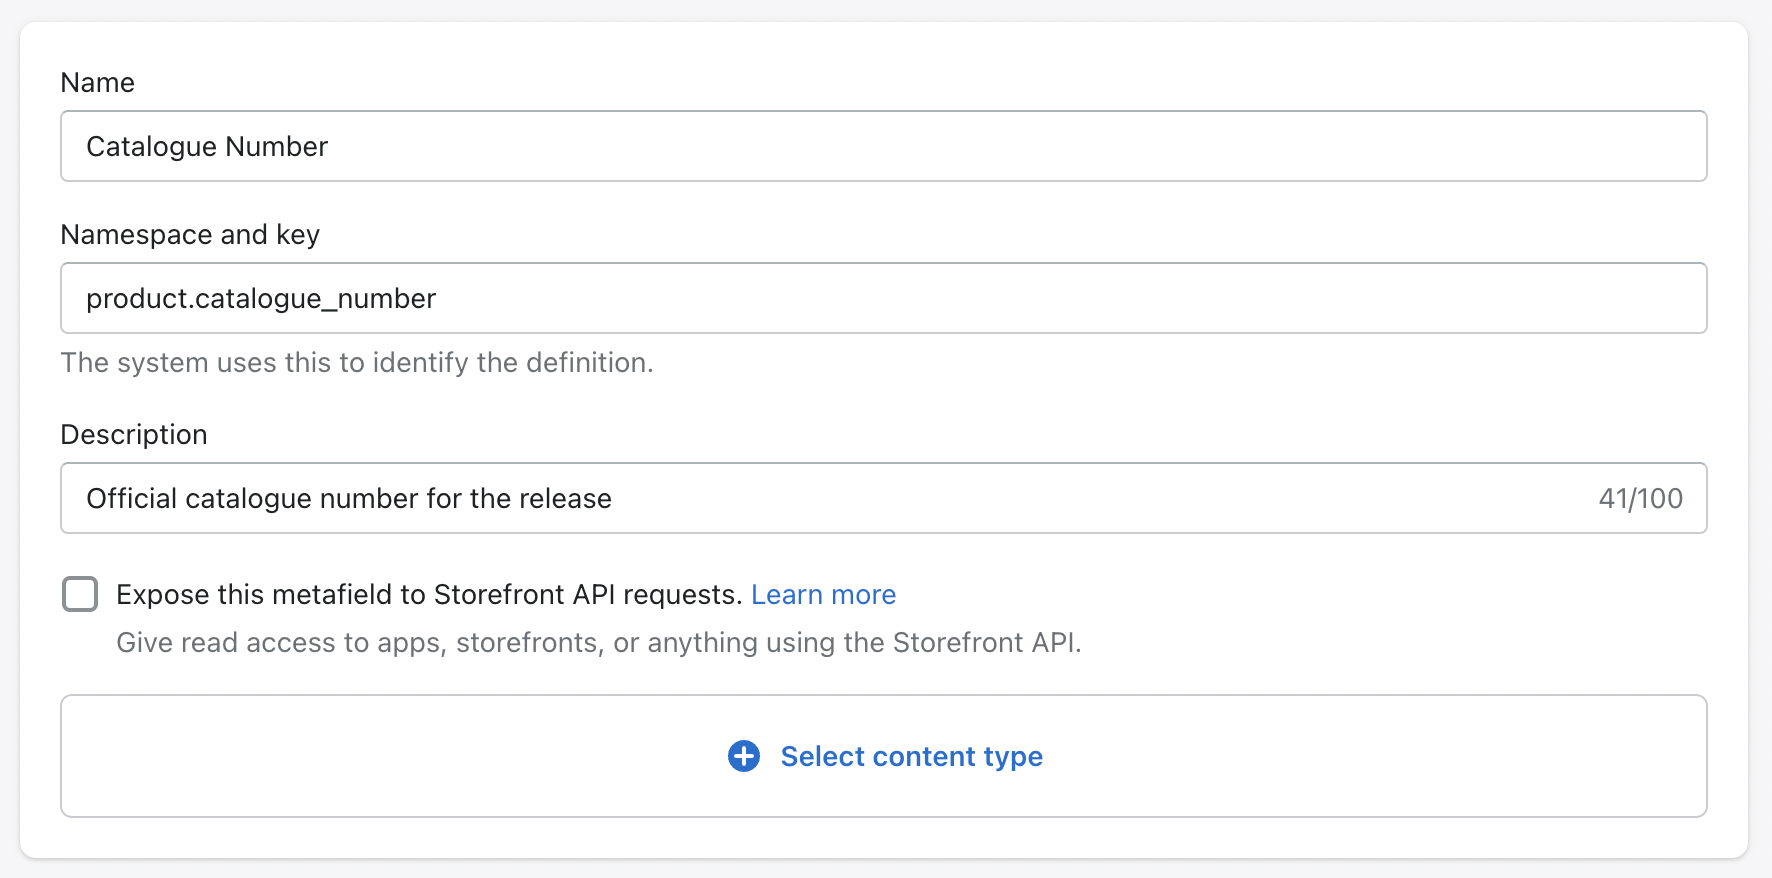
You can add a description as well to help identify exactly what this field is for.
If you are using this Shopify store with any custom storefronts you will want to check the Expose this metafield to Storefront API requests option. If you are just using a regular theme, you can leave this unchecked.
Next, click select content type and choose the option which best represents the field you want to add. In the case of our catalogue number, I'm going to select Single line text as the catalogue number is alphanumeric:
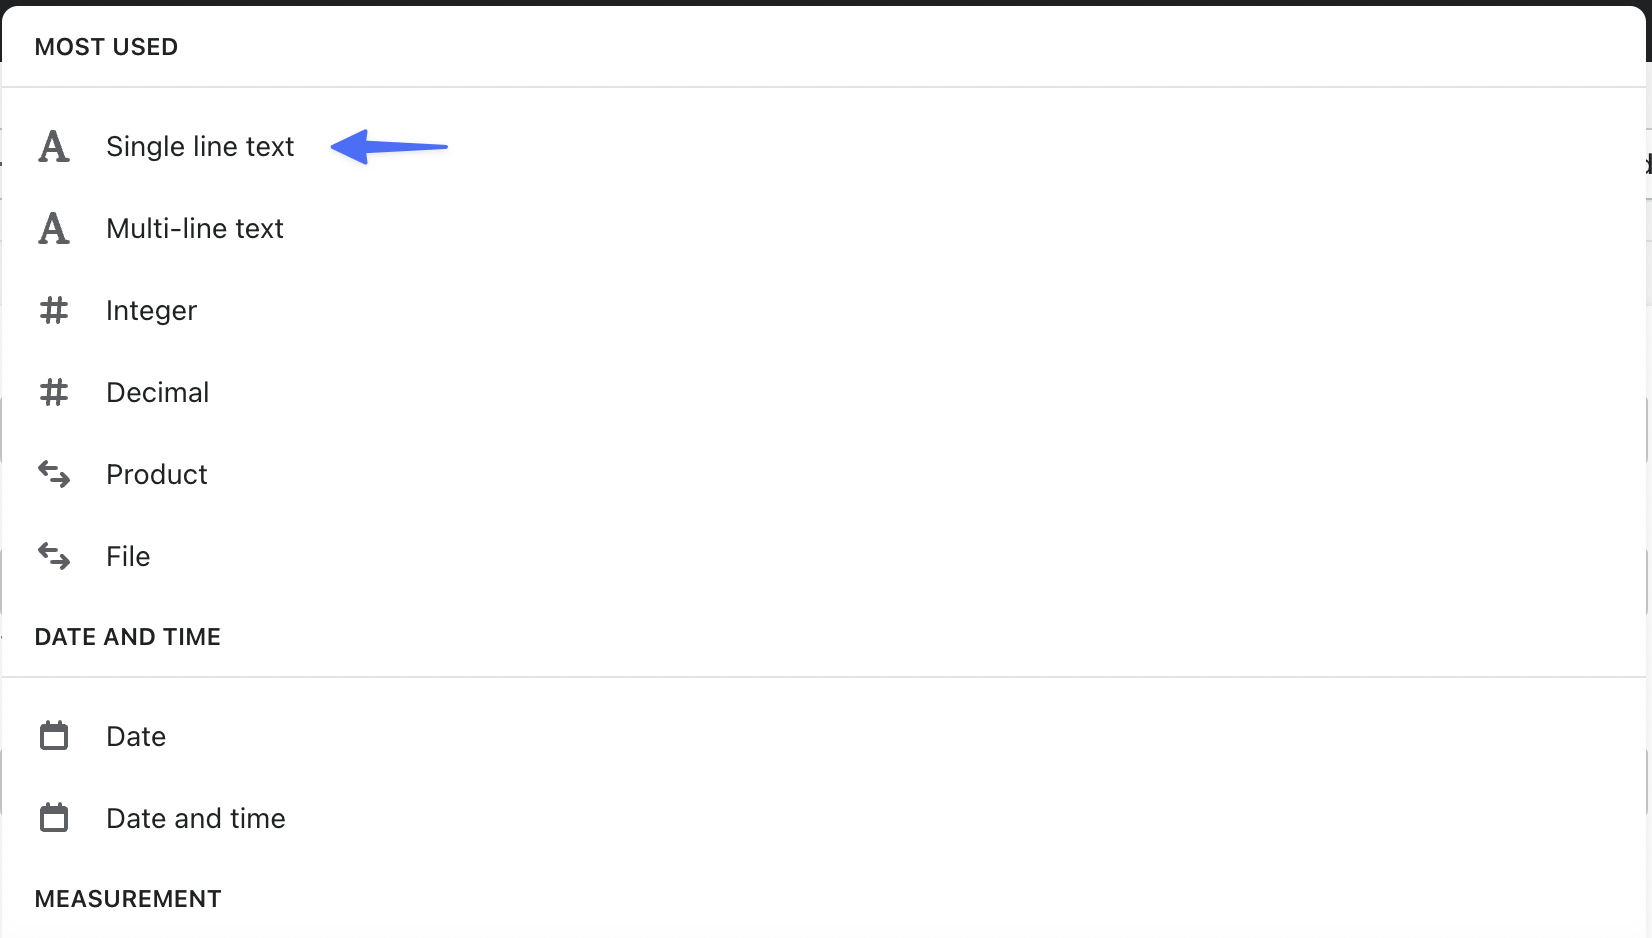
And for the release date, I'll use the Date field.
There are some validation options as well that you can add that can ensure that the correct values are added for these metefields in future. For example, if a field will always have at least 5 characters, you can add a minimum length.
Once you have entered everything click Save.
You will now see your metafields in the definitions list:

We can now add these metafields to our products.
How to add metafields to your products
Now that we have created the metafield definitions, you will see new fields on your create/edit product pages. So if we head to the record we were looking at earlier and scroll to the bottom of the page, we will see the metafields we just created:

All you need to do now is enter in the values for those fields by clicking on them:

Click save. And it's as easy as that, those fields are now saved to that product.
How to bulk edit metafields Shopify
If you only have a few products, individually updating metafields is a great solution. However, if you have many products and many metafields, this can become a very time-consuming process. The good news is that it's actually possible to bulk update your metafields natively with Shopify using the bulk editor.
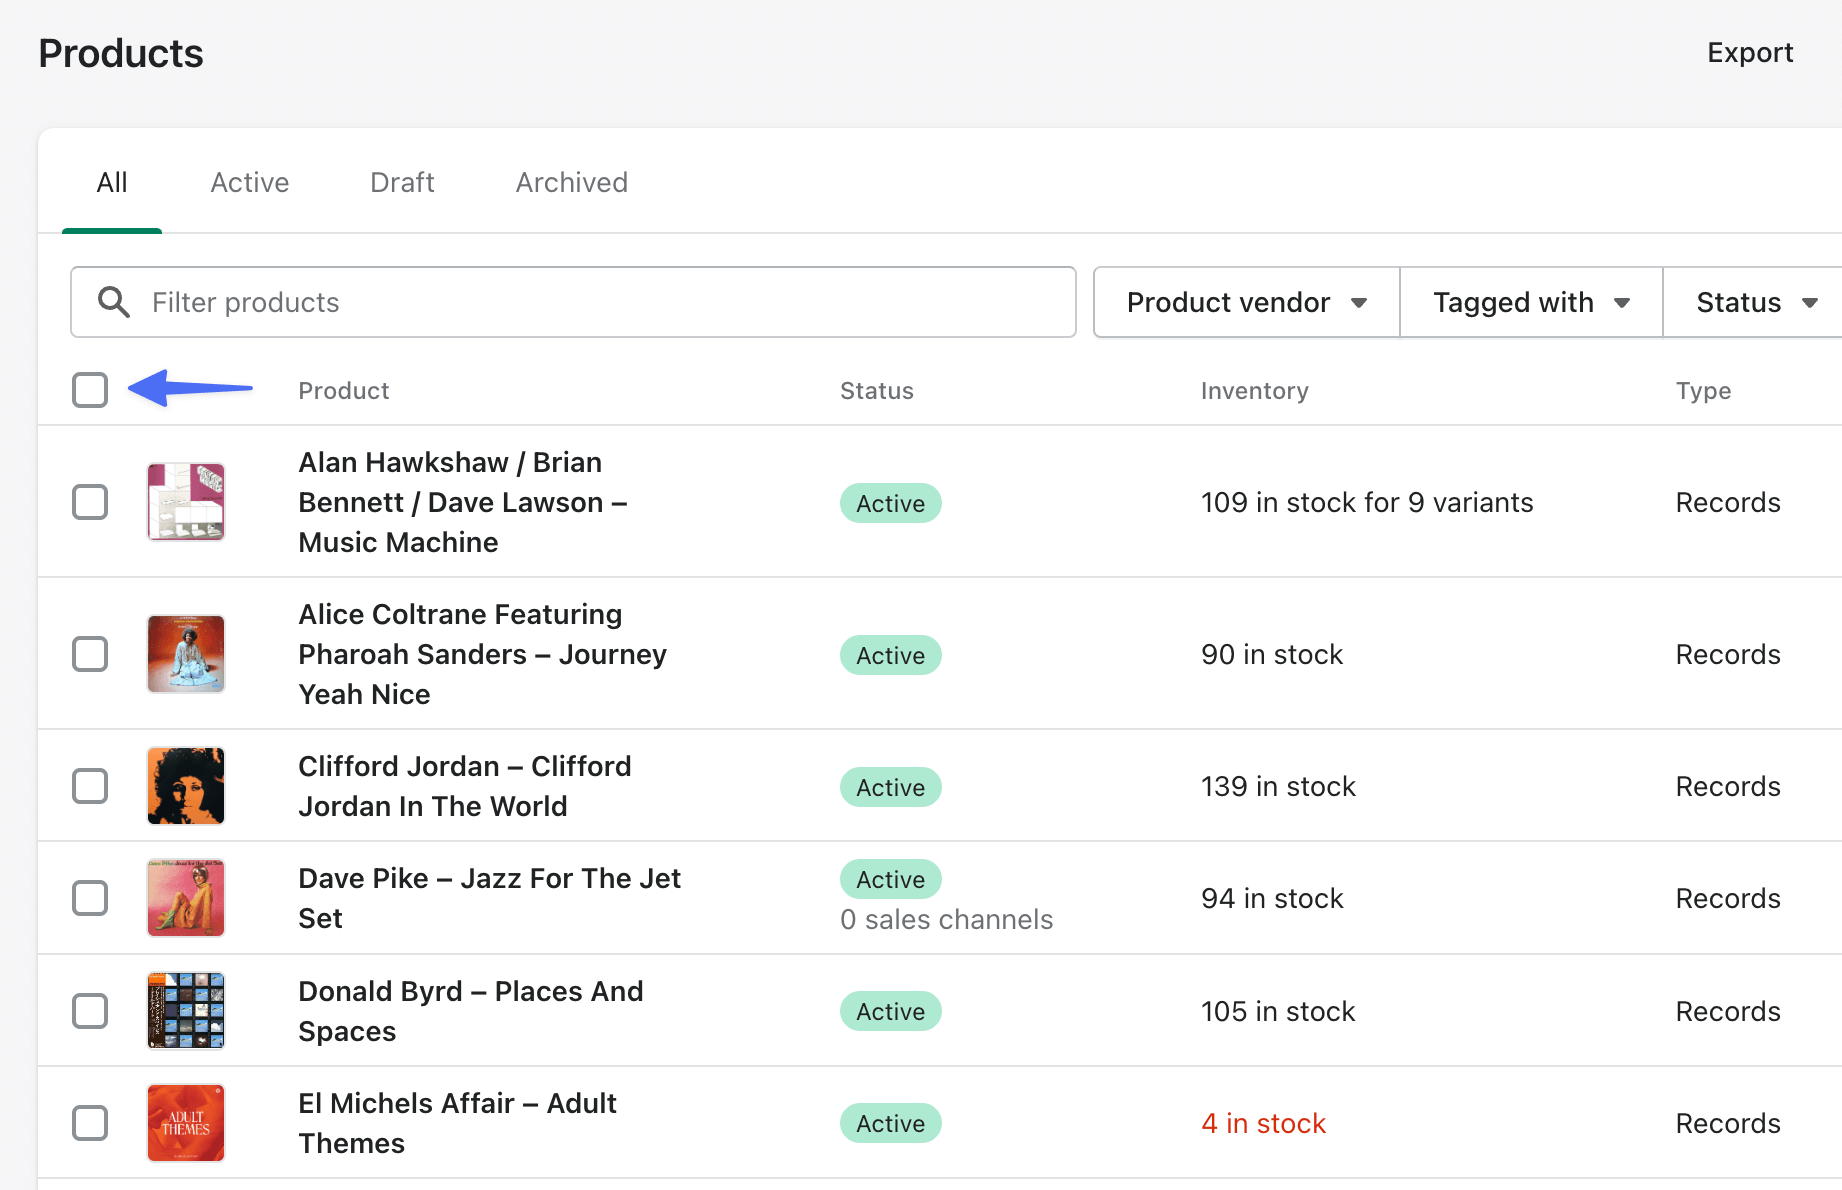
From your products page, check this box to select all your products:
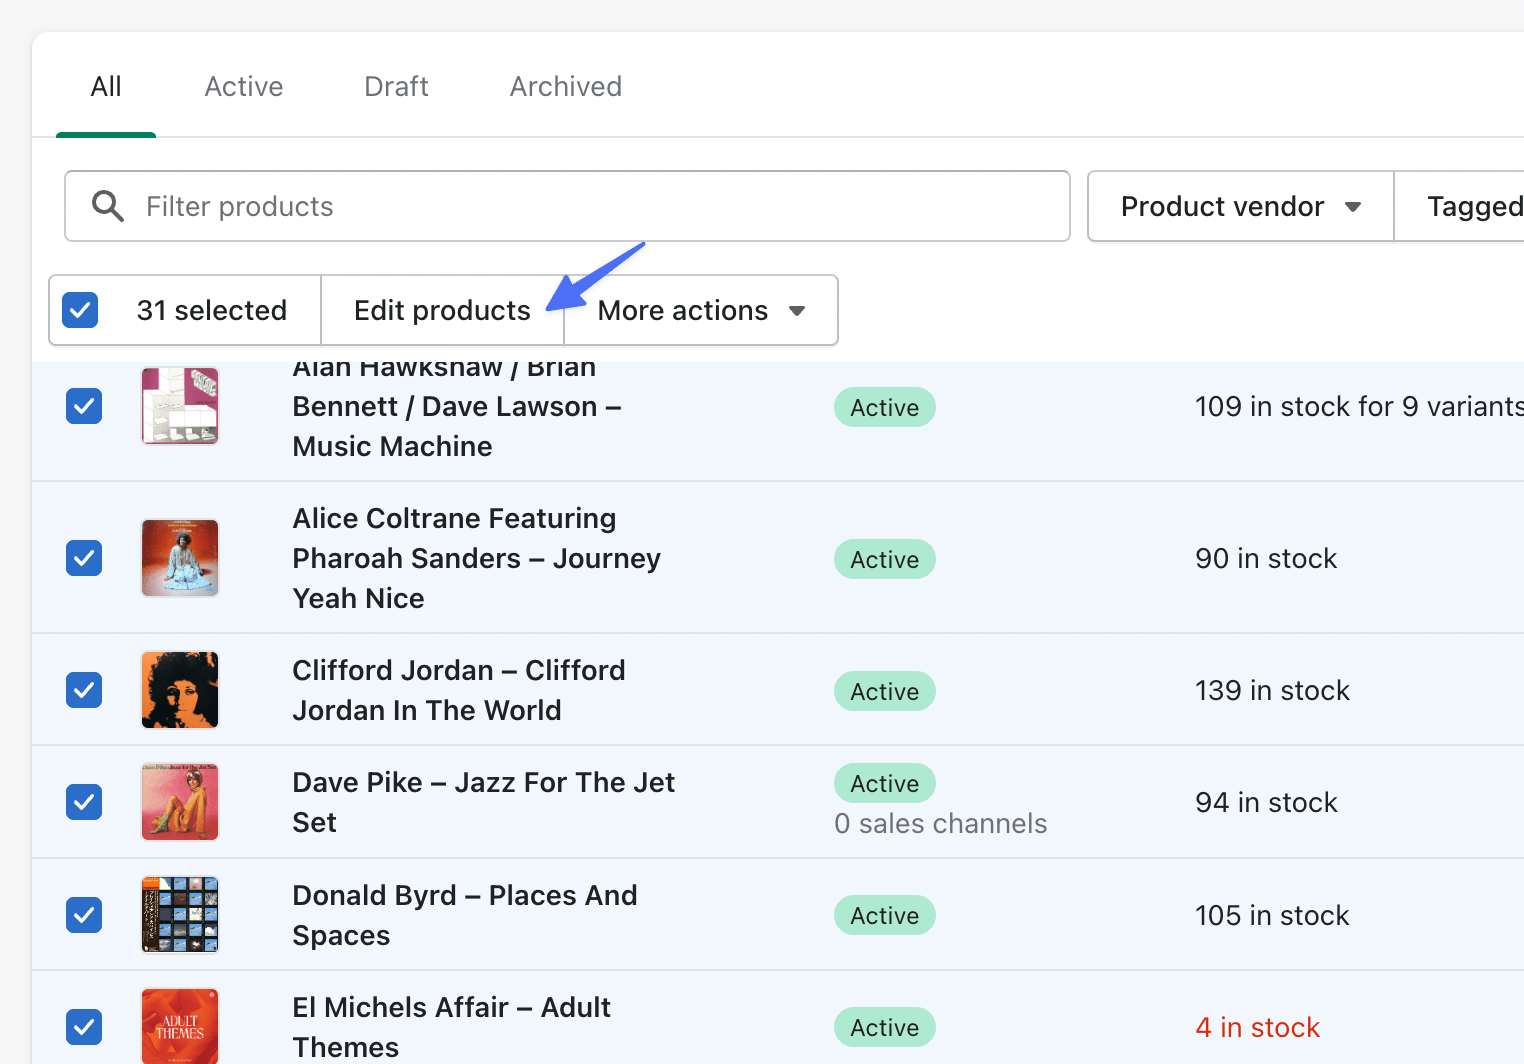
Then click Edit products:
This will take you to the bulk editing page:
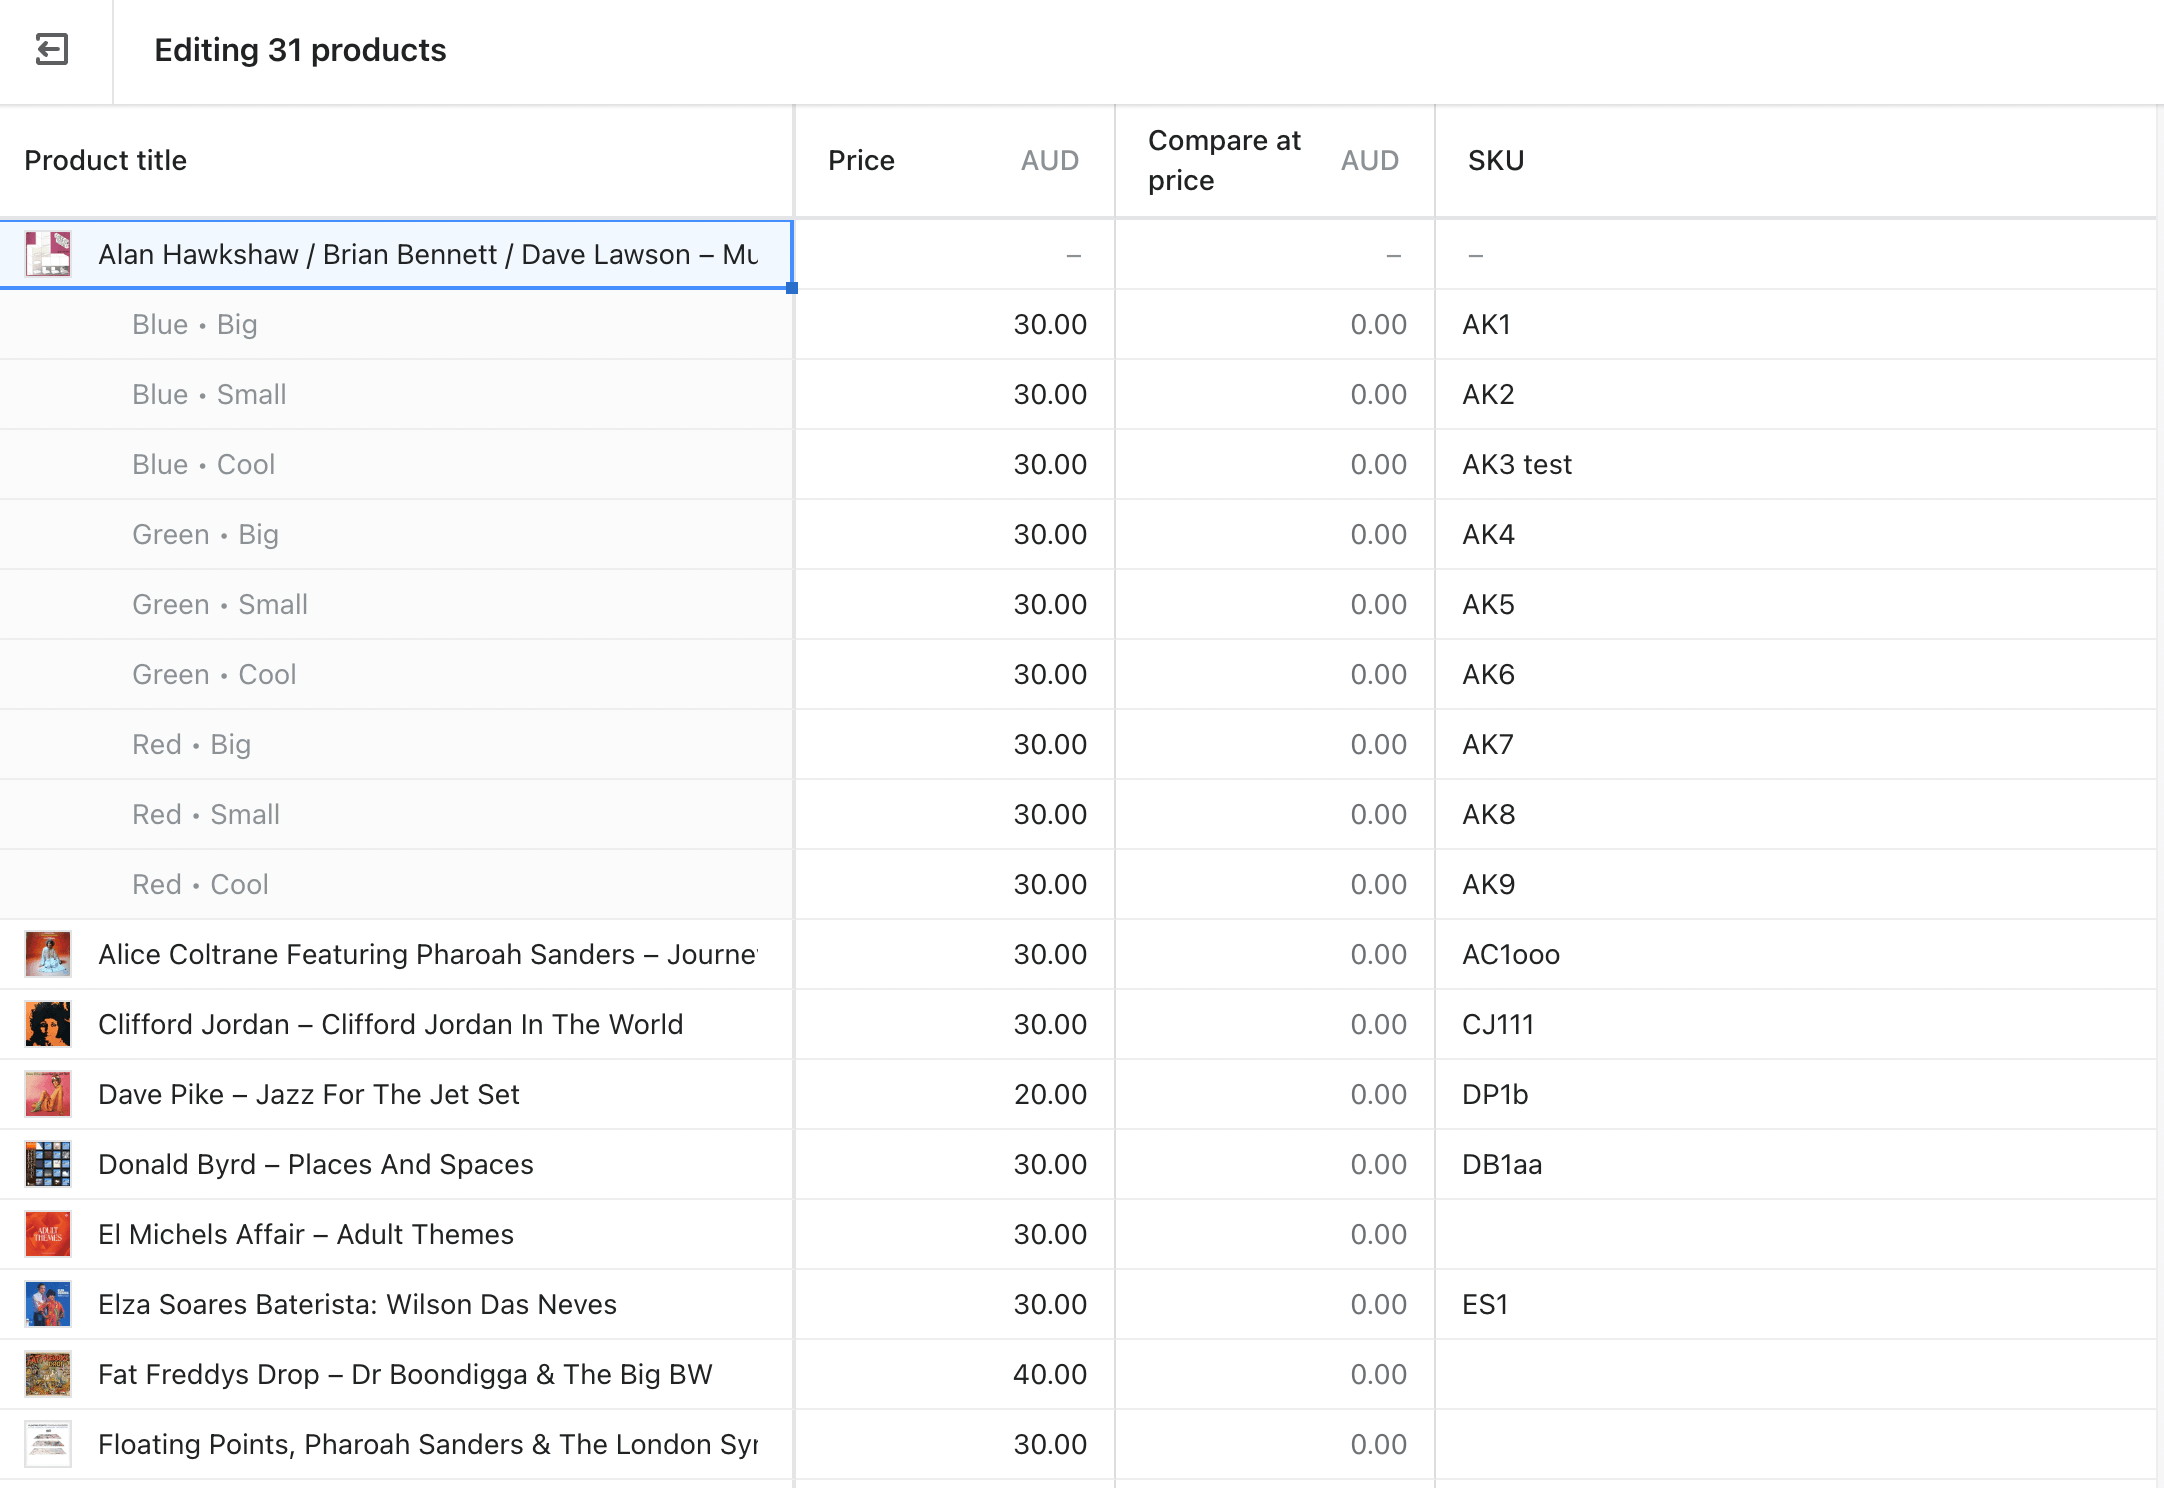
To display the metafields as a column, we need to edit the URL. So currently my URL looks like this: https://shoppu-records.myshopify.com/admin/bulk?resource_name=Product&edit=variants.sku%2Cvariants.price...
To add the metafield, we need to delete everything after edit= and replace it with our the word metafields then the values of our metafield namespace and key (this is the namespace.key from earlier in the post). For the product release date, this would be — metafields.product.release_date.
So the new URL would be https://shoppu-records.myshopify.com/admin/bulk?resource_name=Product&edit=metafields.product.release_date
Hit Enter with the new URL and the page should reload with the metafield as one of the columns:
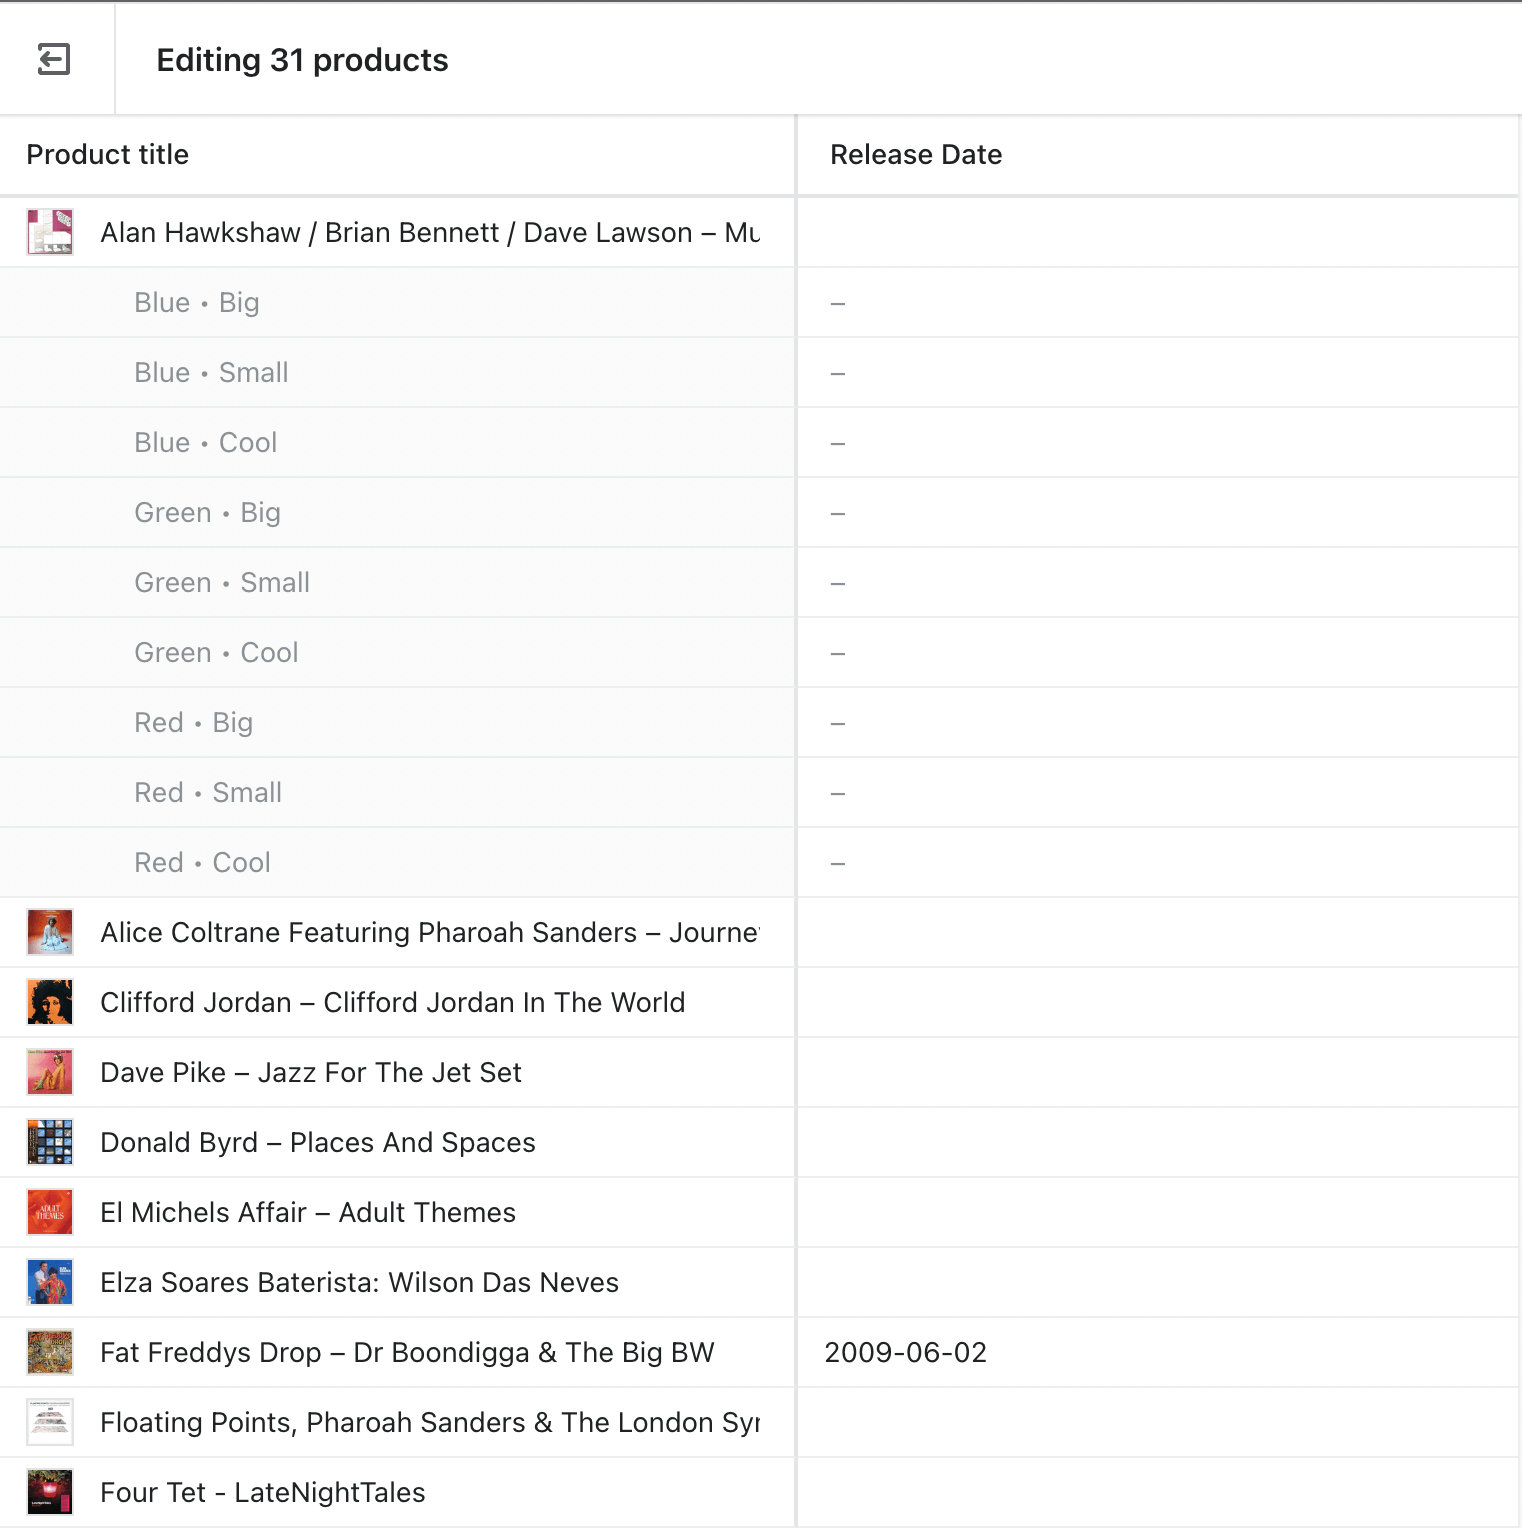
And we can also see that our Fat Freddys Drop record already has the release date filled in from when we added it before.
We can also edit multiple metafields at a time, all we need to do is add the other fields into the URL. So with our URL from before, we just need to append %2C + the word metafield again and the other metafield namespace.key. In our case this looks like this:
https://shoppu-records.myshopify.com/admin/bulk?resource_name=Product&edit=metafields.product.release_date%2Cmetafields.product.catalogue_number
Press Enter again and you will see both each metafield in a column:
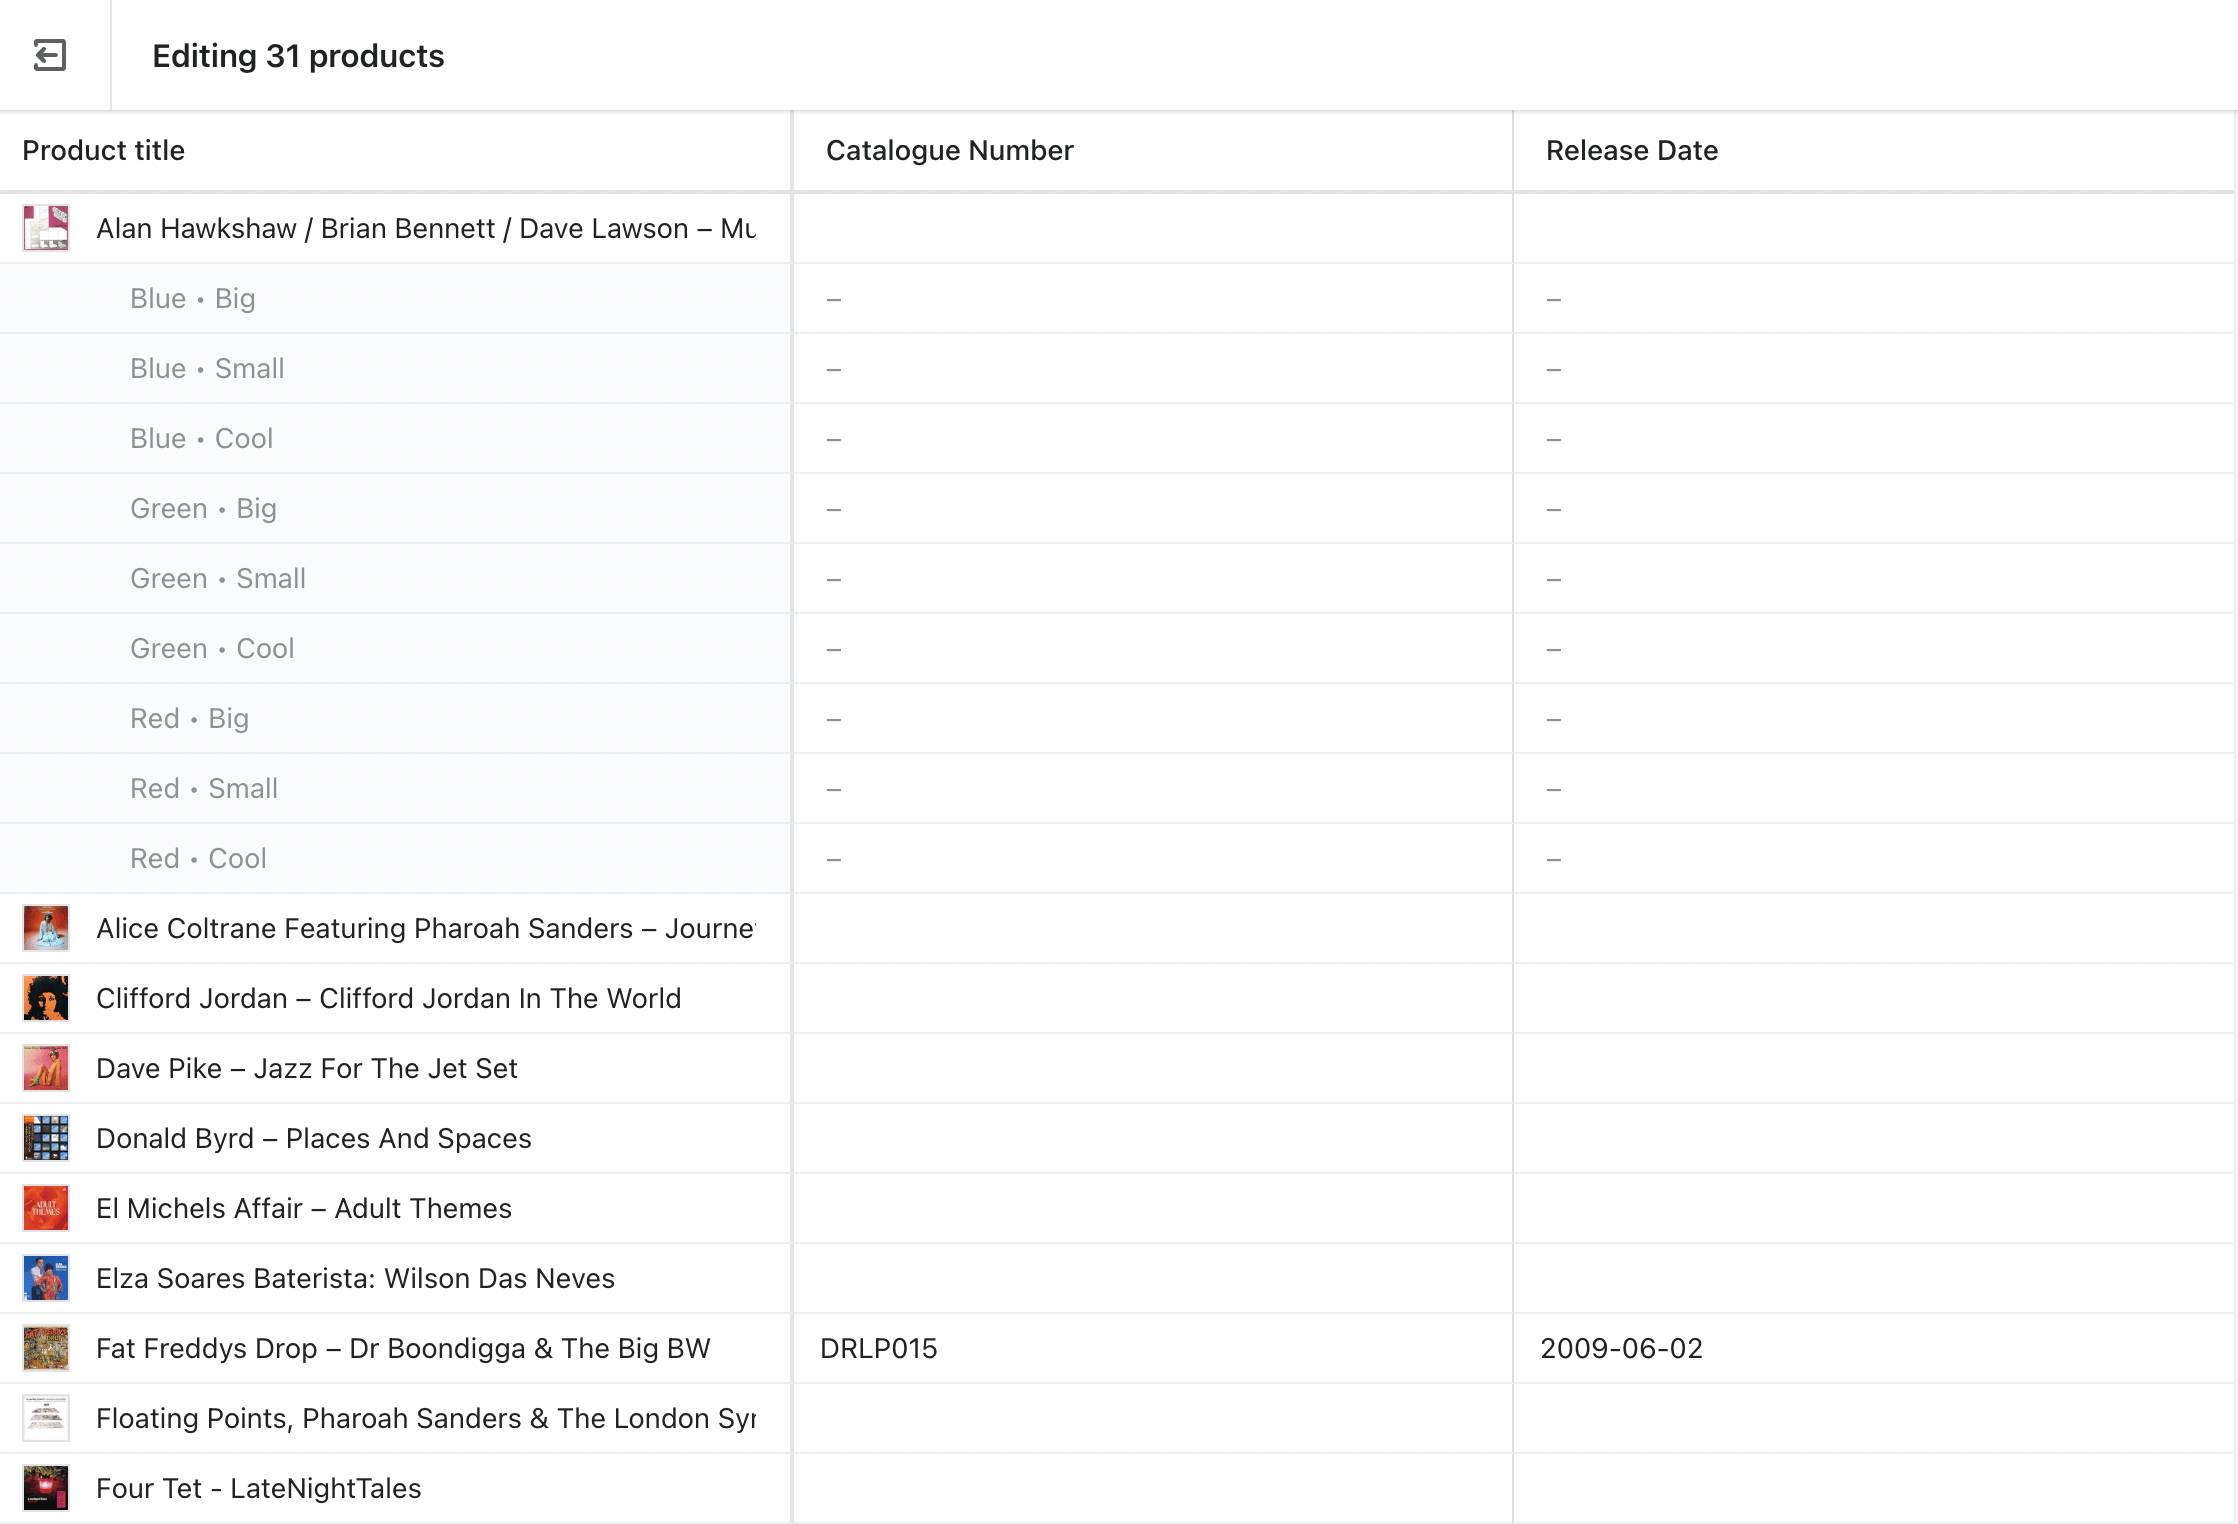
And that's all you have to do. It can be a little finicky at the start, but once you get the hang of it, it's quite smooth and easy. You could even save the URL as a bookmark for quicker access next time.
If your operational workflow involves updating multiple metafields on a regular basis, it might be worth looking at an app like Metafields Guru that can make the process even quicker.
So the final step in our metafields puzzle is to display them on our actual store's product pages.
How to display metafields in Shopify
Displaying metafields in an Online Store 2.0 compatible theme (like Shopify Dawn) is really simple.
To do this first head to Online Store > Themes > Customize:
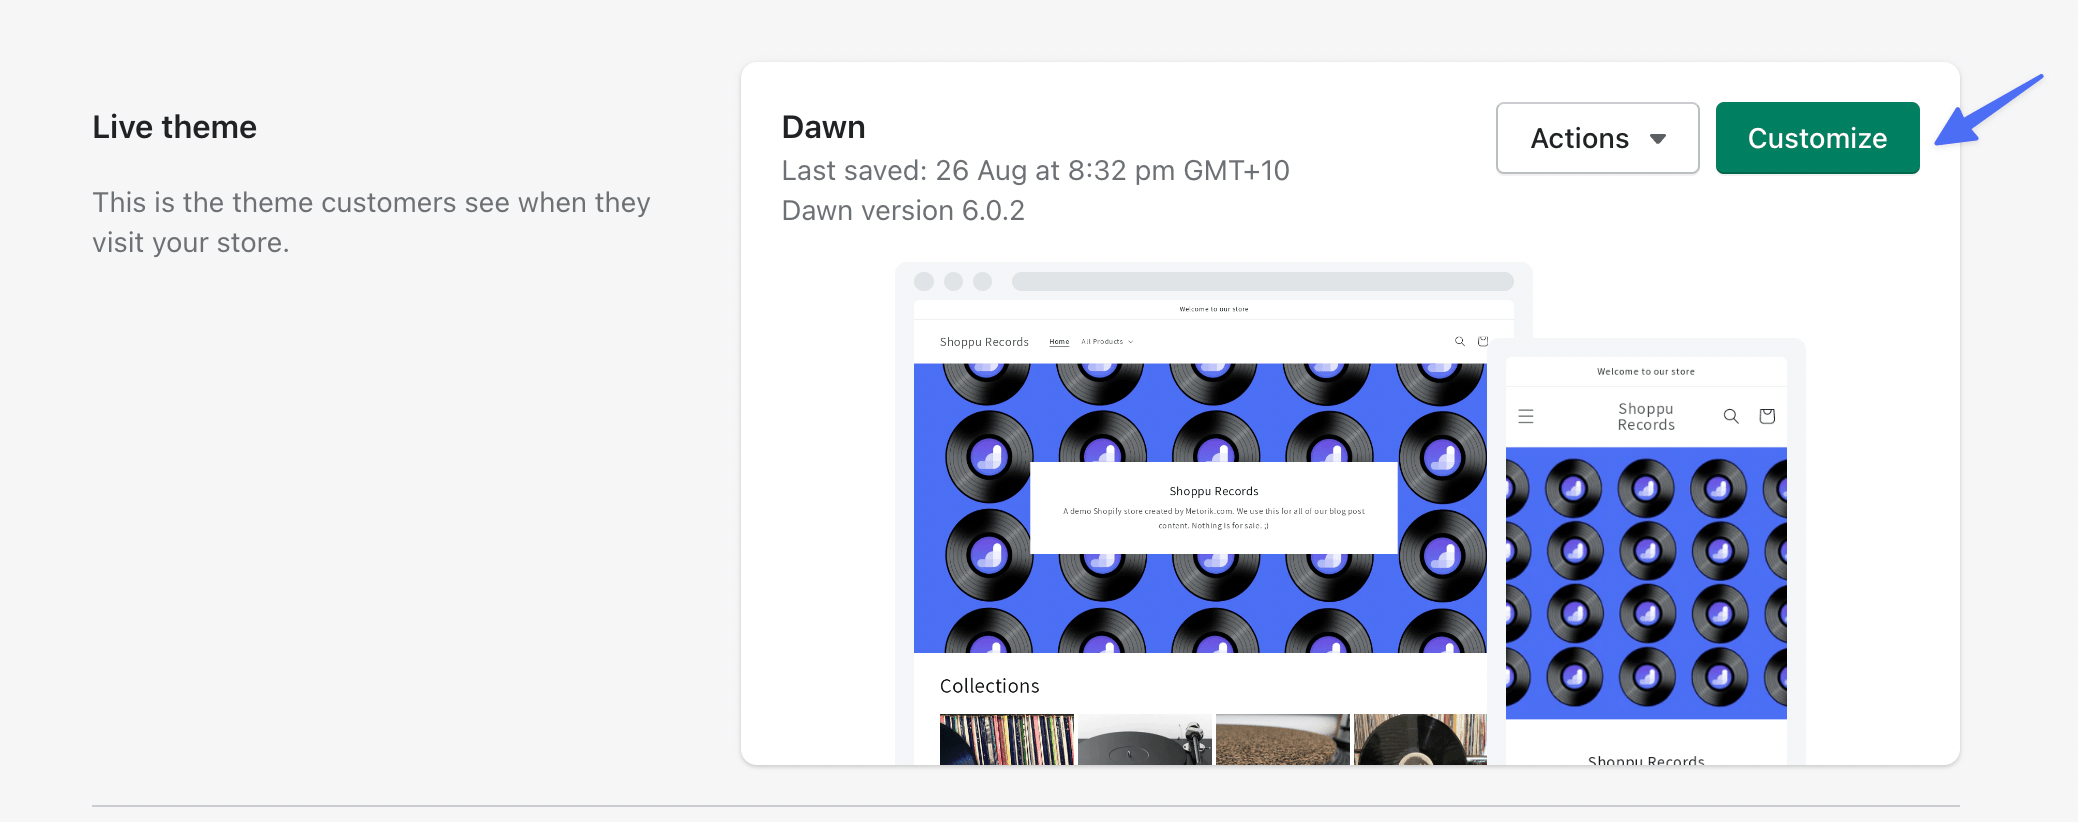
Click on the bar at the top that says Home Page:

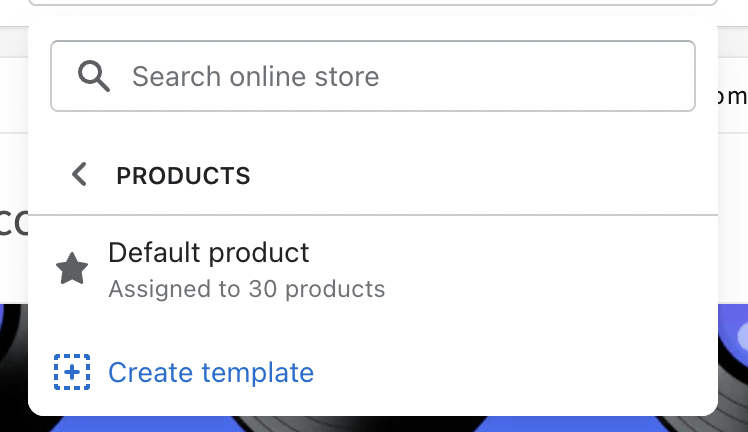
And then select Products > Default Product. This will change the page we are editing from the home page to the individual product page:
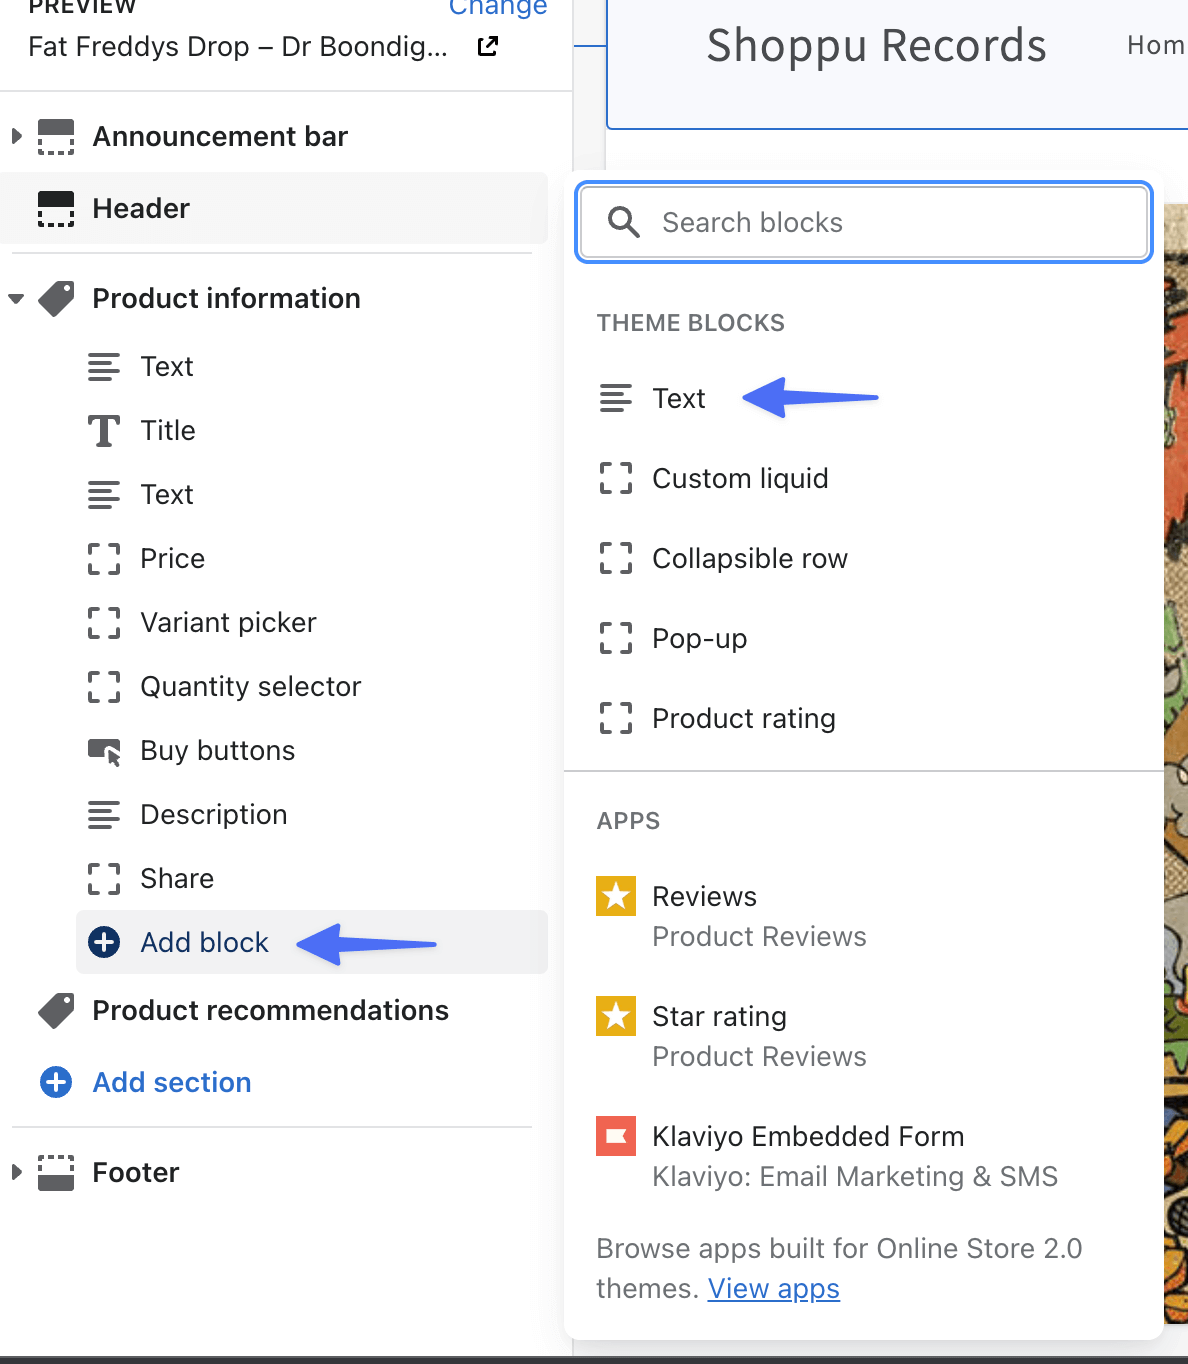
From the sidebar, click add Add block > Text:
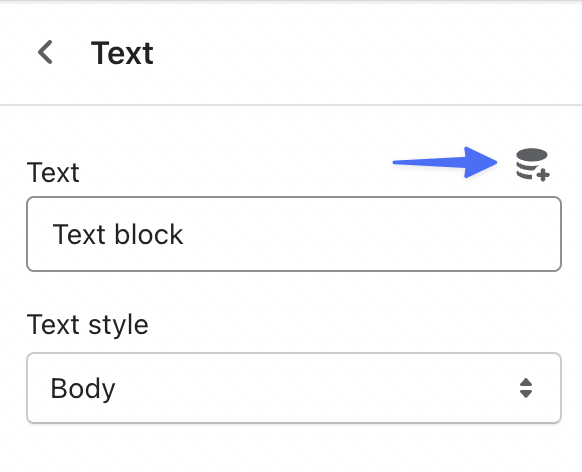
On the text block page, click this icon to add a new dynamic source (a value that can change rather than a static value like text):
You will see the metafields we have created as options here. Select a field to display; I'll choose the release date:
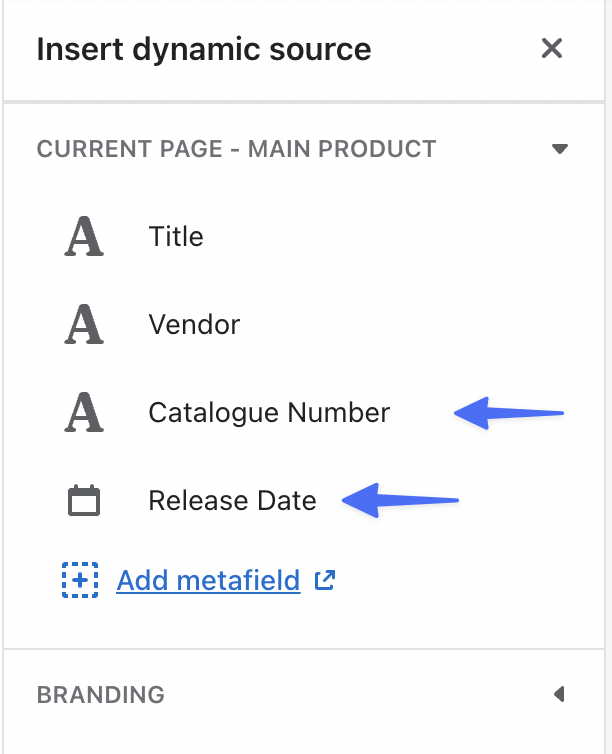
Make sure to click Insert at the bottom of the page to save.
Now you can replace the 'text box' text with text to describe the meta field, in my case I'll write Release Date (this is optional):
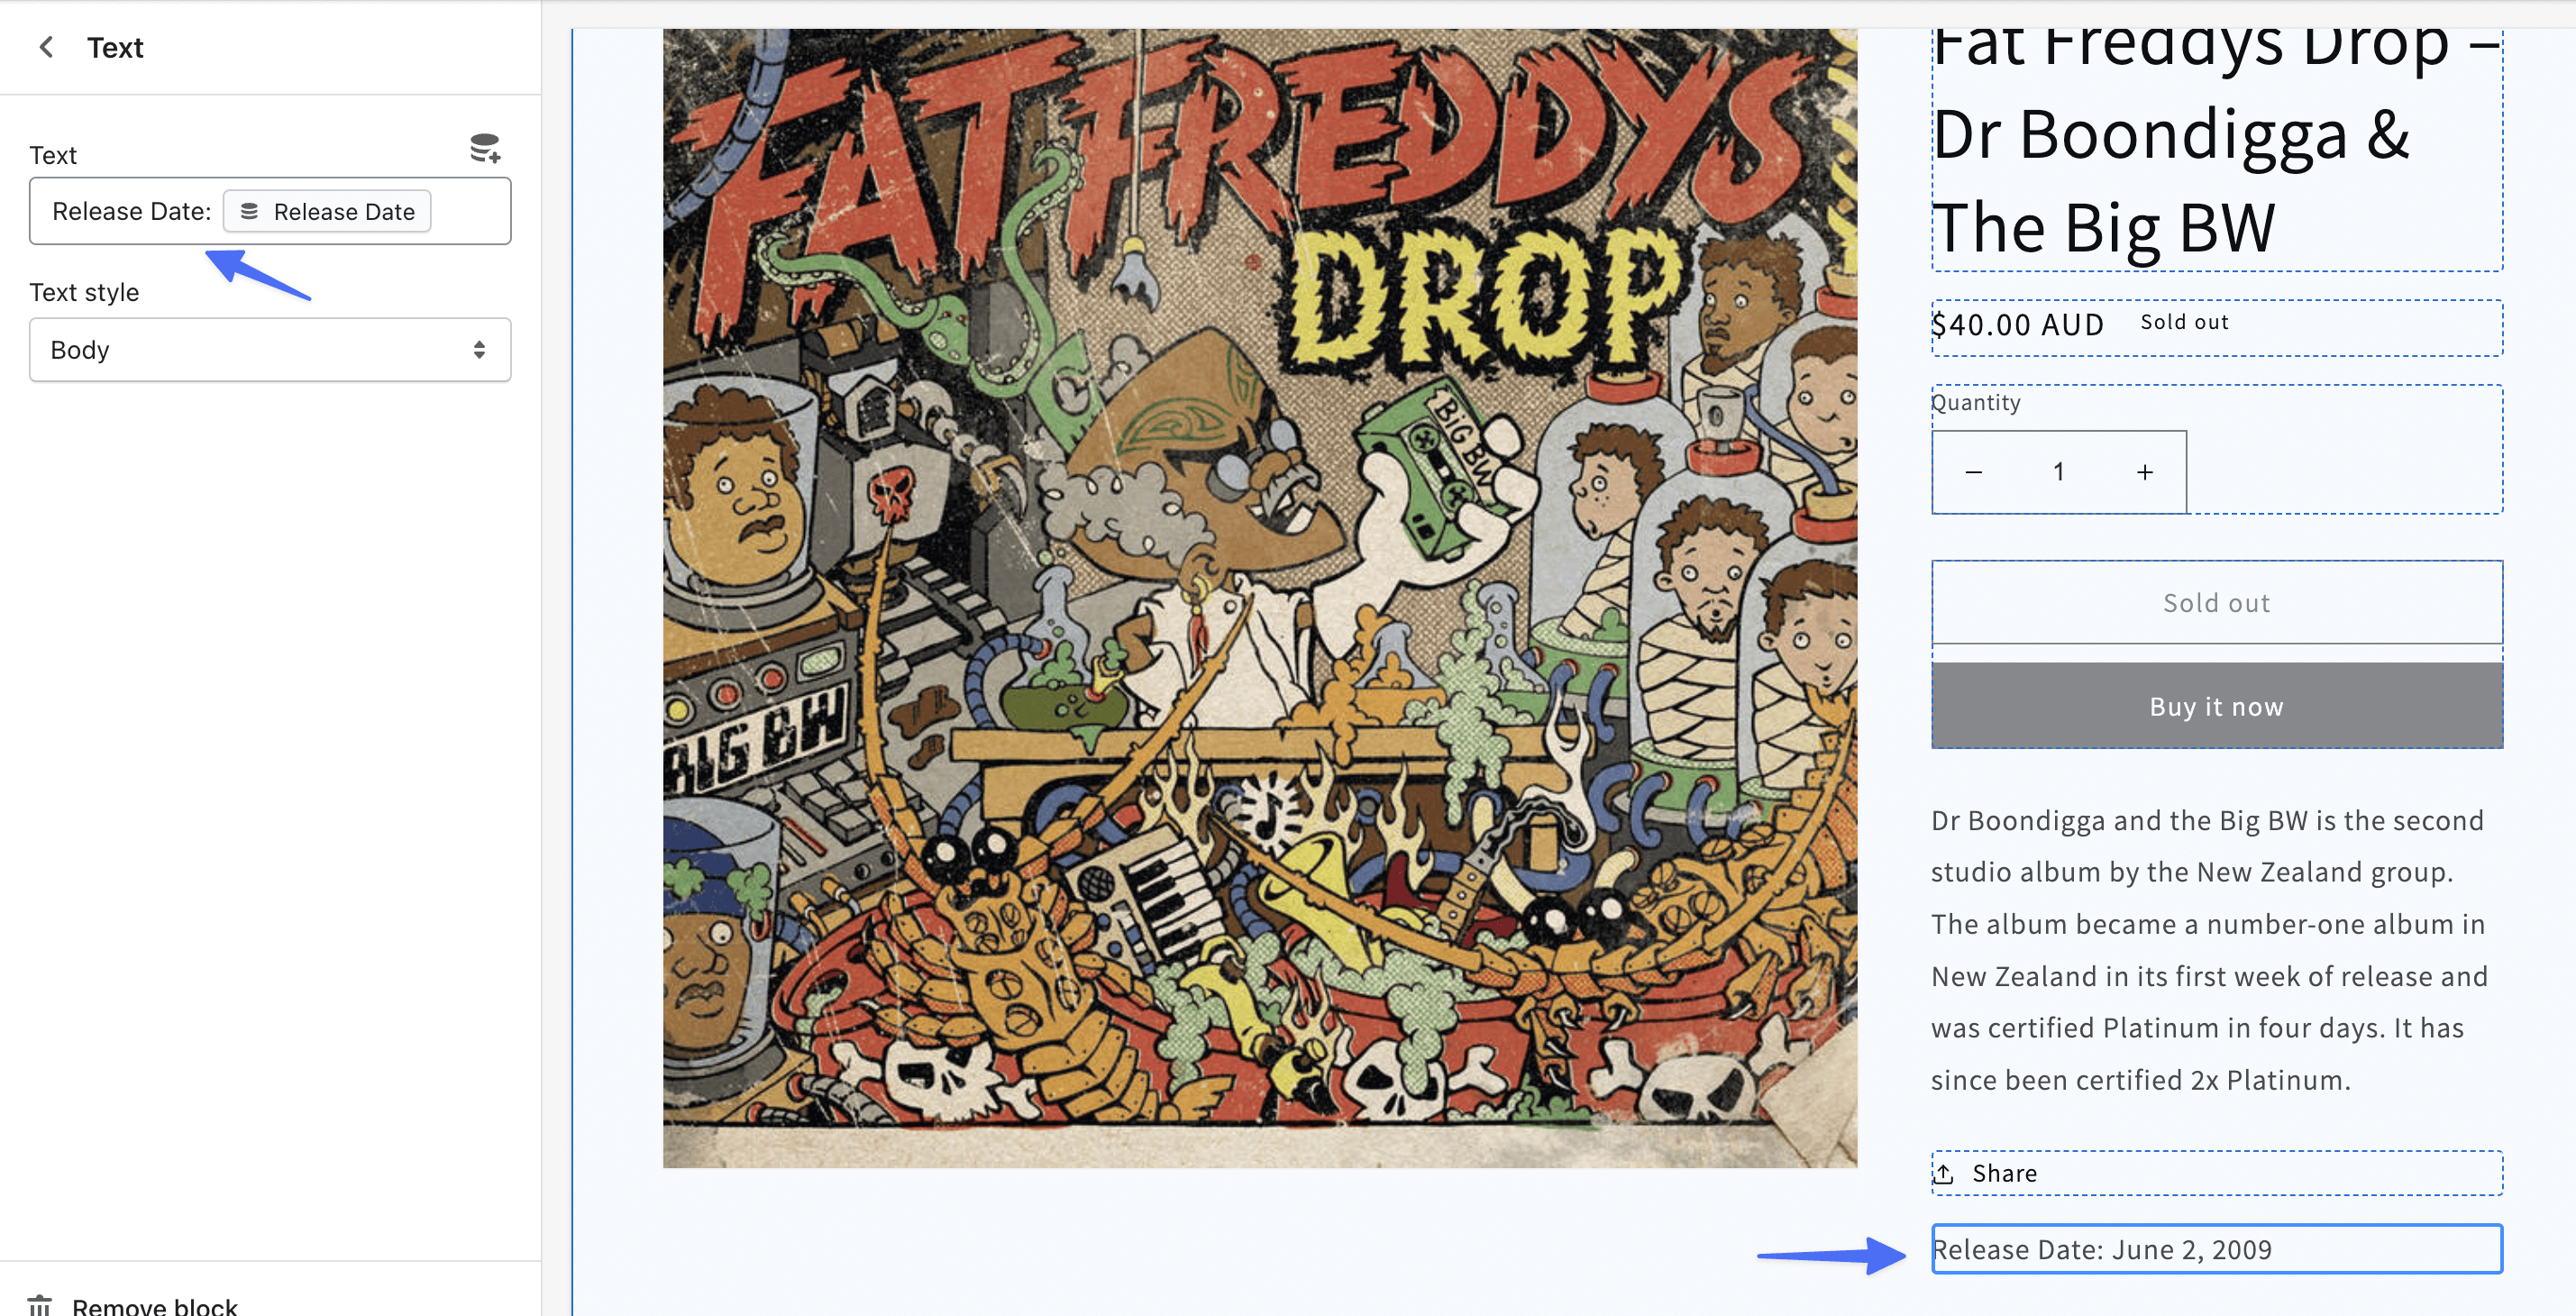
And you can see the date we added earlier for that field is showing on the actual page.
Click Save at the top right of the page.
Now if we head to our live store page, we will see that metafield showing for all the products where we added a metafield value:

Keep in mind that you need to add a value for that metafield for all your products, otherwise, the product page will look like this:

To avoid this you would need either:
Modify your theme to only conditionally display the metafield when the value is set. This is a more advanced concept that requires customizing the themes, so we will cover this in a separate post.
Include the 'description' of the metafield as part of the metafield value. So in our case field, rather than then setting the metafield as a date field, set the field as a text field:
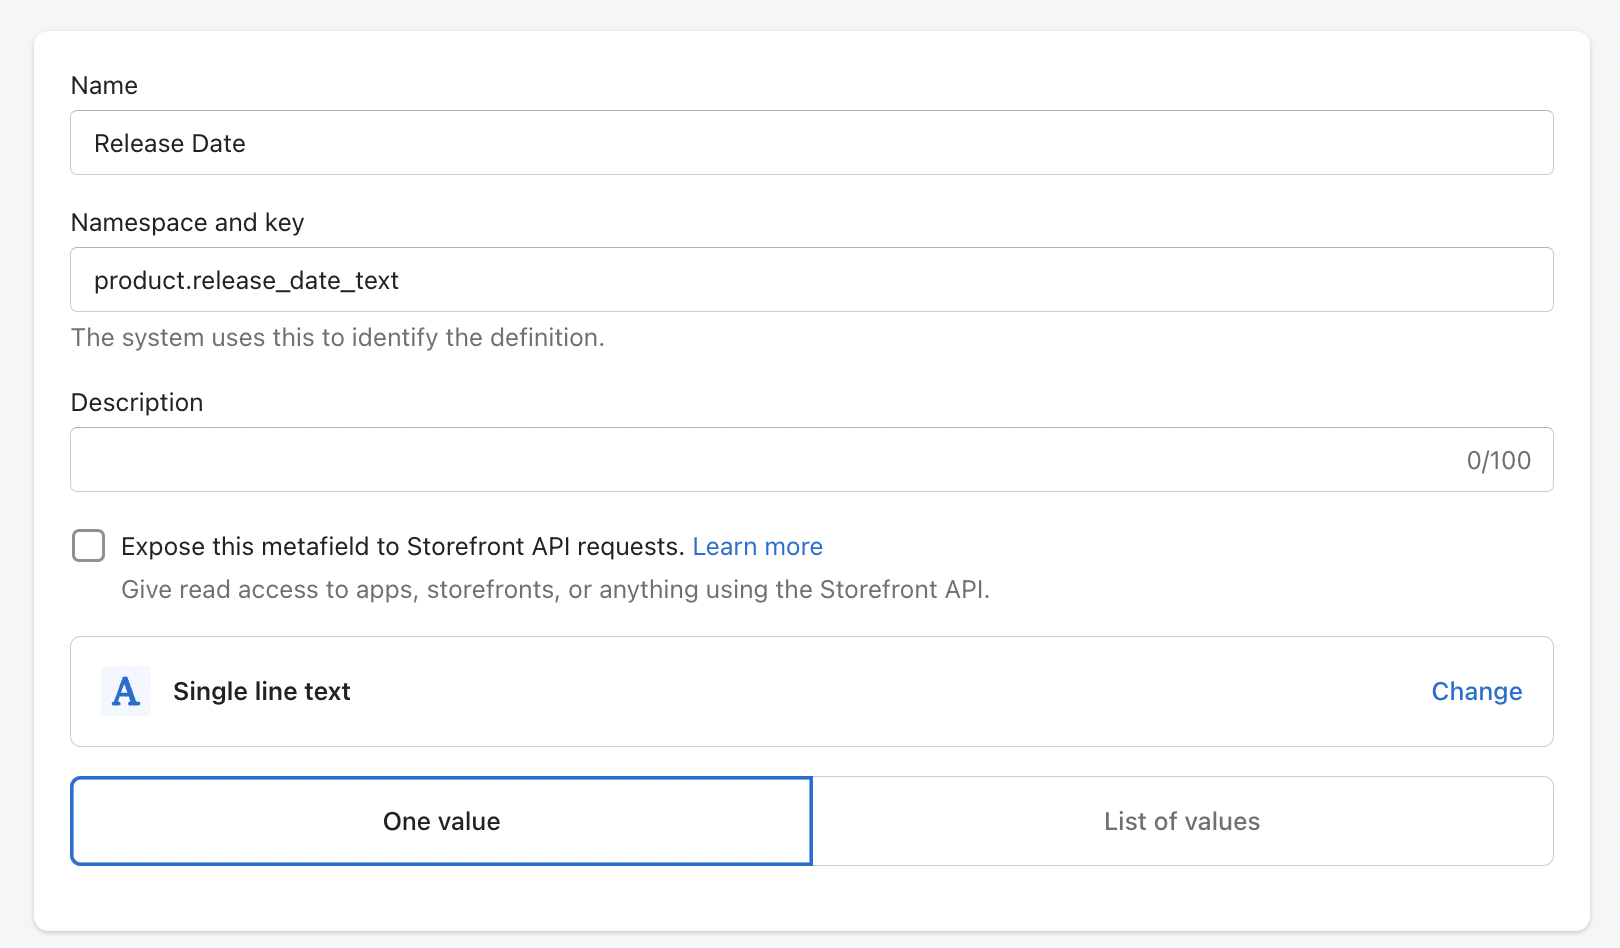
And then set the value with the description and the date:

The great thing is that now this metafield value will show automatically for all products. And if you ever edit the values, these will automatically be updated on your Shopify theme.
Summing it all up
Shopify metafields are an extremely powerful tool in your arsenal as a Shopify store owner/team member. And as if you have seen, it's not too tricky or time-consuming to configure them in your backend and then display them in your theme.
In this post, I have shown you how to add them for your products, but you can use them for other resources in Shopify too, like your orders. We will look at some other use cases for metafields in future posts.
.png)
-1549438730.jpg)
